
 |
|
|
Walkthrough
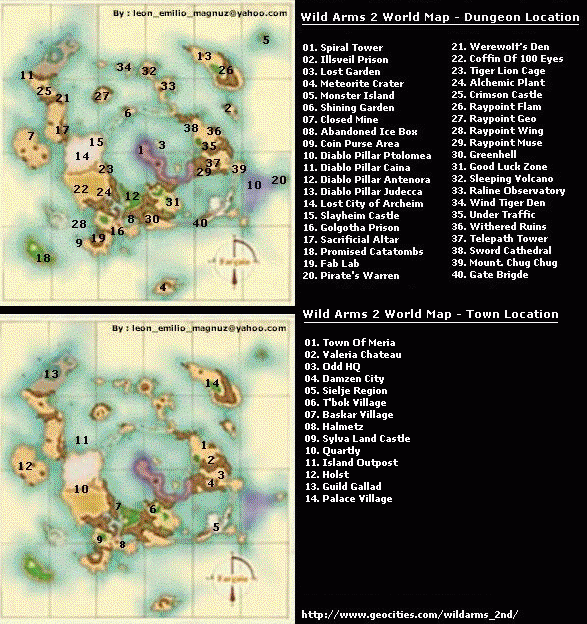
At this point in time your next mission is to find two crystals which will power an "EMMA" engine. The Aguelite and Germatron crystals. You can learn where they are from an individual near the elevator on the first floor. Anyway it might be a good idea to head to Halmetz to upgrade your equipment and pick up the memo pen in a barrel to the north of the item shop. Anyway..from the Live Reflector you can go to either crystal location...personally I head to the Raline Observatory. Select the Dragon's Vein option and you'll be able to find the "Raline Observatory" to the north at the end of the chain of land. Behind a small mountain type land mass. Anyway basically as soon as you enter the Observatory you'll end up in a boss battle. After the fight you'll meet Liz and Ard. This game has some pretty senseless translations...and these two are the worst. Anyway Liz and Ard will help you through this area. Their antics are somewhat strange. Head north...and Liz will flip a switch for you...then you'll flip a switch to for Liz. Continue heading north and you'll be in a wall smashing trap room. When you first walk through the trap you'll be freaked out and jump back. Flip the switch on the wall and your group will make a break for it. Ard will get stuck. Grab the statue that stands out from the others and push it into the trap so Ard can hop out. Head west to pick up a Barrette. Then return to the trap room and head north. Liz and Ard will flip another switch. You'll have to leave Liz behind and find him some other way. From here head south. There is a save block. Save if you wish then continue heading south. You can pick up a Teleport gem from a chest. Slide the block into place and cross. Head down the stairs and east. Move the two blocks so you can cross. Flip the switch in the next room to save Liz. At this point in time head back up the stairs and through south door. Examine the big mask and Ard will flip a switch with his tail but he'll get stuck. As Brad kick the back of the mask and Ard will be freed. Well if you ask me Ard should have just yanked his tail out. He's a lizard...they grow their tails back right? Anyway head south and then west. Liz will flip a switch but end up falling down a pit. He's gone again for now. Make your way up the stairs to get the "Bolt action" from the chest. Now Head through the northern door and down the stairs. Head through the south door and hurl a knife and Liz to wake 'im up so he'll hit the switch. In the next area you'll find the Germatron in the chest. And you'll also have your next boss battle. After this is finished head back to the live reflector and head for the Aguel mine in Holst. Which is under the "Ruins Mine" option in the Live Reflector. From the live reflector head south to find Holst. Welcome to town. Upgrade your personal skills, spells and equipment. Check out one of the houses...in a barrel is the accessory "Gaze Mirror"! Once you've done this head to the inn and head up to the second floor. Use Ashley's "Booty Call" and you'll notice something flashing on the third bed. It's Brad's next tool "Bombs"! This tool is needed to succeed in the mine. Now head to the mine at the far end of town from the inn. From the start of the mine head west. Use Brad's "Bombs" to remove boulders in your way. Once the boulders are removed head north. Pass the door to the west. Continue heading north until you a rock in your way. Bomb 'em and grab the contents of the chest. Now return to the western path and take it. Keep heading west and you'll reach a save point. Use it if you need to. Head north then blow up the boxes and pull the lever. With the rail gone you can proceed. But first...head west...blow up the rocks then head north. In this area you'll encounter a "Sealed Beast Pyramid". Which at this early time in the game you cannot unlock. And even if you did have the ability to open it you'd get your ass kicked so badly it wouldn't even be REMOTELY funny. Pick up the ARM for Brad the "AM cluster" from the sealed chest. Then grab a Heal Berry from beneath one of the boxes. Return to the area with the rail and head to the north. You'll find an "Explosive Rock Excavator" in the areas to the north. Just light a bomb at the end of the large ram type object and it'll slam it's way through the blocked path. In this room there are four switch type things on the ground. Light a bomb on each in a clockwise order and you'll open the way to the next area. Head north to pick up the Aguelite. There you go ladies and gentlemen! Thats both the Crystals! Head back to Valeria Chateau for some well deserved rest and relaxation. Ashley heads back to Meria. Which is under attack by Odessa. Events will occur and you'll face a boss.
I'd suggest that you just use the "AutoPilot" to make your way to the air pad close the Baskar Village. Once you land go north into the forest and search. In Baskar Village you'll learn various facts and Tim will join your team. When you gain control of Tim explore the village while grabbing "HeadGear" for Brad. In one small house you'll see a shiny ^.^ on the table. Examine it and a scene will occur. After which you will end up heading south so Tim can acquire the power of the Guardians. Search the forest to the south and you'll find the "Hidden Trial Arena"! Head north to acquire Tim's first tool Pooka. Continue heading north. You'll now encounter two switches. Have Tim activate one and Pooka activate the other. Continue heading north. Don't waste your time with the chests. Position yourself on the northern platform and have Pooka hit the buttons whilst picking up the "Heart Leaf" Accessory. Return to the south platform and hit the switch. Then head through the door and up the ramp to where the treasures were. Pick 'em up and then head west. Have Pooka hit the switches and then dash over the slabs. Head north then down the hall and through the southern door. Grab the Mini-Carrots then head back to the hall and through the eastern door. You'll face a boss. After which Tim will go off on his own. Now have Pooka hit the switches while you run across the pillars. Head north then up the ramp and then head west. Grab the crest in the chest to the south then return to the ramp and get on the slab. Hit the switch and head north and you'll encounter Tim's final trial. A boss. Once this is complete... you know officially have the POWAH of the Guardians.
This ENTIRE section is basically bosses. There is a combined total of four bosses in this section. Three of them in a row! Anyway after the first three bosses have been taken care of and you've boarded the enemy ship the actual walkthrough instructions begin. Head north. To learn you situation check the console thingy. Kick the can...and continue...you'll find a save block. And considering you just dealt with three bosses one of them which can be quite difficult if you're not properly prepared...SAVE!!! Continue north then head west. Then through the northern door. Pull the block into the gap between the paths. Now cross over it. Turn the barrier off and the power on. Examine the console to activate the lift. Head up the ramp and check the console type thingay to get a code. TA2360 is the code. Activate the power then head back across. Move the crates so they form a bridge. Drop down and cross the bridge. Make your way up the ramp and activate the crane type thingay. Cross and enter the code TA2360. And you've deactivated the first power plant. Return to the main room and head north and up the eastern ramp. Shove the cratey type thingays onto the elevator lifty thingay until it falls down. Head north and climb the ramps. Move alone while avoiding sections of the path that will fall. Turn off the barrier and return to where you made the lift thingay fall. Head to the west and examine the console type thingay to get the code which is TB8180. Return to the barrier console and drop down onto the containers and enter the code TB8180. Head back to the main area. In the main area head east and then north. Kick the containers into place and then head up the ramp. Turn off the power and get the code which is TC6503. Leave and head east. Flip the switch to get past the barrier. Then climb the ramp and have Pooka hit the switch again. Enter the code TC6503 and head back to the main area. You'll face off with a boss and then you head up the lift and into the main area to disable the controls of the craft. Thats the end of this section.