
 |
|
|
Walkthrough Part III

While the Captain is waiting on the 50/50, walk around and explore the region. A few suspicious rocks rest along the road, but they do nothing more than what rocks normally do. For now. You choose to camp in a nearby area with your companions, but your night is spent discussing with Elena... and fighting those rocks because they were Crimson Claws in disguise! The next day, you can not return to the ship. The tide has come in and blocks the path. Noooo, people can not swim in that game. You must return where Elena and yourself had a cute conversation the night before and continue through Ceceile Reef 1 from there. It is quite simple to find your way through this Reef. Be careful, though, because sometimes, ferocious Crimson Claws jump out from holes in the rock walls. At some point in Ceceile Reef 2, there are grey rocks on the shore (on your right). If you follow them, you will discover a Save Point and the two Crimson Tails. The bosses' most powerful attack is Phantom Echo. It hits some of your members and lowers their DEF. Apart from that, they are like normal foes, but with more HP. They drop the Soul Egg when defeated. Soon after is Ceceile Reef Point. Jump down and return to the ship. You are now a few seconds away from witnessing the greatness of the 50/50 and the humour of the Captain! :D Well, it only means that you will cross the Granacliffs and reach Garlan.
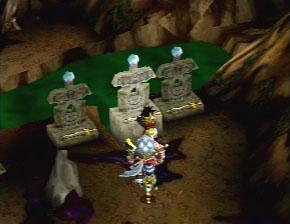
Hatman: All Tutorials Garlan is your hometown, but the villagers are obviously not happy to see you again. It seems that you have something to do with Melfice's sexiness, er I mean evilness. After being insulted by the Chief and some townspeople, go to your old house (upper west corner of the village) and watch yourself fighting with Gatta. Then, go to the Inn to sleep. That evening, Elena finally learns the unbearable truth about your past. You wake up with the inexplicable feeling that Melfice is on his way to Grail Mountain. The entrance is next to the graveyard. Buy a lot of Grail Fruits at the General Store before going there. If you think you have not been insulted enough yet, talk to the nice people in the village.
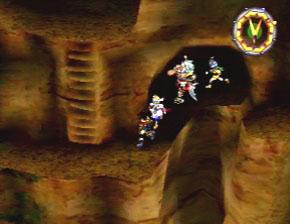
Grail Mountain is truly a detestable place. Ugly, dark, boring, long; it possesses all those "qualities". Moreover, there is not even an obvious road to follow due to sticky black pools of unknown stuff everywhere. Therefore, check the compass. It will do a far better job than myself at telling you where to go. On a few occasions, you must push a tombstone to dry a nearby river from its green fluid in order to cross it. The entrance to the Shrine is on the other side of the Shrine Square, after Grail Mountain 2. They had a lot of imagination for the places names. Inside the Shrine, there is a Seal of Lord Granas in which the Horns of Valmar were resting. When you come back in the Square, Melfice gives a brief speech and subtly invites you to follow him to Grail Mountain 3. At the end of the "road", the Plateau of Memories is lying and the battle with Melfice begins. If you are not strong enough, Melfice will be a real pain in the ass. Equip Life Up to as many people as you can. I must repeat that the stats and magic boosting skills really make a difference. So, equip them. Melfice can easily block your moves and magic, which is simply unbearable. The Sword has the following powerful attacks, each of these corresponding to one of your moves: Wailing Soul Slash (Purple Lightning) and Demon Horde Slash (Sky Dragon Slash; you get it after the battle). Moves and normal attacks do not harm the Sword; use magic instead. On the other hand, the Regenerator is weak against physical hits and casts a lot of ACT/DEF/MOV boosting spells on Melfice. The latter can be hurt with both magic and moves, but he has a good defence. If you think you can pass a turn without healing, you are probably wrong. When the Sword is dead, Melfice uses the attack Evil Horns on some members of your party. As expected, it hurts. :P I normally kill the Sword first, then Melfice with magic. You will run out of SP pretty early in the fight and Blueberries or Butter Rolls insignificantly recover your SP. So, magic is more convenient to use. Before dying, Melfice tells you that the Granasaber lies to the East, along the Granacliffs. Once their host is dead, the Horns need another body to live and yours seems to be the most available at the moment. It literally strikes you down and your friends must carry you to the Inn in Garlan.
You are lying in a bed at the Inn and you must fight in your dreams to release Melfice from his sufferings. Of course, you easily succeed to, but only with the help of Elena and Millenia. When you wake up, you still have the Horns in you. Millenia gently sealed them. As long as you do not succumb to anger, you will be fine. Good. Level up the newly acquired move SKY DRAGON SLASH NOW. Then, return to the 50/50 and allow the Captain to guide you to the East, toward the Island of Arachna. On the trip, Elena talks to herself and is traumatized that she had to rely on Millenia to save you. Anyway, she is a Sister after all. The Captain leaves you on a beach, near Ghoss Forest West. Mareg says he knows this place because the road leads to his hometown. Bakala gives you some love advice and prepares himself to return to Cyrum. Head for the Forest entrance, near the Save Point.

Mareg absoluetly wants to stop at his village because he desires to discuss with the village Elder about your quest. The way to follow is not confusing at all. Giant pink flowers bend down over the rivers to create bridges. Just make sure to not let them fall on you or you will get hurt. The orange leaves hanging in the trees are secret doors. Push them to take the treasures hidden behind. I recommend levelling up the move Lotus Flower from Tio at this point, if you have not already. The majority of your time in Ghoss Forest West 2 is spent on tree trunks. Walk on the leaves of the red flowers to form new passages. The Claws of Valmar were sealed in the middle of this forest, where the land is now befouled and black. Mareg's village, Nanan, is only a trunk away from there.
Hatman: All Tutorials A guy at the entrance warmly welcomes Mareg back. The first thing you need to do is visiting the Elder in his house. He explains that their tribe does not pray to Light nor Darkness, but simply lives through feelings, which pisses Elena off. For so few? Why yes, she is a woman after all. To celebrate the return of Mareg, an enormous feast will be held in the village square at night. However, before celebrating, the Elder wants Elena and yourself to do a special task that no one in Nanan can perform... You must go in the Hut of Trials and try coming back alive. Preparations are futile as you will soon learn that dangers are merely inexistent in there. Read the Miscellaneous page for more details. Once your mission accomplished, you are allowed to participate to the feast. If you talk to the Elder, he will ask you to do something, anything, to get into the rejoicing spirit. Elena's song is perfect for the occasion. After her musical performance, accompany her to the Spring. Watch the scene and laugh at the corniness of the dialogues and situation. :P The next morning, leave for Ghoss Forest East (spend the night at the Inn if you wish). It will bring you to the Great Rift. I suggest you buy many Baobab Fruits at the General Store before your departure.
Ghoss Forest East 1: There is a Save Point right in your face when you enter this lovely place. The trick to reach the exit in this first part of the forest is to follow the giant red swirling flowers. Aren't they trust-worthy enough? Now go and be careful when walking in the mud. The monsters' speed is not affected by the low viscosity of the brown fluid. They will probably take advantage of the situation and attack you from behind. Ghoss Forest East 2: It is the Return of the Orange Mushrooms! Hit them to make yourself a passage or to get treasures. They are your new friends because they are equivalent to the giant red flowers (they lead the way to the exit). The square-shaped trees along the road are Man-Eating Trees in disguise. Be careful. :P Soon after the second bunch of six square-shaped tricky trees, you can enter the Great Rift by walking on a giant root and turning right at the intersection (if it can be called an intersection).
Great Rift 1: You can not turn the camera as you wish here. You only face the side of your characters, so keep in mind that my directions in the next two sentences are given considering this fact. :P There is a Save Point to your left. Then, go right and climb down the ugly stairs. It is up to you to explore more to get the treasures. In fact, I suggest you to do so because it will be easier to find your way and see when/where you must push boulders. It is always obvious, though. No need to worry about it. :P Remember that the Fenny Birds are VERY annoying. They ALWAYS surprise you. That being said, have fun. :P Great Rift 2: This place is a bit funnier than the other one. There are bushes that seem to block your path, but it is only a false impression because you can walk through them. Go right as soon as you can and turn left near those grey rocks. Past this point, it is very easy to reach the deserted area, where you must go. Once there, go right to save and head for the Great Rift 3. Great Rift 3: A little farther from the entrance, a strong wind current is blocking the way. Tio explains it is a protective barrier around the Divine Sword generated by a machine located in Demon's Law. Head forward to go there. Desert Divers are as annoying as the Fenny Birds, if possible. Try surprising them whenever you can.

Turn right, then left to find a room where a Minotaur is apparently waiting for you. Minotaurs are polite like that in this game. Two Snow Leopards are fighting by the boss' side. They are easily taken care of with two Sky Dragon Slashes. Leck Guarder's strongest attack is Buster Horns. It cancels one of your members' attack and makes a lot of damage. A Save Point magically appears after the fight. All you have to do in the next room is to light up the three blue orbs on the middle door by hitting the circular red pillars. One of them is right in your face and the others are in the rooms to your left and right. Behind the newly opened door, two Naga Queens menacingly advance toward your group. No need to try killing the two of them at once; it is an easy fight. They drop the Star Egg after the battle. The core of the Demon's Law is in the Control Room. It is the commander of all the Automatas and is still attempting to follow Valmar's orders. You must destroy it if you want to finally stop the wall of wind around the Granasaber. The Clone's speed is higher than Tio's, but its moves are similar. As expected, Lotus Flower rarely fails to cancel your attacks. You will manage to get quite a few moves done nonetheless. The Clone can hit three times in a row with its weapon, but not hard. When the commander is dead, climb the stairs and hit on the globe... it will calm the wall of wind outside. Return there and cross to the other side (Great Rift 4). Simply watch the scene with Selene, Millenia and another of those disgusting monsters, Valmar's Body.
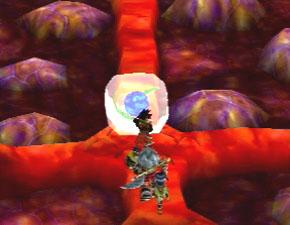
You are in Valmar's body. Consequently, everything is red, pink, viscous and squishy. A Save Point is in the originally called Point of Entry. I wonder what part of the body it is. :P In the Tentacle Passage, follow the "road", hit the eyeball standing on a stick and turn right. There are blue balls in transparent cubes. What you have to do is (push = one transparent cube): push, go right, push, go left, push and go right. Note that once you have jumped down the red "road" after the cubes, you can not come back. The Vein Passage looks really confusing. I will simply tell you which door to choose, whenever there is a choice to make, in my own ugly way (you have to figure out yourself when to push the buttons on the floor :P): left, right, left, right, left and left. Visiting the other passages allow you to pick up neat treasures or, uh, nothing. :P Before going into the Spherical Room, make sure that the right door (your back facing the exit) in the last room is opened. Go in the center of the sphere and push the thing in the middle. The arteries (or whatever it is) rotate and the Artery Passage appears where the Vein Passage was before. It is the same thing as the Vein one, but in red shades. Here is the path leading to the exit: right, left, left, right, left and right. You are back in the Tentacle Passage, but in a different part of the body. The "road" is linear. There are transparent cubes again: push, go left, push, go right, push and go left. After those, reaching the Core is a piece of cake. Not as appetizing as a cake, though. Pwahaha. :P In the next room, do as Millenia says and trash the 3-headed core. The Body has an attack called Suck In, which consists of regrouping everybody and cancelling their next hit with one of the tentacles. Be sure that your moves are at least at level 4 and aim for the Body. Spellbinding Eye works perfectly, so yay. :P Millenia helps you to escape after the battle when the whole structure is falling apart. You are now in complete possession of the Granasaber. It is huge, but the truth is that it is not a real sword. It is a spaceship. Ahah! Fortunately, Tio is a genius when it comes to advanced technology and serving tea. She knows how to control it and leads you to St. Heim to take it back to Zera. Elena is tired, even though she did nothing in Valmar's Body, and asks for a room to rest. All she manages to do is yelling at Millenia in a mirror and making her "disappear". Despite the destruction of Valmar's Body, the skies darken without a warning and Valmar's Moon blocks the sun. People in St. Heim are terrified and think the Day of Darkness has finally come. They try to seek refuge in the Cathedral as you land in the Pastures...
|
|||||||||||||||||||||||||||||||||||||||||||||||||||||||||||||||||||||||||||||||||||||||||||||||||||||||||||||||||||||||||||||||||||||||||||||||||||||||||||||||||||||||||||||||||||||||||||||||||||||||||||||||||||||||||||||||||||||||

| <<< Back to Walkthrough Part II | Back to Walkthrough Main Page | To Walkthrough Part IV, please >>> |
|
|