
 |
|
|
Long Range
Originally I believed that this was a completely new element added into Z Gundam that was missing in Cross Dimension, but its not. The long range battles are essentially an enhanced version of Hot Scramble's first-person shooting stages. An interesting bit of knowledge to note is that after Away to the Newtype was released the long range battle would be further enhanced and implimented into Gundam F91 (which I highly recommend). This, in my experience, is the hardest part of the game for most people, especially when you consider the majority of missions contain long range battles. Initially its a little hard to get the hang of but once you do it turns out to be a very nice touch to the game. When this shrine was first made I had not yet seen any of the Z Gundam anime, and disliked the long range battles because I thought they didn't belong in the game. However, now that I have seen the anime, I must say that the long range adds a very realistic touch to the game. The majority of the battles in the anime actually do happen very much like the battles in the game. This first screen doesn't really tell you much that you can't determine from the Prime Point distribution screens. The only new information there is the mobile suit's model number and name, the pilot's name, and the mobile suit's armaments.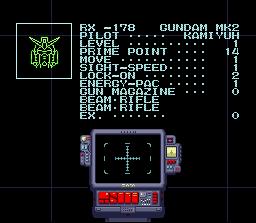
| Pilot | The pilot's name, in this case Kamiyuh is the pilot. |
| Level | The current level of the mobile suit that is being used. |
| Prime Point | The total amount of points that have been used on the Prime Point set. |
| Move | The maximum number of spaces the current mobile suit can use. |
| Sight-Speed | How fast the radar at the bottom of the screen can track enemy units movements. |
| Lock-On | How fast you can get a lock on to an enemy mobile suit. The cross hairs will change from white to red when you get a lock on. |
| Energy-Pac | The number of Energy-Pacs you currently have in your inventory. |
| Gun Magazine | The number of Gun Magazines you currently have in your inventory. |
| EX. | The total amount of experience you currently have. |
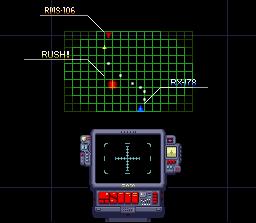
The next two screens don't really show anything important but are included here for the sake of completeness.
 |  |
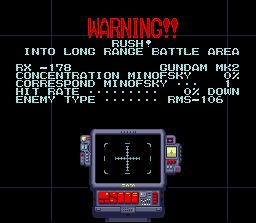
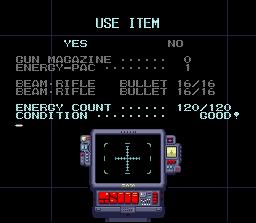
These next two screens are filled with information pertaining to the battle conditions. The first one shows how your mobile suit will be affected by the battle's environment. The second allows you to prepare by repairing your mobile suit prior to entering combat.
 |  | ||||||||||||||||||||
|
Once the battle preperations are done we can move on to the real battle. One more thing before we begin, I recommend making a savestate (if your playing via an emulator, more on later for those of you who aren't) at the beginning of Mission 2 and playing it a couple of times for practice. You'll want to try to be able to eliminate the enemies quickly and with a minimal amount of damage sustained to yourself. If you can get to the point to were you can defeat the three Hi-Zack's without losing any AP then you're probably ready to move on with the game. For those of you who aren't playing the game via rom and emulator (or want to keep the game as "console-like" as possible) I would suggest making it a point to allow yourself to be destroyed a couple times. Don't worry, any experience and levels you gained are carried over making this an effective method of leveling up for our Super Nintendo/Famicom players (myself included).
The following list goes in order from left to right and top to bottom. | ||||||||||||||||||||
