
 |
|
|
Text Walkthrough
Part 2: GreenWood
Part 3: Oceania
Part 4: Mountain of Souls
Part 5: Leo's Lab
Part 6: Magridd Castle
Part 7: World of Evil
Total Monster Lairs: 49 (46 available now)
Number of releases: 25
Treasure: Medical Herb x3, Strange Bottle, Flame Ball magic, Soul of Magician, Sword of Life, Iron Armor, Dream Rod, Goat's Food, Leo's Brush, Pass, Brown Stone
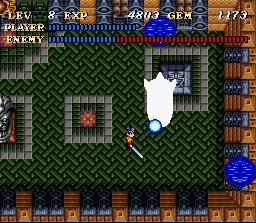
For starters, name your character. (His real name is Blazer.) The place you're in is a kind of traveling temple which will be your base in the game. Whenever you return here, you'll refill your HP and you can save and (later) travel to different levels. The blue diamond squares are teleporters which connect to three different points in each level (the last one is usually right before the boss).
So let's head to the left one, the Trial Room. Open the chest for the Sword of Life and equip it. Your first monster lair spits out Goblins. They're easy if you just stand diagonally of their path and slash away. Beat all the Goblins and the monster lair turns into a green square. Step on the square and you'll release an old man. Talk to him and he'll give you the Flame Ball spell and join your party as the Soul of Magician. You can now cast magic by pressing the Y button; the fireball will shoot out in the direction you're facing. Head back to the temple and you'll notice you have a new destination through the south teleporter. Use it to enter Grass Valley.
There's nothing here yet. Go to the lower left and down the ladder and to the right. There's a lone flower here to talk to. Enter the cave to start your first real dungeon.
You're now in Underground Castle, west, with 14 monster lairs to kill. The first lair is right as you enter and has more Goblins; it opens the way to the right. There's another Goblin lair here. When you touch the green square this time, you'll be warped back to Green Valley to see the Mayor's house and his wife be resurrected. (If you return to Grass Valley, she'll refill your HP.)
Going right is currently a dead end, so head north for a new monster lair, which yields Plant Men. More than one can come out at once, and they wander around, so watch it and get them quickly. Also watch out for the Blue Slimes. They don't belong to any lair, so they'll keep coming back even if you kill them. Watch for the blue puddles and be ready when you come close. Beat the Plant Man lair to reveal a chest holding a Medical Herb. Now go left for another Goblin lair, but watch out for the Flame Statue. You may want to get the Statue first. Beating the lair gets you access to a blue jewel. The fairy in there will give you EXP and offer to take you back to Grass Valley; you shouldn't need to just yet.
Head north and up the ladder to another Goblin lair which opens a ladder north. Head right and down a bit for another Goblin lair; this one opens the Tool Shop and its owner. If you return to Grass Valley and talk to her, you can get a free Medical Herb whenever you run out. Continue down and right. Watch out for the Flame Statues. Go right and up; a Flame Statue guards a chest with 12 GEMs. Continue right and up. Beat the Plant Man lair to release a tulip in front of the Mayor's house.
Head right across the conveyor belt to see a Imp lair; these guys shoot balls at you, so watch out. Beat it to release a bridge in Grass Valley and the bridge guard. Go down the ladder to see a Flyball lair; beat it to reveal a chest next to the Flame Statue to the right. It holds the Dream Rod, which you'll need several times during your quest. Go back up the ladder, right, and down against the flow of the conveyor belt.
You should already meet a bunch of Goblins belonging to the lair just to the left; beat it to open the way to the Plant Man lair just below. Beat that one to release some ivy to the lower right in Grass Valley, which leads to a treasure room. Head left now and down (any path will do) to see a Imp lair. Stay just below the left wall of the conveyor belt and smack them. The lair opens a conveyor belt heading back left. Ignore it and head down the ladder. Beat the Imp lair to release the water mill and its keeper. If you try going onto the machine to the right it'll tell you it needs the water going, so use that new conveyor to the left to return to the entrance to the Underground Castle; exit to the bottom left to return to Grass Valley.
Talk to the Mayor's wife and tell her you want to be her child; she'll refill your HP now whenever you talk to her. If you used up your Medical Herb, go right to the Tool Shop owner and talk to her to get another one. Talk to the bridge guard and he'll let you pass. Just past the bridge, enter the millhouse. Talk to the mill keeper and he'll move; go to where he was standing, face up, and move the wheel. Now go out of the mill and south. Head down the ivy and into the room to pick up the Iron Armor, 50 GEMs, and some EXP from the fairy in the jewel. Equip the armor, then return to Underground Castle, west.
Go back right through the conveyor belt, down the ladder, and return to the machine. It'll take you north to a Plant Man lair. Beat it to release a man near the entrance of town. Now exit to the right to get into the Underground Castle, east. There are 15 lairs to beat here. Start by heading north and beating the Plant Man lair to release a goat and his pen. Continue north.
There are two Goblin lairs here, both guarded by Flame Statues. The lower one releases Lisa and her house, and the upper one releases a tulip just left of the waterfall. Go down the ladder at the top right. Go past some Blue Slimes and you'll reach a Plant Man lair inside a stone enclosure. Enter from the south and beat it to release an architect and a staircase at the top right of Grass Valley. Now go down the ladder at the lower left, past the Flame Statue and Blue Slimes, and enter the conveyor belt heading right.
The conveyor belts go all over the place here. For starters, just keep going right to hit dry land, and go up for two monster lairs, a Goblin and Imp. Beating the left one (Goblin) releases ivy to the left of the waterfall, and the right one (Imp) releases the Tool Shop owner's son (return to him later). Now go back down and left, and take the conveyor belt up. Go all the way up, then right a bit and go down as soon as you can back onto dry land. Beat the Flyball lair for another Flyball lair to appear, and repeat twice. The Flyballs appear faster in every new lair. The fourth lair releases another goat.
Go back to the top and head right on the conveyor, then to the bottom right. Go left past the Blue Slimes, then along the narrow corridor till you get to a Goblin lair. Beat it to make a Flyball lair appear behind you. Watch out for Imps shooting you from the south. Beat the Flyball lair to release another tulip. Continue left along the narrow corridor and you'll reach another Goblin lair. Head all the way to the left; it's easier to avoid the Imp and Flame Statue shots. Beat the lair to open a path back to the beginning of this screen. Return to heal up if you need it, then return to this spot and go south. You'll notice a Plant Man lair, but can't get to it right now.
Head right along the conveyor, destroying the Flame Statues along the way, then up and left to reach the Imp lair. Beating it releases Dr. Leo's house and a man inside. Talk to the jewel to return to Grass Valley.
Go into the Tool Shop and talk to the son to get a bag of goat food. Talk to the lower goat in the wooden pen to the right of the bridge, if you wish. Search the lower right corner of the pen for a Medical Herb, but since you can get those for free nearby it's useless. Go to the right and into Lisa's house. Equip the Dream Rod and talk to her. Hit the nearby lair, then talk to her again. Try to leave the house, then talk to her yet again. Now return to the Underground Castle.
Go straight to the east section via the elevator. You can now go down the ladder. To the right is the Plant Man lair you couldn't reach before; beat it to release a house (and its owner) right near the teleporter square. Go left and up to pick up Leo's brush. Now return to Grass Valley and talk to Lisa. Equip Leo's brush and go to the top right house. Look at the painting to enter it.
There are 5 monster lairs on this screen. There are two Birdy lairs right above. The left one releases another tulip, and the right one opens the way forward. The Green Statues here belong to a lair which opens the way forward again. Go up either conveyor belt to reach a Spearman lair which opens a northward pathway to your right. Go up it to reach another Spearman lair, which releases a lonely goat to the right of the wooden pen. Go up to enter the next screen.
Again 5 monster lairs here (but you can only get 4 of them now), and again the first two are Birdy lairs, right away. The top lair releases more ivy at the lower right of Grass Valley, and the lower one opens the path forward via the top right. You'll see a chest holding a Medical Herb, then further right a bunch of Eyeblocks. Hitting their lair opens the way forward to a Spearman lair. Don't fight them on the conveyor; go near the lair and use your crabwalk technique to take them out easily. Watch out for the Metalpus, which you can't destroy just yet. Hit the lair to open the staircase to the next screen.
There are 4 monster lairs here, but you can only get 3 of them, the first of which is a Spearman lair right at the start. Beating it releases a goat in the yard near the teleporter. Don't fight on any of the conveyor belts here; just get past them, avoid the Metalpuses, and get to dry land where you can fight your enemies. For now, go to the right and you'll reach a bunch of Eyeblocks; their lair releases a boy in the lower right, and his hut. Go north from here to reach a Birdy lair (fight them at the very top of the screen) which releases a sleeping tulip near that hut. Now go left, all the way down, and left to return to the start. Go up to the next screen.
Again 4 lairs here but you can only get three. And again the first one is a Spearman lair (head up a bit). It's guarded by Metalpuses, though. Grit your teeth and run past them, then fight the Spearmen on their own turf. When you beat the lair, you'll open a new teleporter! Save and heal, then go back up the conveyor belt and left. The easiest way to beat the Green Statues is with a single Flame Ball spell, while you're facing upwards at the bottom. The lair releases a boy and his secret cave. Go up again to see two lairs; the right one is the Metalpus lair, and the left one has more Spearmen. Beat it to open the way to the final boss, Solid Arm. But before you go for the boss, enter the teleporter, save, and return to Grass Valley.
Head to the lower right and down the ivy. You can use the Dream Rod on the tulip if you want, but nothing interesting happens. What you really want to do is PUSH the tulip to the left. Go to where it was to pick up a pass. Go to the top, just east of the waterfall, equip the pass, and talk to the boy. Go through the passage, and walk to the right to pick up a strange bottle. Now return to the teleporter, go back to the last teleporter point, and walk up to confront Solid Arm!
You can't hit Solid Arm from the same platform he's standing on; you have to get him from the conveyor belts. But once he stops moving, he'll fire at you! So you have to keep him moving. Move just beneath one of the side conveyors and he'll walk towards you. Wait until he fires a triple shot, then quickly go to the center conveyor, and stay near the top while you slash away. You can get 1-3 hits each time. When he gets too close, quickly run down the conveyor and repeat the process. It's long and tedious, like all boss battles. When you win, hit the lair to release the Village Elder.
Return to Grass Valley and go to the top floor of the Elder's house. Talk to him to get the Brown Stone. Now go back to the temple and go to the top; you can move to the next area, GreenWood!
Part 2: GreenWood
Total Monster Lairs: 56 (51 available now)
Number of releases: 23
Treasure: 410 GEMs, Medical Herb, Strange Bottle, Light Arrow magic, Soul of Light, Psycho Sword, Ice Armor, Shield Bracelet, Delicious Seeds, GreenWood Leaves, Mole's Ribbon, Emblem C, Green Stone
Again, there's nothing here so head to the right to enter the fray! This is Lostside, a large marsh which connects GreenWood and the Shrines of Water, Fire, and Light. There are only 9 monster lairs here, but there are lots of non-lair monsters which keep coming back. Most notable of these are the Geckos, which jump out and shoot fireballs at you when you get near the water where they hide. Plus, if they reach the water again, they refill all their HP! Watch out.
For now, there's a Mudman lair to the right (they're stupid and slow, but they're churned out real fast) which releases a bird (and a tree stump) right near the entrance to Lostside. Go up (watch for the Geckos!) and left along the top path. Beat the Mudman lair to open a path above you. To get to it, go back left, then down and left along the lower path. Ignore the path to the right and go up to another Mudman lair. Beating it releases another tree stump and a dog. Now take the path to the right. You'll reach a Treant lair (watch it, they're invincible when their branches are extended!) Beating it opens a path north into the Water Shrine.
There are Geckos here too, so watch out! There are only three lairs on this screen, and the first is a Mudman lair which you can see right away. Beating it opens a path right and up to a Treant lair. Beating the Treant lair releases a squirrel and his tree home. Now go back to the start, then left and down the stairs.
There are 6 lairs here. A Mudman lair is just above you; beat it to open a bridge to the right. There's a Treant lair here which releases another bird and tree stump. Continue right and down, then back right and up. Go slowly and beat the Geckos before passing. At the top right is another Treant lair; beating it opens the waterfall to the left and gives you access to a chest with 150 GEMs. Go back down to the bottom right, then head left.
There's a Mudman lair among the spear traps (the traps are easy to anticipate; they just go around in a circle). Beating the lair reveals a jewel. Talk to it to get 180 EXP. Go left and open the chest for a Medical Herb; the Mudman lair above you releases a mole and its hole, back in GreenWood. Now go left and down the stairs. Go left and down to meet a Treant lair. Beat it to open the way to a chest containing Delicious Seeds. Go back upstairs, and talk to the jewel to the right to return to GreenWood. Go to the center-lower part of the screen and enter the new mole hole. Talk to the mole to get the Soul of Light, which lets you see things you couldn't before. Now go to the top right treehouse, equip the Delicious Seeds, and talk to the squirrel to get the Psycho Sword, which is excellent. Now return to the Water Shrine and go back to where you were before, down those stairs.
Now go up instead of down. Beat the Mudman lair to open the way to a Plant Man lair to the right. All the Plant Men are released at once; I recommend using Flame Ball to defeat most of them, and only then go in. Beating the lair releases a crocodile to the south of the mole hole. Go back left and up for another Mudman lair. Beating it releases a passage to the right. It looks like a dead end, but step on the gray tile in the center to get a Strange Bottle. Go back left and up.
Follow the path till you get to five Demon Statues. Hit the second one from the left and it'll come alive and start teleporting around. Beat it and hit the lair it reveals to release the leftmost treehouse and squirrel. Go right and down. You'll see two columns of statues. The top left and second from bottom on the right are alive. Beat the lair to release a mole hole to the left of the first one. Continue down and left. Ignore the first passage down and take the second one for a Mudman lair. Beat it for a chest to appear to your right. It holds 50 GEMs. Go back left and up, and back upstairs.
There's a Demon Statue to your right, but now there are spikes around, so be careful. Beating it releases a stage and a deer, the first of three partners. Continue right and upstairs. Go straight left and beat the Mudman lair (watch out for the Gecko) to open a ladder back to the start. You can now pass straight through the Water Shrine! Go up, left and down. Beat the Gecko and open the chest for another 50 GEMs. Return to the staircase you came in by and go up to exit back to Lostside.
The Mudman lair right at the start releases a dog. Head right and down for a Plant Man lair; beat it to reveal a teleporter! Enter and heal up, but there's nothing back at GreenWood right now. Go back up and left. Beat the Plant Man lair you see to open the path to the Fire Shrine. Enter.
You can't beat the Scorpions here, but you can stun them using the Psycho Sword. There are 5 lairs here but you can only beat 4 of them. The four are all on the north-leading platforms. The easiest one to start with is all the way at the right, a Moon Tribe lair. Stay a bit away from it then slash. Beating it releases a bunch of tables and a dog. The next one to the left is a Lizardman lair; beating it releases a staircase in the middle platform. Skip that one and go to the next one, also a Lizardman lair; beating it reveals a chest with a Medical Herb. The last one on the left is the Scorpion lair, so ignore it. Go down the staircase on the middle platform.
There are 6 lairs here, but you can only beat 5 of them. You'll have to use the Psycho Sword to stun the Scorpions here if you want to move around; the pathways are too narrow to go around them. The Scorpions can still hurt you even when they're stunned, though, so watch out. The chest you see at the start is empty. There's a Lizardman lair just to your right; beating it reveals a staircase down. Ignore it for now.
To your lower right is a Moon Tribe lair (the Moon Tribes are already out of it); beating it releases a graveyard and a dog. Go all the way to the bottom right, then left to meet your first Fader lair. These guys are tough. Watch the direction they face just before they disappear; that's the direction they'll head. Don't get too close, but try to intercept them. They can hurt you even if you can't see them! Beating the lair releases a crocodile just above the graveyard.
Go near the top left of the screen to find another Lizardman lair; beating it releases another squirrel and a tree stump. Go straight to the right for your last beatable lair; it's a Moon Tribe lair. You can't actually get to the beaten lair yet, though! Return to where you came in and go down the stairs you opened.
There are 9 lairs here, but you can only beat 8 of them. Go straight left to a Fireman lair. Beating it releases a mole hole to the lower left. Wait for the flaming bridge to turn grey, then quickly cross it to the south. Beat the Moon Tribe lair to release a squirrel on the stage. Continue right. To cross the flaming bridge leading left, wait till it turns grey, then go as far as the outcropping tile and step on it while the bridge is red. Repeat until you reach the other side and a Lizardman lair. Beating it reveals a jewel to the south. Cross the bridge back to the right and go there; talk to the jewel to get the Light Arrow magic spell! Equip it right away; in my opinion, it's the most useful magic in the game.
Go back all the way to the right. You'll see three flaming bridges heading north. Take the leftmost one to reach a Fader lair. Only one Fader is released at a time, so it's not so bad. Beat it to lengthen the middle bridge. Take it (time it really well) to reach another Fader lair, this time guarded with Scorpions! Watch out, and use the Psycho Sword. Beat the lair to lengthen the rightmost bridge. Now take that bridge. Head left past the Scorpions for 100 GEMs.
The Scorpions hug the inside here, so walk on the outside of the bridges. First go up. Stand at the very top, face left, and keep slashing to beat the Lizardmen and stun the Scorpions at the same time! Cross to the left and hit the beaten lair to release a sleeping bird at the graveyard. Cross down and left. To get past the Scorpions, follow them in the direction they're going (not against them). Beat the Fireman lair you see to release yet another mole hole. Continue and beat the Lizardman lair to release a bird and a tree stump. Head right at the bottom for 60 GEMs, then go left and up two flights of stairs.
Head right and beat the Fireman lair to reveal a path back to the beginning. You can now pass straight through the Fire Shrine! Go right and down the stairs. You'll see the Moon Tribe lair you already beat (or beat it now if you haven't yet). Hit it to release a squirrel sitting at the table. Go back upstairs and exit north. Try going north and you can't! Time to head back. Go through the Fire Shrine, then head to the lower left and the teleporter. Go back to GreenWood.
Go south and you should see three mole holes next to each other. Enter the middle one. Go through it and equip the Dream Rod. Talk to the stump. Go right and hit the lair to open a path! Talk to the bird to end the dream. Now go back through the mole hole and up. Just right of the main entrance is now a pathway! Go around the back of the main entrance to get the Ice Armor; equip it.
To the south of the mole holes is a crocodile. Tell it you want to cross over its back. Go over this one and the next one. Talk to the bird at the lower left with the Dream Rod equipped to enter its dream. Hit the lair, then talk to the dog, then the bird. Now go back and enter the rightmost mole hole. Go south and walk over the bones to get the GreenWood Leaves. This is what you're looking for. Now go back through the Fire Shrine; the rafts will take you around now.
Follow the rafts around until you reach a Mudman lair; beat it to release another mole. Your final Lostside Lair of Mudmen is right and down; it releases the third stage player, a dog. Now go up and follow the rafts again to enter the Light Shrine.
There are 11 lairs here, but you can only beat 10 of them; you can't hurt the large Spirit Balls. Go right and up and beat the Lizardman lair to open the way right. Beat the Moon Tribe lair to open the way up. Go up and beat the Lizardman lair to open the way up again. Go up and beat the Fader lair to open the way both right and left. Right is the Spirit Ball lair, so ignore it. Go left and down and beat the Fireman lair to open all directions. Go left and beat the Fader lair to open the way up. Go up and left and beat the Fader lair to open both up and down. First go up and beat the Fireman lair to release a second squirrel in the top right house. Go down and beat the Fireman lair to open the way down; beat the Moon Tribe lair to open the way to the staircase (finally!)
There are 6 lairs here, but you can only beat 5 of them. Although you can't see anything, you're at the bottom left of a big open space. Go to the top right till you see a Fader lair; beat it to open the way up. Go right and down to another Fader lair, which will release a crocodile. Continue down all the way, then left all the way, then up a bit and left again to see both a Fader and Fireman lair. The Fireman lair (bottom one) releases a mole aboveground; the Fader lair (top) releases a teleporter just above you! Before going into it, go left and up and beat the Moon Tribe lair to open the way north. Now return to the teleporter, heal and save. Go back to GreenWood.
Talk to the mole aboveground (her name's Monmo). She'll follow you. Take her to the three mole holes, and maneuver her so she lands in the leftmost one. Talk to her and she'll disappear down the hole. Follow her to see a chest holding the Mole's Ribbon. Now equip the ribbon and go down the middle hole. Talk to the mole here and he'll move; talk to the one below him to get the Shield Bracelet! Have it equipped at all times now.
Go into the top right treehouse and talk to the top right squirrel to get the Emblem C. If you need a Medical Herb, talk to the squirrel on the stage. They'll all turn into squirrels and move around. Keep track of the real squirrel and you'll get a Medical Herb. Finally, if you wish, go to the lower left and talk to the deer. Follow it and talk to it again. It'll make a jewel appear. The jewel will be useless for quite a while, though. When you're done, go back to the teleporter and into the Light Shrine. Go back left and up, then right and up (maneuver around a bit) to get to the boss battle with the Stone Statues!
First head left for the Light Statue to come alive. This one's pretty easy; just make sure you're diagonal to it and slash away. It'll shoot lightining four times, but none of them will hit you. When it shoots the fourth time, move away from it until it starts shooting again, then quickly get back into diagonal position. Repeat until it's dead. When you beat it, go to the right and the Water Statue will come alive. This one's ridiculously easy. Move towards the bottom of the screen (not at the very bottom), face right, and just keep slashing (turbo buttons work fine). You'll get hit a maximum of four or five times, and the guy will just die! Click here for a snapshot of the position I mean. Finally, the Fire Statue will come alive. You can do the same strategy with the Fire Statue, except you'll get hit sometimes. It is the easiest thing to do, though. Exchange the Shield Bracelet for the Medical Herb when you're almost dead, then switch back. He'll die in no time.
When you beat all three Statues, hit the lair to release the Forest Guardian. Use the teleporter in the dark room below to return to GreenWood, then talk to him to get the Green Stone. Return to the teleporter and you can now move to your third destination, Oceania!
Part 3: Oceania
Total Monster Lairs: 76 (75 available now)
Total Releases: 30
Treasure: 140 GEMs, Medical Herb x3, Strange Bottle, Soul of Shield, Magic Flair magic, Bubble Armor, Critical Sword, Thunder Ring, Power Bracelet, Mermaid's Tears, Big Pearl, Emblem D, Blue Stone
You start off in the St. Elles Temple, your "village" area. Go up and talk to the mermaid statue, then go back into the teleporter and go left to enter Southerta. There are 14 lairs here. Go right and follow the path up and left till you reach a Palm Tree lair. Beat it to release a dolphin. Go to the top left and Continue along the path till you reach a Gorilla lair; beat it to open a path south, which leads back to the start. Go up along the left side (north of the new path) and follow it till you reach a Gorilla lair. Beat it to open the path north to a Palm Tree lair; beat that to release a mermaid who's a dance instructor.
Go back to where you made the new path and go right this time; watch out, because you'll be faced with a Firebird. Get close to it at the end of its flight length and smack it. There's only one in the lair. Now go south along the left side. Watch out for the Rocky masquerading as a stone; it belongs to a lair. Beat it to make two Gorilla lairs appear. The top one releases the mermaid who guards a passage; the bottom one releases one of the mermaid dancers.
Continue along the path and beat any Rockys you see; their lair lies along the path and will open a path north inside the trees. Ignore it for a second and continue left. Hit the lair which used to belong to the Firebird to open a path further north, beyond the trees. Go back right and up and beat the Palm Tree lair to reveal a chest to your south. Go right and down to pick it up; it holds a Medical Herb. Now go back up and left and up the new path you opened with the Firebird lair.
It's hard to see that there's a path there at all, but there is: hug the southern pool and go all the way around until you reach the Palm Tree lair. Beat it to open the whole section up. Beat all the Rockys you see and hit the lair near the center of the area to reveal a Gorilla lair. Beat that to release the mermaid palace back in St. Elles! Return there now. You'll notice that you're still missing one monster lair, but you'll get it soon. In St. Elle's, go south to the mermaid palace and talk to the mermaid there to get the Bubble Armor. (From now on, talk to her to automatically heal up.) Equip the armor, save if you want, then head south to the seabed.
There are 10 lairs here. Go south and beat the Seahorse lair to reveal... well, nothing much. Ahem. Go left and up the stairs to return to Southerta. Beat the last Gorilla lair to release the second mermaid statue. Go back down to the seabed and head right this time. Go up and beat the Jellyfish lair to open a stairway below you. Ignore it and return to St. Elles.
Talk to the mermaid statue by the teleporter to open the way. Return to the stairway southeast in the seabed. Head left and up the stairs. Beat the Jellyfish lair to open a shortcut back to the beginning. Go to the southwest. Beat the Hermit Crabs (you can't hit them when they're inside their shells, only when they're moving) and hit their lair to the north to open yet another shortcut. Now return to the south end of that stairway.
This time, go right and immediately up the staircase. Go down and right and beat the Jellyfish lair to release a second mermaid dancer. Go back left and up. Beat the Seahorse lair to make a Jellyfish lair appear. Go up, around, and down to get to the lair, then beat it to open a shortcut back. Now go right and out to Rockbird.
There are 16 lairs here. You can do this in any order, but here's how I did it. Go straight up and beat the Palm Tree lair to reveal a Gorilla lair to the north. Beat that to release another mermaid inside the palace. Go back down and right. You'll see both a Firebird lair (which has two Firebirds this time) and a Palm Tree lair. The Firebird lair opens paths to two chests, which have 60 GEMs and a Medical Herb; the Palm Tree lair reveals another Gorilla lair to the left. Beat that one to open a Rocky lair to the left. Beat that one to release another mermaid; this one will give you the Magic Flair magic when you get back to her.
Now head all the way right and up to the corner of the screen. Beat the Gorilla lair to drain the water to the left. Go back down, left, and up and enter the new area. Beat the Gorilla lair to reveal a Rocky lair below you. First, though, go out of the dry water and beat the Rocky lair to the left to drain the top left water. Go in the left side and out the right side, and beat the Firebird lair to reveal a jewel. Talk to it to get 200 EXP and a chance to return to St. Elles if you want. Go back out of the water, down, and right.
Beat the Rocky lair in the drained water at the far right to drain the water just left of it. Beat this Rocky lair to reveal FOUR lairs: two Gorilla and two Palm Tree. First beat the Palm Trees inside the rocks by standing diagonally and slashing; this minimizes damage. Next beat the Gorillas. The two Gorilla lairs open the rocks. The top right lair releases the second mermaid statue, and the bottom left lair releases an important angelfish. That's it, now return to St. Elles.
Exit the palace and go right and down. Go into the side door and pick up the Mermaid's Tears. Now go right and talk to the angelfish to get the Soul of Shield to join you. Finally, talk to the left mermaid statue to open another passageway. Return to the seabed.
Go to the lower left (all the shortcuts should help you now) and then up the stairway. Beat the Seahorse lair to release a dolphin. Go left and down the stairway, then right. The Jellyfish lair opens a shortcut back right. Go back up and left and beat the Manta Ray lair to reveal both a jewel and a stairway back. The jewel gives 250 EXP and a chance to return to St. Elles. Continue to the top left to enter Durean.
There are 16 lairs here too, but you can only get 15 of them at the moment. If you have the Soul of Shield, you won't have to worry about the falling rocks. Go left and beat the Gorilla lair to release Lue, the dolphin. Continue on and beat the next Gorilla lair (watch out for the unbeatable Metal Gorillas!) to reveal a Firebird lair to the left. Beat that to release the mermaid guarding the other end of the passage. Continue up.
Beat the Rockys and hit their lair to release the third mermaid dancer. Continue along the path and beat the Firebird lair to reveal two Gorilla lairs. The bottom one reveals a chest with a Strange Bottle, and the top one reveals another Gorilla lair. Beat that to release a house in the top left, with a mermaid inside. Go back down and head down along the left side. Beat the Firebird lair to reveal a shortcut back to the start.
Go back to St. Elles using the jewel. First, head up the left side, left, and down. Talk to the dolphin from the front and he'll swim you to a chest holding the Big Pearl. Talk to him from the front again to get back. Go down and right and talk to the mermaid to get the Magic Flair magic spell. Return to Durean.
Go right and up the stairs. Avoid the magma; it hurts bad! Beat the Firebirds now; you'll get to their lair soon. Go left. Avoid the Metal Gorillas and continue. Beat the Rockys and hit their lair to release another dolphin near Lue. Continue right past the Gorilla lair inside the magma, and beat the Rocky lair to open a stairway nearby. Use it. Continue on the path till you get to a Gorilla lair; beat it to open staircases both up (forward) and down (back). Go up.
Hit the Firebird lair you beat before, then go back and up the stairs. Equip the Mermaid Tear and go up; the magma will all disappear! For starters, go down the stairs, left, and up. Beat the Gorilla lair to release the third mermaid statue. Go right and use the stairs to the north. To your right is a chest with the Critical Sword, and to your left is a Gorilla lair which releases the Queen's maid. That's it; return to St. Elles.
Go down, left, and up, and talk to the mermaid guarding the passage. Tell her you've seen the queen and she'll let you through. Go down and talk to Lue to get the Thunder Ring. Now return to the teleporter and talk to the top right mermaid statue to open a passage. Return to the seabed and head to the top right; enter the cave.
There are 9 lairs on this screen. Head to the top right and enter the cave. Beat the Hermit Crab lair to release an angelfish at the top left in St. Elles. Head left and beat the Manta Ray lair to release a mermaid and a house at the top right in St. Elles. Go back right and up. Go into the water, and hold down to get back onto dry land. Beat the Jellyfish lair to release another angelfish to the right of the palace. Go back into the water and hold down again to get back to dry land. Beat the Seahorse lair to reveal a jewel. Talk to it to get 300 EXP and a chance to return to St. Elles. There's nothing there now, so don't. Go back in the water and head to the dry land on the left. Go up and walk across the top to the right. Beat the Hermit Crabs and hit the lair at the end to open the way to Blester.
There are 9 lairs here, also. Head up and right and beat the Gorilla lair to release another of the Queen's maids. There are two more Gorilla lairs to the right and above the strange yellow pillar. Equip the Thunder Ring now. When you walk near the yellow pillar, thunder will strike and defeat any enemies in a radius. The lair to the right releases another angelfish, and to the top opens the path upwards.
Go up and then all the way left. Beat all the Rockys and hit the lair at the top left to get rid of all the rocks. Go down and beat the Firebird lair to release a sleeping dolphin near Lue. Now go all the way right. Again beat the Rocky lair (lower right) to make the rocks disappear. Beat the Firebird lair above it to release another mermaid in the palace. Now go back to the center and go up.
Go to the top left and allow the Metal Gorillas to follow you. When you and they get near the yellow pillars at the top, walk right up to the pillars and the thunder will fry the Gorillas. Do this to all of them, then hit the lair to release the fourth mermaid statue. Now go all the way to the right and beat the Firebird lair to reveal a jewel. Talk to the jewel to return to St. Elles.
Talk to the top left mermaid statue to open the final path. Now go left to Lue's passage, equip the Dream Rod, and talk to the sleeping dolphin at the lower left. Now equip the Big Pearl and talk to the dolphin. He'll move away; step on the lair to open a passage. Try to leave to exit the dream. If you need a Medical Herb, talk to the mermaid in the house at the top right. Now go back to the seabed. Go to the top left and into the cave.
Go up and left a bit and beat the Manta Ray lair to open a shortcut. Before going south, however, go straight right till you get to a chest which has the Power Bracelet. Your choice whether to equip this or the Shield Bracelet. Go back left and south and to the bottom left. Beat the Hermit Crab lair to release another angelfish. Go back right, up a bit, and left. Go up into the cave. Beat the Hermit Crab lair to make four chests appear: they hold 80 GEMs, Emblem D, a Medical Herb, and the last one is empty. Go back out of the cave and right. Return to the start of the screen.
Continue on the original path till you reach a Manta Ray lair; beat it to release Servas, the dolphin. Keep going and exit at the top. Beat the Jellyfish lair to open a teleporter! Save and heal, then come back here and go up the rope to the Ghost Ship. Walk slowly upwards; watch out for Leeches, which will bust out of the floor and hurt you. You can stop the torches from shooting by hitting them a few times, but they'll come back to life in a few seconds. Be careful! Go up the left side, then right side, then left side. When you reach the steering wheel, go down to the mast, down again, then up the right side. Enter the top of the ship for the Ghost Head boss fight!
The Ghost Head has two hands; you can beat the hands separately if you wish, but they'll come back to life. This will be a hard fight. The best way to get him is to stay at the top part of the boat, but at the lower end of that part. The boss will stay at the top while his hands grope after you. Slash away at them, but more important is running - they take off a LOT. The boss will then swoop in (that's when you hit it!) and shoot three fireballs, but if you're hitting him from the side and a bit up from his mouth, none of them will hit you. Note that the head takes off way less than the hands! Again long and tedious - good luck! When you beat him, you'll get 200 EXP; hit the lair to release the Queen of the mermaids. Return to St. Elles and talk to her to get the Blue Stone. Go back to the teleporter and you can reach your next destination, the Mountain of Souls!
Part 4: Mountain Of Souls
Total Monster Lairs: 63
Total Releases: 26
Treasure: 90 GEMs, Medical Herb, Strange Bottle, Magic Armor, Lucky Blade, Rotator magic, Mushroom Shoes, Emblem E, Emblem F, Silver Stone
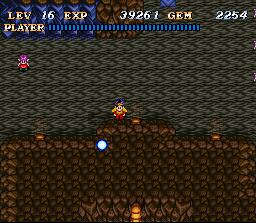
Go left and up to reach your first dungeon, North-slope. There are 8 lairs on this screen. Beat the Snow Rat lair to release a girl near the entrance. Go up. Beat this Snow Rat lair to reveal a Devil lair. You can't get to it yet, so go right. Beat the Yeti lair to release a Grandpa. Go right and down the slope; beat the Yeti lair to reveal a chest with 40 GEMs. Go back up, left, and up again. Beat the Devil lair to open a staircase up. Watch out for the Bone Deer here; they're invincible while their heads are flying around. Beat their lair to open a slope back down. Ignore it, go left and down; you're back at that first Devil lair. Beat it to release a mushroom. Go back up and right a bit, then up again. Beat the Snow Rat lair to open a slope back down. Ignore it and go right and up to your next dungeon, Aurora's Peak.
There are 9 lairs here. Beat all the Snow Rats, but don't hit the lair yet. First you want to get rid of the snowballs. They look like little snowballs, but they travel after you, get bigger, and keep on your tail! The only way to get rid of them is to have them follow you and bash into a rock. These are nasty, and you don't want to fight enemies with them around. So first lure them into rocks (they have to be going at a certain speed or they'll just stop and won't break) and then hit the lair to reveal a Yeti lair further on. Beat that to reveal another Snow Rat lair, beat that to reveal a Devil lair, and beat that to reveal a Yeti lair (watch out for the Devils above you, though!). Beat that to reveal two Snow Rat lairs. The right one releases a Grandpa, and the left one releases a racing snail (The Neverending Story, anyone?)
Go back left now. The snowballs are back; get rid of them again! Go up the blue slope and right. Beat the Devil lair to reveal four chests: Medical Herb, 50 GEMs, and Magic Armor, which cuts the GEMs needed to cast spells in half. The fourth chest is empty. Go back left and up the slope. Go all the way up (you'll get a hit or two, but it's better than fighting on the slope). Beat the Devil lair to release a boy. Go right and enter the cave to reach the Top of Snow Mountain.
There are 5 lairs here. Just to the left is a Snow Rat lair which releases a girl. Head up, break the snowballs on the rocks, and down the ladder. You'll slip and slide here until you hit a wall. Once you hit the lower wall, press the following keys to get up the next ladder: Right, up (under the two rocks), right, up, left, up, right, down, left, up, left, up. Beat all the Bone Deer, but you can't get to the lair right now. Go left and down to a Yeti and Snow Rat lair. The top (Yeti) lair releases an important boy; the bottom (Snow Rat) lair reveals a jewel and a path back to the start. Talk to the jewel to get 300 EXP and return to the Mountain of Souls. Talk to the boy directly south to get the Mushroom Shoes. Go back to the Top of Snow Mountain using your shortcuts; watch out for the snowballs.
Go up past the jewel, go right and down into the ice. Equip the Mushroom Shoes and you won't slip. First go back to the top right and hit the Bone Deer lair you beat before to release a Grandma. Now go back down; go to the lower right, up the ladder, and to the lower left. Get close to the Devil lair to beat it and open a shortcut back. Go down the stairs to reach the Ice Hill.
There are 10 lairs here. The blue area pulls you downward, so watch it. First head to the top right and beat the Green Slime lair to release a mushroom. Now go down. Beat the Wizard lair first to reveal the path down; go up and beat the two Green Slime lairs to release the other two racing snails. Go down.
The star-shaped spikes here will break into eight pieces and shoot off in the eight directions, when you hit them. But the pieces will only travel a short distance, so just hit it and then walk away quickly. For starters, go down the leftmost shaft. Hit the spike and run away, then go all the way down for a Bat lair. Beat it to open a path to the next shaft to the right. Head back up via whichever shaft you wish, then go down the large, center shaft. It's probably better to go all the way down first, and beat the Green Slime lair to open more paths. Now go up and beat the Bats one by one. Hit the lair to release a girl. Now go to the bottom right of the now-opened paths. Wait until four Bats come out of the lair to the right, then use Light Arrow to get rid of them. Go up, right, and down, hit the spike and run away, then continue down. Hit the lair to open a Wizard lair further down. Return to the other shafts and go further down.
Head all the way to the bottom left and beat the Wizard lair to release a snail. Go up a bit and right. Go to the top right and beat the Wizard lair to release a mushroom inside a closed space. Exit to the lower right to reach Laynole, the ice field.
There are 11 lairs here. Go down, hit the star spikes so they're not in your way, and beat the Wizard lair to release a Grandpa. Head right a bit and wait for six Bats to come out, then use Light Arrow against them. You can't reach the lair yet, though. Go right and look for a shimmering bridge to the north (be patient). Follow it and go left to pick up the Lucky Blade. Go back to the lower left to see another Bat lair. This one has 5 Bats. Beating it opens a path south. Ignore it for now, go right, and beat the Wizard lair to open a path to your left. Equip the Mushroom Shoes and go into it. Continue on the path and beat the Wizard lair to release a Grandpa near the water. Continue more and hit the Bat lair you beat before to release a snail next to Grandpa. Exit the ice area and go back to the bottom left and down the path.
Go left. There are four Bats in the lair to your lower left; beating it releases another Grandpa. There's a Green Slime lair in the top right which reveals a teleporter! Before using it, though, go back right and just left of the entrance to the icy area. Be patient and look for a shimmering bridge leading down. Go down it and beat the Red Wizard lair to release Grandpa and the jail cell. Now use the teleporter and return to the Mountain of Souls.
Go to the lower right, then up into the cave to return to Laynole. Head right and up and beat the Green Slime lair to open a path to the right. There's a shimmering bridge just above you which leads to a Red Wizard lair. Beat it to open a path to the left, leading to a Strange Bottle. Go back right; there's another bridge leading up to a Bat lair. Beat it to reveal a chest holding the Rotator magic. Go down both bridges and to the right. Exit to the lower right to get into the Passage to Lune.
There are 7 lairs here. If you see spikes popping up around you, that's because of the Spike Statues. Use Light Arrow to get them. Head right, down, right and up and beat the Red Wizard lair to release a boy in jail. Go right, up and around, and beat the Wizard lair to reveal a Red Wizard lair below. Beat that to release Nome, the snail. Head right, down, and left; beat the Green Slime lair to reveal a stairway below. Ignore it for the moment and head left. Beat the Bat lair (they only come out one at a time, be patient) to open the way north to the Green Slime lair. Beat that to reveal a jewel. Talk to the jewel to get 300 EXP. Now go down the stairway and left; beat the Red Wizard lair to reveal... nothing much. Exit south to enter Lake Lune.
There are 12 lairs here. First go right and beat the Red Wizard lair to open the way right to a Green Slime lair. Beat that to release a mushroom in the jail. Go back left and up. Beat the Bat lair (there are 3 Bats) to open paths left and right. First go left. Beat the Wizard (top) lair to open a path north, and the Green Slime (bottom lair) to open a path south. Go south. Beat the Red Wizard lair to open a Bat lair to your right. To get to it, go up, right, and down. Beat it to release a Grandma. Go back up, left and north. Beat it to reveal a teleporter! Save if you wish.
Go all the way right. Beat the Red Wizard lair to open a path south. Go down it, and beat the Wizard lair to reveal a Green Slime lair to your right. Go up, left, and down to reach it. It releases another Grandma. There's one lair left, but you can't get it yet. Go back to the top left, save, then go right and up to the boss, Poseidon!
OK. There are three indentations here: center, right, and left. That's where you'll be fighting. Here's the pattern: First he floats to one of those indentations, out of reach. He'll swing back and forth and shoot three fireballs from his spear. These are easy to dodge when you realize that it makes a difference which hand his spear is in. If it's in his left side, dodge to the right, and vice versa. Then he'll come in close and start swinging with his spear; it's very hard to dodge that, but this is the only time you can get in hits, so swing away! Then he'll go back out; make sure to stand very still right now! He''ll shoot two fireballs which turn inwards. If you're at the top of the indentation, move down, and vice versa; the fireballs will miss you. Then the pattern repeats. Unusually tedious, but not too tough. When you win, hit the lair at the left to release the Gnome King. Use the teleporter in the Lake to return to the Mountain of Souls.
Head all the way down, left, and up to the jail which is now open. Talk to Nome to get the Silver Stone. Now go left, equip the Dream Rod, and talk to the mushroom. Go left and hit the lair, then continue left to exit the dream. Return to the teleporter and go right, back to Lake Lune. Go down, right, down, down, and right. Beat the Bat lair to release a snail, then walk to the top of the platform you're on to pick up Emblem F. Return to the Mountain of Souls. Go down and a bit left and walk through the wall to the south (Click here to see exactly where.) Talk to the snail to get Emblem E. Now return to the teleporter and you can go to the next section, Leo's Lab!
Part 5: Leo's Lab
Total Monster Lairs: 75 plus 7 from other sections
Total Releases: 29 plus 4 from other sections
Treasure: 170 GEMs, Medical Herb x2, Strange Bottle x2, Zantetsu Sword, Recovery Sword, Mystic Armor, Light Armor, Tornado magic, Spark Bomb magic, Soul of Detection, Emblem A, Emblem G, Red-Hot Stick, Door Key, Actidinia Leaves, Purple Stone
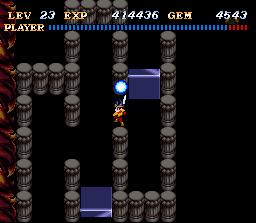
The furniture here can talk. Go to the top left and talk to the door to get it to open; go left and downstairs to enter the Lab Basement. There are 19 lairs here, but you won't be able to hit many of the enemies until you get the Zantetsu Sword.
Go up and beat the Inchworm lair to open a path to the right. Follow it and beat the Broombot lair to release a great door. Go back to the start, go up through two doors, and pick up the chest to get the Zantetsu Sword! Now that you have it, let's go back to some earlier places and beat the folks we couldn't before.
For starters, go all the way back to Grass Valley and into Leo's Painting (you need to equip Leo's Brush to enter). Go up to the next screen. Go right and beat the lone Metalpus; hit the lair to reveal a chest with the Tornado magic. Go up to the next screen. Beat the Metalpuses and hit the lair at the top left to release some ivy next to the sleeping tulip. Go up again. Beat the lair at the top right to release more ivy at the other end of the secret passage. Now use the teleporter to return to Grass Valley.
Go to the lower right, down the ivy, then left and up the ivy. Walk left to pick up Emblem A. Now go back to the top and enter the secret cave just east of the waterfall. At the other end, climb the ivy and talk to the jewel to get the Recovery Sword! You can't use it until you reach Level 22, though. Now go back to the teleporter, and move to GreenWood. Go to the left teleporter. Go to the top left to enter the Fire Shrine.
Beat the Scorpions and hit the lair at the top left to reveal a jewel; talk to it to receive 1 EXP. However, keep talking to the jewel; you'll get another EXP each time! Emulator speed-up is good; otherwise it's useless. Now go down the stairs in the middle of the room. The lair is at the top right here, and reveals a chest with a Strange Bottle. Go back to the stairs and go down again. Equip the Ice Armor to make the going easier. Just keep going and kill all the Scorpions you see; the lair's north of the stairs at the end. It releases a bird at the top right of GreenWood. Now go up the stairs to return to the first screen; use the jewel you created before to return to GreenWood. Return to the teleporter (through the tree mouth) and move to Oceania.
Go south through the ocean palace to the seabed (Remember to equip the Bubble Armor!), then head to the lower left and follow the path to enter Durean. Go up the staircase to the right, then left. Beat the Metal Gorilla lair to release a mermaid in the ocean palace. Now return to St. Elles and talk to the mermaid (facing down in the ocean palace) to get the Red-Hot Stick.
That's it for now; return to Leo's Lab and go to the basement. Go up all the way. Beat the Broombot lair to release a cat (watch out for the Helibot!) Now go down and left. Beat the Broombot lair to open a path south. There are now a bunch of ways you can go and you can do it in any order, but here's how I did it. Go all the way left and up. Beat the Fangbot lair to release a plant. Go back down along the very left, and beat the Broombot lair to release a plant in the mousehole. Go back up and right. Go down the next path to the right to see it branch out. Beat the Inchworm lair to open a path back to the start.
Go up and right as soon as you can. Go down as soon as you can. Beat the Inchworm lair to open a path left to the Fangbot lair. Beat that to release a cat and a bunch of tables on the second floor. Go to the bottom right and beat the Helibot lair to reveal another Helibot lair north. Beat that to reveal an Inchworm lair further north. Beat that to reveal a Fangbot lair, and beat that to reveal a Speedbot lair. Just face south and keep slashing to get rid of them. Hit the lair to reveal a Broombot lair south and a Speedbot lair north. The Broombot lair releases a cat, and the Speedbot one releases another door.
Continue north for another Speedbot lair; beat it to open a path north. Follow it and beat the Speedbot lair to release a chest of drawers. Go back down and west; beat the Helibot lair to open a path leading back to the start. Return to heal up if you wish, then come back and return to the top right to go to the second basement.
There are 15 lairs here. Wear the Ice Armor here so the fiery floors won't damage you. You'll see four south-pointing paths below you. Walk down the leftmost one and beat the Helibot lair to open a path to the next path. Go there and down and beat the Inchworm lair to release a cat on the second floor. Finally, go to the third one and beat the Inchworm lair to open paths between the last three pipes. Go south.
The little staircase takes you *into* the pipe. Beat the Fangbot lair to release a mouse. Go down, left, and down; beat the Speedbot lair to open a path below you. Go back right and down, and left through the new path. Follow it till you get to a Fangbot lair; beat it to open a path back to the start. Go left and down, and beat the Fangbot lair at the bottom to reveal a Helibot lair to the north. Beat that to reveal a jewel. Talk to it to get 300 EXP and a chance to return to the lab. There's nothing there, so don't bother.
Go north up the left side, past the fiery floors. Beat the Helibot lair you see to release the stairway to the second floor! Go north from the lair and beat the Broombot lair to open a path north. Follow it and beat the Fangbot lair to release a great door upstairs. Go to the far left and walk up past the fiery floors. Beat the Speedbot lair to open a path right. Follow it and beat the two Broombot lairs. The bottom one releases a town model, and the top one opens a path back to the start. Go up and beat the Helibot lair to open a teleporter! Use it to go back to the lab.
Go right and upstairs. Equip the Dream Rod and talk to the cat to get a Door Key. Go back downstairs and equip the key. Go up through the door, left, and down through both doors. Talk to the chest of drawers to get the Mystic Armor; equip it. Now go to the right side of the chest of drawers and PUSH it to the left (wait a bit until it moves), then go to where it used to be to get Emblem G. Now go back upstairs and search Town Model A to enter it.
There are 20 lairs here. I recommend beating any Archers you see using Light Arrow as soon as you can; it'll save you a lot of trouble. First, go up and left. Beat the Soldier lair to open a path north. Go left and kill all the Archers; the lair is past the new path and releases a mouse on the second floor. Go back down, down past the little break in the trees, left, up, and beat the Soldier lair to create a bridge north. Follow it. Go left as soon as you can, then continue north. Beat the Cavalry lair to release a chest of drawers back on the first floor. Go back to the bridge and go north. Take the first real path (not stair) to the right and follow it to a Soldier lair. Beat it to open another Soldier lair west. Beat that to release a mouse in the mousehole. Go back to the first Soldier lair and go north. Beat the Archer lair to release a plant on the first floor.
Beat all the archers you see and hit the lair just to the left to release another mouse in the mousehole. Now go back left and north all the way. Go right and beat the Cavalry lair to open a bridge leading east. Follow it. Watch out for invisible Spike Machines and Bombers! You can see where the Spike Machines are by watching for the spikes they throw out.
There are now a whole lot of lairs you can beat in any order; here's what I did. Go down as soon as you can, then west as soon as you can. Go down and beat the Archer lair to reveal a bridge leading back to the start. There's nothing there, so ignore it. Instead, go right just before the bridge and beat the Cavalry lair (get the Spike Machine with Light Arrow first) to reveal a bunch of GEMs (40 in total); hurry up and pick them up! Go back left, north, and east. Beat the Soldier lair (watch out for Spike Machines) to release a great door on the second floor. Return there now using the southern bridge.
Go left and talk to the great door (use the B button when you're standing in the doorway) to get the Soul of Detection to join you. Now, if there are Spike Machines or Bombers within the range of the soul, you can see them! Go back north all the way, then east. Go right past the bridge, then up to the top, then back left. Beat the Bomber lair to reveal two chests below. They hold 80 GEMs and a Medical Herb. Go to the top right of the screen and beat the Soldier lair to reveal a jewel. Talk to it to get 300 EXP. Go back south. Beat the Archer lair to reveal two Bomber lairs. The top one releases a mouse on the second floor, and the bottom one releases the steps to the attic.
Go south past the bridge, and left. The Cavalry lair at the bottom left releases a path back to the start. Before taking it, go north. The Soldier lair (left) releases the path to the chest with 50 GEMs, and the Archer lair (right) releases the second model town. Go back to the lab. If you're low on HP, go right up, and talk to the mouse, who'll move out of the way. Face up to heal your HP. That's it for now, so head back into Model Town B (the right-hand one).
There are 10 lairs here. Go north, left, down, right, and beat the Soldier lair to release a mouse in the mousehole. Go to the top left and north past the bridge.
Go left as soon as you can, then north. Beat the Cavalry lair to open up the area and reveal a Soldier lair. Beat that to reveal a plant on the second floor. Go back down to the southern bridge, go north, and take the second right. There are two Bombers above the lair and two below; get rid of them quickly, then hit the lair to open up the area. Beat the Archer lair to the right to release a chest of drawers in the attic.
Go north and right across the bridge. Go down right before the next bridge. Beat the Archer lair to reveal two chests. The lower one has a Medical Herb, and the upper one has a Strange Bottle. Go left and down, and beat the Archer lair to reveal a bridge leading back to the start. Ignore it, go back north, and cross the bridge leading east. Head north and west across the top bridge. Beat the Soldier lair to release a cat in the attic. Go back east and down, past the southern bridge. You'll see two staircases, one left and one right.
First go left. Beat the Spike Machines, then beat the Cavalry lair at the top left to open a staircase back to the start. Now take the right staircase, and beat the Bomber lair to open steps leading to the basement, back on the first floor. Return to the lab.
Back on the second floor, talk to the plant to get the Actidinia Leaves. Equip them, then go downstairs and into the room with the mousehole. Talk to either cat to get both of them to follow you. Lead them out of the room, then go back and talk to the mouse. He'll move and let you enter the mousehole. Go in and talk to the mouse who's not moving in the center of the room; you'll get the Spark Bomb magic. Exit south at the right end of the room; if you need a Medical Herb, talk to the plant to get one. The chest in the attic will store an extra Medical Herb if you so wish (can't see the point of it myself, but...)
Head down the new staircase near the teleporter to enter the Power Plant. There are 9 lairs here. Go right. Watch out for the Spike Balls; they're fairly easy to avoid, but pack a punch. Beat the Inchworm lair to open a path south. Follow it to get the Light Armor. Go back up and right. Go along the pipes and beat the Helibots and Fangbots. Make your way inside to their lairs; they both open up new pipe areas. Go back left and down. Go along the bottom right and beat the Broombot lair to open an area south.
Head to the far right; equip the Ice Armor again. Follow the path down, beat the Fangbots, and go right at the end of the pipes. Hit the Fangbot lair to make a Inchworm lair appear. Beat that to release a doll on the second floor. Go back up to the green floor, left, and down. Go left along the pipe and down. Stand on the left side of the platform, face down, and slash away to kill the Helibots. Follow the path till you get to their lair, and hit it to reveal a jewel back to your right; talk to it to get 300 EXP. Return to the left, and beat the Helibot lair to reveal a teleporter! Save, then follow the path from the top left to reach a staircase and the boss, Tin Doll!
An even more tedious battle than the last, but way easier. Just keep moving, and there's no way this guy can hit you! Here's his pattern: He'll chase after you until you hit it once or twice. Then, he'll shoot a bunch of rockets into the air, then run to either the right side or left side (it can shoot slow-moving fireballs if you're too close), and teleport to the other side. Then repeat. It'll take a while, but you can do this without taking a single hit! When you beat him, hit the lair at the bottom right to release Marie, the doll, in the attic.
Return to the attic and talk to Marie to get the Purple Stone. You're now ready to head on to the next section, Magridd Castle!
Part 6: Magridd Castle
Total Monster Lairs: 57 (plus 2 from another section)
Total Releases: 25 (plus 1 from another section)
Treasure: 440 GEMs, Medical Herb, Strange Bottle, Spirit Sword, Elemental Mail, Flame Pillar magic, Soul of Reality, Super Bracelet, Harp String, Platinum Card, VIP Card, Mobile Key, Red-Hot Mirror, Emblem B, Emblem H, Black Stone
Head down, left, up, and into the stairs to reach the Torture Chamber. There are 6 lairs here. You can't hit the Ghosts yet, so avoid them. First go right (before going down the stairs) and up. Beat the Skeleton and hit the lair to make a chest appear below. Go down and around to get it; it holds 80 GEMs. Go to the top left and go up the stairs. Beat the Skeleton lair to release a soldier next to the staircase leading here.
Continue along this path to the right. Beat the Skeleton lair to reveal a chest, which holds the Spirit Sword! You can now beat the ghosts. First, though, examine the broken skeleton at the top of the screen to get a Harp String. Now go back left, down the stairs, and right, and beat the Ghost lair to release another soldier at the crossroad. Go back upstairs and back to the Spirit Sword chest; go down along the right side. Beat the Ghost lair to be shoved down to the lower level. Kill the Snakes, then go north and follow till you reach a Skeleton lair which opens a path back to the start. Take it. We're going back to GreenWood.
Return to GreenWood and head into the right teleporter, which leads to the Light Shrine. You can now beat the Spirit Balls here. (Emulator users, press the 2 button to be able to see!) Head right and wander around blindly to kill three Spirit Balls, then return to the start and go left for another two and the lair at the top left. Hit it to release a bird and a stump. Make your way to the staircase at the other end of the floor (groan...) Or, you can just get back to the teleporter, use the left teleporter, walk through the Fire Shrine, and end up back at the same place. Your decision, based on how much you like being lost. Here, the Spirit Ball lair is at the top right. Beat it to reveal a chest with the Flame Pillar magic.
Go back to GreenWood. On the left side of the screen should be a red bird near a stump, but it flies away to the right side of the screen once you come close to it. You have to approach it from the back (not front or side). When you catch it, it'll give you the Red-Hot Mirror. Once done, head back to the Magridd Castle Torture Chamber.
Go back right and down, and down the stairs into the Basement. There are 10 lairs here. Go up the far right side and watch out for the Steel Balls. Beat them and hit their lair at the top right to reveal a Skeleton lair below. Beat that to release the ghost of a soldier. Now go up to the top and beat the Skeleton lair to reveal a Steel Ball lair below. Beat that to release a bridge guard. Continue down and beat the Ghost lair to release a house and a singer. Now go to the top left and follow till you reach a Ghost lair; beat it to release the second bridge guard. Continue south and beat the Skeleton lair to reveal two Ghost lairs. The left one releases a sleeping soldier, and the right one releases a road and a soldier. The staircase below leads to the second basement.
Before continuing, go all the way out of the prison. Go down and left a bit. Equip the Dream Rod and talk to the sleeping soldier. You'll get the Elemental Mail. Equip it, then return to the prison. Go down the staircase to the second basement.
There are 11 lairs here. The spikes won't damage you with your new armor. Go north till you get to a fork, then take the right one. Beat the Ghost lair to release a maid and a house. Continue north and follow the path to the right. Beat the Skeleton lair to reveal a Ghost lair and a lot of spikes. Beat the Ghost lair to reveal a teleporter which is useless right now.
Continue right and down. Beat the Skeleton lair to reveal a Ghost lair. Beat that to release a soldier inside the singer's hall. Continue down. Beat the Steel Ball lair to reveal spikes and a Ghost lair. Beat that to release another singer. Continue. Beat the Steel Ball lair to open the way west. Take that way. Beat the Steel Ball lair to release a soldier near the airship. Continue north and beat both Steel Ball lairs; the right one releases a soldier and a new dungeon, and the left one reveals the way back north. Use the teleporter to return to the castle.
Go to the lower left building and go up to the singer. Equip the Harp String and talk to him. The soldier at the bottom will move. Go to where he was to receive the Platinum Card. You can now enter the upper left dungeon. Equip the Platinum Card and talk to the guard to enter.
There are 9 lairs here. Keep moving so the beams from the Trap Heads don't hit you. Beat the Grunt lair at the start to open the way north to the next Grunt lair. Beat that to open the way west to a Knight lair. Beat that to open the way north to a Grunt lair. Beat that to open both east and west Red Grunt lairs. The east one releases a house and an important soldier; the west one opens the way south to a Knight lair. Beat that to open the way south to a Grunt lair. Beat that to open the way east to a Knight lair. Beat that to open the way east back to the start. Return to the castle.
Go to the lower right house and talk to the soldier to get the Soul of Reality to join you. First, return to the Torture Room. Go up to the next floor using the stairs at bottom right. Go up all the way, then left a bit. The soul should reveal a chest below, with a Strange Bottle. Continue left, down all the way, and follow the path right. The soul will reveal a chest with 100 GEMs. It'll also reveal a passageway north. Follow it to reach a Steel Ball lair. Beat it to reveal a jewel which doesn't do much. Go up the stairs at the bottom left. Go up all the way and to the top left to see a chest with Emblem B. Go right and use the teleporter to return to the castle, and reenter the Left Tower.
Go left and up the stairs. There are 4 lairs here. Go right and beat the Grunt lair to open a secret passage right, to a Red Grunt lair. Beat that to reveal Queen Magridd. Go out of the passage and up; beat the Red Grunt lair to open a secret passage left to the Golem lair. Beat that to release a maid inside the singer's hall. Go up the stairs to the top right to enter the Prison.
There are 6 lairs here. Go down and beat the Golem lair to release a soldier. Go left and up, and beat the Grunt lair to be shuttled to the lower floor. The top left lair (Red Grunt) will release a soldier on the airship; the top right lair (Red Grunt) will release the Right Tower and its guard; the lower left lair (Grunt) will release Dr. Leo on the airship, and the lower right lair (Grunt) will reveal a jewel. Talk to it to return to the castle.
Go to the far right house and talk to the Queen. Tell her she's pretty to get the VIP Card. Equip it and go to the top right. Talk to the soldier to get into the Right Tower.
There are 7 lairs here. Go up and beat the Red Grunt lair to release a soldier inside a house. Go back down and right and beat the Knight lair to release the bottom-right house and a maid. Go up and left. Beat the Golem lair to reveal a Grunt lair. Beat that to reveal a Red Grunt lair. Beat that to reveal a second Red Grunt lair, and beat that to reveal a Knight lair. Beat that to reveal the castle and its guard. Go to the top right and up the hidden stairs to the next level.
There are 3 lairs here. Head right and down. The chests are actually Mimics; beat them and beat the Red Grunt lair to reveal two REAL chests, which have a total of 160 GEMs. Go down and beat the Knight lair to release another soldier. Go down and left till you reach a secret passage north. Follow it and beat the Golem lair to release another house and a soldier. Use the stairs at the top left to exit.
There are 3 more lairs here. Go right and beat the Golem lair to cause four Trap Heads and a Red Grunt lair to appear. Beat the lair to release a soldier standing by the water. Go down and left and beat the Knight lair to cause four chests to appear. The top left and bottom right ones are real, and hold 100 GEMs and a Medical Herb. Continue down and right and up the next stairs to reach the Corridor.
There's 1 lair here, and it's a Red Grunt one - just beat them all and hit the lair in the top left to reveal a teleporter and the way forward. (Both chests are fake.) Save and head left to reach the airship dock. Go left and down. Talk to Dr. Leo. When he moves in front of you, step right up behind him to get the Mobile Key. When you can move, return to the castle using the teleporter. Enter the house just below and to the right of the teleporter room, and step between the stool and the crate to get the Super Bracelet. Equip it! Now return to the airship docks. Go up to the top of the airship, equip the Mobile Key, and go up to the steering wheel to start a boss fight with the Dragonbird!
This guy is tough strategically, but statistically you can now whip its butt thanks to your new bracelet. You'll take a licking, but keep on ticking! You'll be blown to the back of the ship by a wind during the fight. He has two tactics - to dive at you diagonally (this is when you hit it) or shoot fire from the top of the ship. Under no circumstances let yourself slip below the steering wheel! When he dives, keep tapping the up directional button and the B button, and if you time it right you'll be just under him when you slash. You'll usually get hit, though. When he shoots fire, stay near the steering wheel. He'll go either left to right or vice versa, so if you walk left past a space in the pillars when he's going right, you're home free for that run. The timing is very tough. With a bit of perseverance and a Medical Herb, you should make it all right, but barely (I usually have one or two HP left when I win).
Go down and hit the lair to release King Magridd. Go back to the castle and talk to him to get the Black Stone. Before leaving the castle, though, go to the teleporter room, go down, and head left as soon as you can (before the bridge). Go past the pillars and as far as you can go to the left; you'll pick up Emblem H. Now, with all six Stones, you're off to the World of Evil!
Part 7: World of Evil
Total Monster Lairs: 14
Total Releases: 0
Treasure: 300 GEMS, Soul Blade, Soul Armor, Phoenix magic, Medical Herb, Magic Bell, Red-Hot Ball
Before you enter, you've now got all 8 Emblems! Go back to GreenWood. If you haven't already, talk to the deer at the lower left twice to get it to reveal a jewel. Talk to the jewel to get the Magic Bell, which lets you fight without using GEMs. At this point, though, I prefer the Super Bracelet. Anyway, you can now go to the World of Evil! All your colored Stones will disappear when you enter.
There are 8 lairs here. Go straight up and beat the two Bug lairs to get rid of the Gargoyle Statues above. There are Cyclops lairs to your left and right. You have to use magic to beat the enclosed Cyclops on each side. Both lairs open paths above them to get chests. To get to them, just go up and around. The right one has a Medical Herb, and the left one has 200 GEMs.
Head all the way left (or right, it doesn't matter) and follow the path until you can go north. Do so, and go up to beat a Cyclops and a Bug lair (both of which remove the Gargoyle statues above you). Go up again and beat another two lairs (you have to use magic to get the Cyclopes this time) and remove a Gargoyle statue and reveal a teleporter to your right. However, it's blocked off! Before going any further, go all the way back south and return to the original teleporter. Now go to the left teleporter. Walk south to pick up the Red-Hot Ball, then return to the teleporter. Now leave the World of Evil and return to the Mountain of Souls. Talk to the king to get the Phoenix magic.
Return to the World of Evil and take the bottom teleporter. Go back to the top of the screen and take the red teleporter. There are 4 lairs on this screen. Watch out for the flares here. First head left, around and up. Defeat the Cyclops lair (using magic for some of them) to open a path north. (You can do the same thing on the right, but there isn't much point.) Go north and beat the two Bug lairs (avoid the Rollers) to open paths on the left and right. Go left. Wait for both Rollers to hit the bottom before following them, and use the crevices on the right to hide when they come back your way. Go right, use the same tactic down the right side, and go down to pick up the Soul Armor. Equip it right away. Go back up and use the red teleporter at the top of the screen to reach Dazzling Space.
There are 2 lairs here. If you're not wearing the Soul Armor, you'll steadily lose health when the ghosts arrive in the background. To avoid the Rollers, go all the way right or left, and only go up when the coast is clear. Go up, left, and down to pick up 100 GEMs. Go up some more; move right while avoiding the Rollers. Stand in the second crevice, face down, and beat the Bugs as they come towards you. Continue right and hit the lair to open a path north. Ignore it, and first go to the right and down, past the Rollers, and pick up the Soul Blade.
If you're at Level 24, equip it; otherwise go back to the new northern path, go to the top right, and beat the Cyclops lair to cause a teleporter to appear. If you're STILL below Level 24, return to Magridd Castle Torture Chamber and beat up on some Snakes. Once you reach Level 24, you can earn way more EXP by equipping the Soul Blade and beating up on the Rollers - 4000 EXP each! When you're ready, go into the teleporter and save, then go back left and up into the castle for the final boss fight.
Equip the Soul Blade, Soul Armor, and Phoenix magic, and make sure you have at least 400 or more GEMs. When the first fight begins, go to the top left, face right, and just keep slashing away; you'll get hit a few times, but that's it. Now the real fight begins. Deathtoll will make four blue pillars appear. Hit them a few times with your sword or Phoenix; they'll disappear and leave behind GEMs. Don't bother getting them unless you really need them. As soon as the last pillar disappears, Deathtoll's eyes will turn green and he'll spit out three balls of fire; you can get 1-4 decent hits with the Phoenix in at this point, then run to a safe point. The safe points are just right or just left of center, or on the far side of either end. All this time the two jewels on either side of the will shoot little lasers at you; ignore them, because it's almost impossible to avoid them. Concentrate on avoiding the fireballs, don't get tempted by the GEMs (like I said, you should start with enough so you don't need them!) and you should be able to win without much of a problem. Congratulations!