
 |
|
|
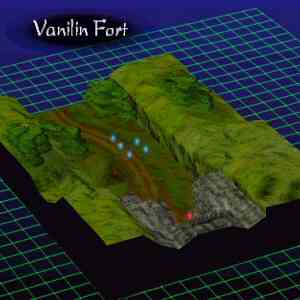
Mission 40: Zulwarn's Breath
We'll have to get through this Imperial blockade before we can storm the capitol.. but doesn't security seem a little lax?
Annihilate all enemies. |
|
 |
Imperial 1 (Einlager ATAC) | HP: 99 | Level: 10 | Money: N/A | |||||
| BAS: 11 | POW: 9 | DEX: 8 | AGL: 8 | DEF: 9 | WEP: 9 | Spirit: 45 | Range: 5 | Speed: 4.86 | |
| Equipment: Gradius, Garnet, Knight Coat-of-Arms | Attacks: Slash, Thrust, Str. Slash, Kick | Dormant Abilities: Mass Menace | |||||||
|
Imperial 2 (Einlager ATAC) | HP: 99 | Level: 10 | Money: N/A | |||||
| BAS: 11 | POW: 9 | DEX: 8 | AGL: 8 | DEF: 9 | WEP: 9 | Spirit: 45 | Range: 5 | Speed: 4.86 | |
| Equipment: Gradius, Garnet, Knight Coat-of-Arms | Attacks: Slash, Thrust, Str. Slash, Kick | Dormant Abilities: Mass Menace | |||||||
|
Imperial 3 (Barbatos ATAC) | HP: 82 | Level: 10 | Money: 3500 | |||||
| BAS: 8 | POW: 7 | DEX: 8 | AGL: 8 | DEF: 9 | WEP: 9 | Spirit: 45 | Range: 4 | Speed: 4.74 | |
| Equipment: Gradius, Turquoise, Knight Coat-of-Arms | Attacks: Slash, Thrust, Str. Slash, Ice Shards | Dormant Abilities: Mass Menace | |||||||
|
Imperial 4 (Barbatos ATAC) | HP: 82 | Level: 10 | Money: 3500 | |||||
| BAS: 8 | POW: 7 | DEX: 8 | AGL: 8 | DEF: 9 | WEP: 9 | Spirit: 45 | Range: 4 | Speed: 4.74 | |
| Equipment: Gradius, Turquoise, Knight Coat-of-Arms | Attacks: Slash, Thrust, Str. Slash, Ice Shards | Dormant Abilities: Mass Menace | |||||||
 |
Zeira (Toreadore ATAC) | HP: 196 | Level: 25 | Money: 8000 | |||||
| BAS: 19 | POW: 25 | DEX: 21 | AGL: 19 | DEF: 18 | WEP: 18 | Spirit: 90 | Range: 7 | Speed: 7.82 | |
| Equipment: Gunganir, Royal Jade, Power Tiara | Attacks: Slash, Thrust, Tackle, Str. Thrust, Tornado, Turbulence, Wind Strike, Sonic Blade | Dormant Abilities: Chivalry | |||||||
 |
Galvas (Serata ATAC) | HP: 194 | Level: 24 | Money: 5000 | |||||
| BAS: 24 | POW: 25 | DEX: 15 | AGL: 14 | DEF: 16 | WEP: 18 | Spirit: 87 | Range: 5 | Speed: 6.82 | |
| Equipment: Darkblade, Kunzite, Power Tiara | Attacks: Slash, Thrust, Tackle, Str. Slash, Kick, Fireball, Melting Flare, Flare Bomb | Dormant Abilities: Reflect Attack, Chivalry | |||||||
 |
Ganlon (Waiban ATAC) | HP: 172 | Level: 23 | Money: 5000 | |||||
| BAS: 19 | POW: 16 | DEX: 13 | AGL: 20 | DEF: 19 | WEP: 18 | Spirit: 84 | Range: 6 | Speed: 8.06 | |
| Equipment: Dragontail, Ruby, Rainbow Gem | Attacks: Thrust, Long Thrust, Str. Thrust, Fireball, Melting Flare | Dormant Abilities: Parry, Stealth Motion | |||||||
 |
Ione (Haizuron ATAC) | HP: 179 | Level: 24 | Money: 4000 | |||||
| BAS: 24 | POW: 16 | DEX: 17 | AGL: 19 | DEF: 18 | WEP: 18 | Spirit: 87 | Range: 5 | Speed: 8.02 | |
| Equipment: Durandar, Sardonis, Wind Necklace | Attacks: Slash, Thrust, Tackle, Str. Slash, Kick, Quicksand, Earthquake | Dormant Abilities: Parry, Rear Menace | |||||||
 |
Reyna (Haizuron ATAC) | HP: 149 | Level: 23 | Money: 4000 | |||||
| BAS: 17 | POW: 19 | DEX: 22 | AGL: 15 | DEF: 17 | WEP: 18 | Spirit: 84 | Range: 5 | Speed: 6.78 | |
| Equipment: Durandar, Lapis Lazuli, Dex. Ring | Attacks: Slash, Thrust, Tackle, Str. Slash, Kick, Ice Shards, Ice Storm, Mirage Mist, Reyna's Trick | Dormant Abilities: Parry, Mental Vision, Front Menace, Rear Menace | |||||||
 |
Kaidul (Haizuron ATAC) | HP: 149 | Level: 23 | Money: 4000 | |||||
| BAS: 17 | POW: 17 | DEX: 16 | AGL: 19 | DEF: 16 | WEP: 19 | Spirit: 84 | Range: 6 | Speed: 7.74 | |
| Equipment: Durandar, Jade, Pegasus Boots | Attacks: Slash, Thrust, Tackle, Str. Slash, Kick, Tornado, Turbulence | Dormant Abilities: Chivalry | |||||||
 |
Kingdom 1 (Glaive ATAC) | HP: 146 | Level: 20 | Money: 3000 | |||||
| BAS: 19 | POW: 15 | DEX: 15 | AGL: 16 | DEF: 12 | WEP: 16 | Spirit: 75 | Range: 4 | Speed: 7.10 | |
| Equipment: Darkblade, Sapphire, Holy Headband | Attacks: Slash, Thrust, Tackle, Str. Slash, Kick, Ice Shards, Ice Storm | Dormant Abilities: None | |||||||
|
Kingdom 2 (Glaive ATAC) | HP: 146 | Level: 20 | Money: 3000 | |||||
| BAS: 19 | POW: 15 | DEX: 15 | AGL: 16 | DEF: 12 | WEP: 16 | Spirit: 75 | Range: 4 | Speed: 7.10 | |
| Equipment: Darkblade, Sapphire, Holy Headband | Attacks: Slash, Thrust, Tackle, Str. Slash, Kick, Ice Shards, Ice Storm | Dormant Abilities: None | |||||||
|
Kingdom 3 (Glaive ATAC) | HP: 146 | Level: 20 | Money: 3000 | |||||
| BAS: 19 | POW: 15 | DEX: 15 | AGL: 16 | DEF: 12 | WEP: 16 | Spirit: 75 | Range: 4 | Speed: 7.10 | |
| Equipment: Darkblade, Sapphire, Holy Headband | Attacks: Slash, Thrust, Tackle, Str. Slash, Kick, Ice Shards, Ice Storm | Dormant Abilities: None | |||||||
| Important Battlefield Events: |
| - Imperials 1-4 are the only enemies on the battlefield at the start. Once everyone has had a turn, Imperials 1-4 flee the battle, and Kingdom 1-3, Kaidul, Reyna, Ione, Ganlon, Galvas and Zeira join the battle. |
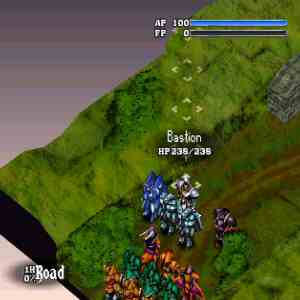
| Going into this mission without knowing how things turn out would be fatal; luckily you have this wonderfully done shrine to help out, right? Oh, you're too kind.. Let's get down to business then. You can take down Imperial 3 and 4 if you'd like to, but they're just going to disappear anyway. However, move towards them and knock out one of them to get to the fort wall if you have to. This wall is absolutely vital to this mission.
Now, once the Kingdom soldiers arrive, you should have more than enough time to mobilize and get into formation. Your team should be at the fort by now, so position them so that Claire and perhaps Halak are blocking the 2-spaces leading to the door. Behind them should lie Franco and Bastion, and behind Bastion or Franco should lie Sadira. This way, your close-range attackers will hold the fort, while Sadira can easily jump at your opponents with Spiral Dive or wear them down with Turbulence, and Bastion can use any of his big attacks, but he's also in a very good position to heal any weary team members. Should Sadira get dizzy, the enemy will have a tough time reaching her. Enemies who come in too close can be held back by Claire's Flare Bomb and Fireball attacks, or by Halak. Halak should also be used to heal, but make sure you keep her HP up too. That being said, all you have to do is wait for the enemy to come to you. Zeira is your biggest threat, so take him out first using the usual tactics. Galvas and Ganlon are also dangerously powerful, and thus must be dealt with. Afterwords, work on defeating Reyna, Ione and Kaidul, then finally the Kingdom troops. Keep your HP up as high as you can, and keep your frontline defense on low FP; if they get dizzy, you're in trouble. If you know you can win the battle, but a team member of yours has been KO'ed, keep going anyway. Morale has no effect on the game at this point, and if you're having trouble with this mission, sometimes it takes a fallen comrade to win. This mission is not at all easy, but the strategy given here will give you a fighting chance. |
Now that the mission is complete..
- You move on to Mission 41
Before beginning Mission 41, save, load stats from Options screen and then Interview. The Shop is open, so get any last-minute Amulet shopping out of the way. Check the Briefing for an overview of what's next, and when you're ready, head to Mission 41: Battle for Tomorrow. It's the last mission, so good luck!
|
|