
 |
|
|
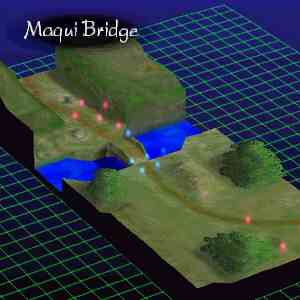
Mission 3: Tragic Farewell
Another Imperial attack! This time, the soldiers are no mere bandits, but the Imperial Guard! Kamorge will hold off the enemies coming from the northern side of Maqui Bridge, and since there is only space for one ATAC on the bridge, no one should get through. You concentrate on taking down the Prince and his bodyguards!
Annihilate all enemies. |
|
 |
Bodyguard 1 (Einlager ATAC) | HP: 87 | Level: 6 | Money: 5000 | |||||
| BAS: 10 | POW: 9 | DEX: 5 | AGL: 5 | DEF: 5 | WEP: 8 | Spirit: 33 | Range: 5 | Speed: 4.10 | |
| Equipment: Gladius, Garnet | Attacks: Slash, Thrust | Dormant Abilities: NONE | |||||||
|
Bodyguard 2 (Einlager ATAC) | HP: 85 | Level: 5 | Money: 5000 | |||||
| BAS: 10 | POW: 9 | DEX: 4 | AGL: 4 | DEF: 5 | WEP: 7 | Spirit: 30 | Range: 5 | Speed: 3.86 | |
| Equipment: Gladius, Garnet | Attacks: Slash, Thrust | Dormant Abilities: NONE | |||||||
|
Bodyguard 3 (Einlager ATAC) | HP: 81 | Level: 5 | Money: 5000 | |||||
| BAS: 9 | POW: 8 | DEX: 6 | AGL: 6 | DEF: 3 | WEP: 7 | Spirit: 30 | Range: 5 | Speed: 4.30 | |
| Equipment: Gladius, Garnet | Attacks: Slash, Thrust, Str. Slash | Dormant Abilities: NONE | |||||||
|
Bodyguard 4 (Einlager ATAC) | HP: 79 | Level: 4 | Money: 5000 | |||||
| BAS: 9 | POW: 8 | DEX: 4 | AGL: 4 | DEF: 4 | WEP: 7 | Spirit: 30 | Range: 5 | Speed: 4.10 | |
| Equipment: Gladius, Garnet | Attacks: Slash, Thrust | Dormant Abilities: NONE | |||||||
 |
Duyere (Sarbelas ATAC) | HP: 112 | Level: 3 | Money: 12000 | |||||
| BAS: 9 | POW: 5 | DEX: 9 | AGL: 7 | DEF: 3 | WEP: 16 | Spirit: 24 | Range: 6 | Speed: 4.54 | |
| Equipment: Mystaria, Sardonis | Attacks: Slash | Dormant Abilities: Forest Motion | |||||||
 |
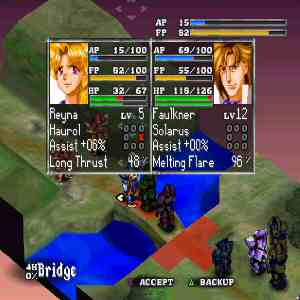
Faulkner (Solarus ATAC) | HP: 126 | Level: 12 | Money: N/A | |||||
| BAS: 13 | POW: 14 | DEX: 9 | AGL: 8 | DEF: 12 | WEP: 14 | Spirit: 51 | Range: 5 | Speed: 4.94 | |
| Equipment: Darkblade, Ruby | Attacks: Slash, Thrust, Tackle, Str. Slash, Kick, Fireball, Melting Flare | Dormant Abilities: Parry, Mass Menace | |||||||
 |
Imperial 1 (Barbatos ATAC) | HP: 52 | Level: 3 | Money: N/A | |||||
| BAS: 4 | POW: 4 | DEX: 5 | AGL: 4 | DEF: 3 | WEP: 8 | Spirit: 24 | Range: 4 | Speed: 3.62 | |
| Equipment: Gradius, Onyx | Attacks: Slash | Dormant Abilities: NONE | |||||||
|
Imperial 2 (Barbatos ATAC) | HP: 52 | Level: 3 | Money: N/A | |||||
| BAS: 4 | POW: 4 | DEX: 4 | AGL: 5 | DEF: 3 | WEP: 8 | Spirit: 24 | Range: 4 | Speed: 3.86 | |
| Equipment: Gladius, Onyx | Attacks: Slash | Dormant Abilities: NONE | |||||||
|
Imperial 3 (Barbatos ATAC) | HP: 56 | Level: 3 | Money: 3500 | |||||
| BAS: 5 | POW: 4 | DEX: 4 | AGL: 4 | DEF: 3 | WEP: 8 | Spirit: 24 | Range: 4 | Speed: 3.66 | |
| Equipment: Gladius, Turquoise | Attacks: Slash, Thrust | Dormant Abilities: NONE | |||||||
|
Imperial 4 (Barbatos ATAC) | HP: 52 | Level: 3 | Money: 3500 | |||||
| BAS: 4 | POW: 4 | DEX: 5 | AGL: 4 | DEF: 3 | WEP: 8 | Spirit: 24 | Range: 4 | Speed: 3.62 | |
| Equipment: Gladius, Turquoise | Attacks: Slash | Dormant Abilities: NONE | |||||||
 |
Kamorge (Barazaph ATAC) | HP: 77 | Level: 10 | |||||
| BAS: 8 | POW: 10 | DEX: 6 | AGL: 9 | DEF: 12 | WEP: 11 | Spirit: 45 | Range: 4 | Speed: 4.98 |
| Equipment: Gladius, Onyx | Attacks: Slash, Thrust, Str. Slash | Dormant Abilities: Reflect Attack, Parry, Chivalry, Mass Menace | ||||||
| Important Battlefield Events: |
| - Kamorge stays on the bridge the entire time. Imperial 1 will attack him, but will be defeated quickly. Once defeated, Imperial 2 goes after Kamorge with similar results. Finally, Faulkner attacks Kamorge. In the second round of combat between Faulkner and Kamorge, both leave the battlefield, and Imperials 3 and 4 go after your team. - Duyere doesn't stick around long; after the fourth turn in which he performs an action other than resting to recover FP, his ATAC malfunctions and he leaves the battlefield along with Bodyguard 1. If this doesn't happen, he will split when Faulkner leaves. - Once the mission is completed, if Bastion is Level 8, you can choose to continue on the Kingdom Branch (choose "We must attend to Kamorge!", or head for the Empire Branch (choose "I shall find that murderer!") |
| By looking at the stats of the enemies on the battlefield, one would figure this is a very difficult mission. You don't actually have to fight Faulkner though, so breathe a sigh of relief.
Duyere is difficult to defeat in this mission, and coughs up very little experience points, but a LOT of money. It's up to you to decide if you want it or not; I'd say it's worth the hassle. On his first turn, he'll move south (probably with a bodyguard two spaces behind him). Sneak in there with Bastion and Str. Slash him to do big damage. Then, get Duyere's FP up to 100 with constant attacks from the front and side. Have Ione and Devlin or Barlow hit the side of him, while Reyna should Long Thrust him from just out of his counterattack range. That way, Ione will take the counterattack damage, and should she be knocked out, it won't matter much anyway. Once he's dizzy, a Str. Slash in the back may take him out. When Duyere is taken care of, Reyna may be pretty bruised up from all the hits she's taken. It would be a good idea to back her against the edge of the map to rest, while you concentrate on defeating the Bodyguards. 1 and 2 have the highest stats, but 3 is capable of using Str. Slash! I've found that it works best to simply take down whatever ones expose their backs to you. Cover your own backs in the meantime; those Bodyguards hit HARD! Concentrate on eliminating one at a time, so that you have less to deal with.
|
 Ione is primarily used for wearing down the enemies in this level, and she takes lots of punishment, so use her to distract the enemies and take the hits. If you're lucky, the enemy will spend his turn resting instead of attacking! Just make sure you allow Reyna, Barlow and Devlin to gain at least one level each, because you want them to learn Str. Slash and Str. Thrust. Of course, if you're going for the Empire Branch, don't worry too much about your team's safety; use them all as sacrifices for getting Bastion to Level 8 and through this mission.
Now that the mission is complete..
- Kamorge leaves your party
- You move on to either Mission 4 or Mission 25
Before beginning Mission 4, save your game and load stats from the Options screen (do this after every mission to be safe), and head to the Interview screen. Devlin is a grumpy one, and will probably have the lowest Morale rating, so you may want to speak with him 3 times. Prepare yourself for Mission 4, which is much different from what you have faced so far.
If you're going for the Empire Branch, save your game and all that jazz, then check the Briefing and prepare for Mission 25.
|
|