
 |
|
|
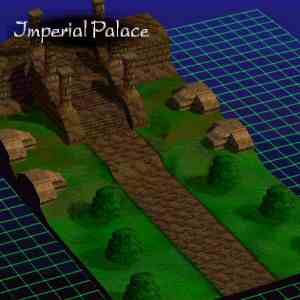
Mission 23: Light and Darkness
This is it.. the battle of good versus evil; the Prince of the Kingdom versus the new leader of the Empire! The battle that will decide the fate of the continent of Eptina!
Defeat the devil machine (defeat Faulkner). |
|
 |
Franco (Korbelan ATAC) | HP: 149 | Level: 23 | Money: 4000 | |||||
| BAS: 17 | POW: 16 | DEX: 20 | AGL: 16 | DEF: 15 | WEP: 21 | Spirit: 84 | Range: 6 | Speed: 7.02 | |
| Equipment: Durandar, Olivine, Dex. Ring | Attacks: Slash, Thrust, Tackle, Str. Slash, Kick, Tornado, Turbulence, Wind Strike | Dormant Abilities: Reflect Attack, Chivalry | |||||||
 |
Halak (Korbelan ATAC) | HP: 155 | Level: 24 | Money: 4000 | |||||
| BAS: 18 | POW: 18 | DEX: 20 | AGL: 16 | DEF: 13 | WEP: 19 | Spirit: 87 | Range: 7 | Speed: 7.06 | |
| Equipment: Durandar, Olivine, Pegasus Boots | Attacks: Slash, Thrust, Tackle, Str. Slash, Kick, Tornado, Turbulence, Wind Strike | Dormant Abilities: Bad Back, Mass Menace | |||||||
 |
Claire (Sharking ATAC) | HP: 228 | Level: 23 | Money: 5000 | |||||
| BAS: 13 | POW: 28 | DEX: 16 | AGL: 18 | DEF: 14 | WEP: 29 | Spirit: 84 | Range: 5 | Speed: 7.34 | |
| Equipment: Ginsunami, Dark Eye, Fairy Earring | Attacks: Slash, Str. Slash, Cutting Wheel | Dormant Abilities: Parry, Chivalry, Front Menace | |||||||
 |
Shion (Sharking ATAC) | HP: 234 | Level: 24 | Money: 5000 | |||||
| BAS: 14 | POW: 24 | DEX: 15 | AGL: 21 | DEF: 20 | WEP: 27 | Spirit: 87 | Range: 5 | Speed: 8.10 | |
| Equipment: Ginsunami, Dark Eye, Armor Amulet | Attacks: Slash, Str. Slash, Cutting Wheel | Dormant Abilities: Parry, Chivalry | |||||||
 |
Duyere (Sarbelas ATAC) | HP: 204 | Level: 23 | Money: 12000 | |||||
| BAS: 22 | POW: 18 | DEX: 20 | AGL: 22 | DEF: 12 | WEP: 19 | Spirit: 84 | Range: 6 | Speed: 8.66 | |
| Equipment: Mystaria, Sardonis, Power Tiara (ha ha, girly man is wearing a TIARA!) | Attacks: Slash, Str. Slash, Quicksand, Earthquake, Gaia Blade | Dormant Abilities: Assassinate, Mental Vision, Hoverjets, Second Attack, Stealth Motion, Forest Motion | |||||||
 |
Logan (Crimson ATAC) | HP: 190 | Level: 26 | Money: 12000 | |||||
| BAS: 17 | POW: 32 | DEX: 16 | AGL: 13 | DEF: 19 | WEP: 22 | Spirit: 93 | Range: 5 | Speed: 6.30 | |
| Equipment: Bloodblade, Bloodstone, Rainbow Gem | Attacks: Slash, Thrust, Tackle, Str. Slash, Kick, Fireball, Melting Flare, Flare Bomb, Raging Heat | Dormant Abilities: Reflect Attack, Chivalry, Mass Menace, Forest Motion | |||||||
 |
Imperial 1 (Sharking ATAC) | HP: 226 | Level: 22 | Money: 18000 | |||||
| BAS: 13 | POW: 19 | DEX: 17 | AGL: 19 | DEF: 19 | WEP: 26 | Spirit: 81 | Range: 5 | Speed: 7.58 | |
| Equipment: Ginsunami, Dark Eye, Knight Coat-of-Arms | Attacks: Slash, Str. Slash, Cutting Wheel | Dormant Abilities: Mass Menace | |||||||
|
Imperial 2 (Sharking ATAC) | HP: 226 | Level: 22 | Money: 18000 | |||||
| BAS: 13 | POW: 19 | DEX: 17 | AGL: 19 | DEF: 19 | WEP: 26 | Spirit: 81 | Range: 5 | Speed: 7.58 | |
| Equipment: Ginsunami, Dark Eye, Knight Coat-of-Arms | Attacks: Slash, Str. Slash, Cutting Wheel | Dormant Abilities: Mass Menace | |||||||
|
Imperial 3 (Sharking ATAC) | HP: 226 | Level: 22 | Money: 18000 | |||||
| BAS: 13 | POW: 19 | DEX: 17 | AGL: 19 | DEF: 19 | WEP: 26 | Spirit: 81 | Range: 5 | Speed: 7.58 | |
| Equipment: Ginsunami, Dark Eye, Knight Coat-of-Arms | Attacks: Slash, Str. Slash, Cutting Wheel | Dormant Abilities: Mass Menace | |||||||
|
Imperial 4 (Sharking ATAC) | HP: 226 | Level: 22 | Money: 18000 | |||||
| BAS: 13 | POW: 19 | DEX: 17 | AGL: 19 | DEF: 19 | WEP: 26 | Spirit: 81 | Range: 5 | Speed: 7.58 | |
| Equipment: Ginsunami, Dark Eye, Knight Coat-of-Arms | Attacks: Slash, Str. Slash, Cutting Wheel | Dormant Abilities: Mass Menace | |||||||
|
Imperial 5 (Sharking ATAC) | HP: 226 | Level: 22 | Money: 18000 | |||||
| BAS: 13 | POW: 19 | DEX: 17 | AGL: 19 | DEF: 19 | WEP: 26 | Spirit: 81 | Range: 5 | Speed: 7.58 | |
| Equipment: Ginsunami, Dark Eye, Knight Coat-of-Arms | Attacks: Slash, Str. Slash, Cutting Wheel | Dormant Abilities: Mass Menace | |||||||
|
Imperial 6 (Sharking ATAC) | HP: 226 | Level: 22 | Money: 18000 | |||||
| BAS: 13 | POW: 19 | DEX: 17 | AGL: 19 | DEF: 19 | WEP: 26 | Spirit: 81 | Range: 5 | Speed: 7.58 | |
| Equipment: Ginsunami, Dark Eye, Knight Coat-of-Arms | Attacks: Slash, Str. Slash, Cutting Wheel | Dormant Abilities: Mass Menace | |||||||
|
Imperial 7 (Sharking ATAC) | HP: 226 | Level: 22 | Money: 18000 | |||||
| BAS: 13 | POW: 19 | DEX: 17 | AGL: 19 | DEF: 19 | WEP: 26 | Spirit: 81 | Range: 5 | Speed: 7.58 | |
| Equipment: Ginsunami, Dark Eye, Knight Coat-of-Arms | Attacks: Slash, Str. Slash, Cutting Wheel | Dormant Abilities: Mass Menace | |||||||
|
Imperial 8 (Sharking ATAC) | HP: 226 | Level: 22 | Money: 18000 | |||||
| BAS: 13 | POW: 19 | DEX: 17 | AGL: 19 | DEF: 19 | WEP: 26 | Spirit: 81 | Range: 5 | Speed: 7.58 | |
| Equipment: Ginsunami, Dark Eye, Knight Coat-of-Arms | Attacks: Slash, Str. Slash, Cutting Wheel | Dormant Abilities: Mass Menace | |||||||
 |
Faulkner (Zulwarn ATAC) | HP: 662 | Level: 30 | Money: 20000 | |||||
| BAS: 28! | POW: 29! | DEX: 31! | AGL: 29! | DEF: 27! | WEP: 29! | Spirit: 105 | Range: 5 | Speed: 10.58 | |
| Equipment: Soulstab, Black Diamond, Devil's Horn | Attacks: Slash, Tackle, Long Thrust, Str. Slash, Str. Thrust, Shadow Binding, Dark Thunder, Shadow Blade, Heaven's Gate | Dormant Abilities: Parry, Second Attack, Mass Menace | |||||||
 |
Sadira (Sylpheed ATAC) | HP: 178 | Level: 22 | |||||
| BAS: 18 | POW: 12 | DEX: 18 | AGL: 23 | DEF: 19 | WEP: 19 | Spirit: 81 | Range: 7 | Speed: 8.74 |
| Equipment: Steelburn, Star Diamond, Rainbow Gem | Attacks: Slash, Thrust, Str. Slash, Str. Thrust, Tornado, Turbulence, Wind Strike | Dormant Abilities: Parry, Chivalry, Hoverjets | ||||||
| Important Battlefield Events: |
| - About 57 turns after the start of the battle, Imperials 1-4 appear in the spots indicated on the map. About 57 turns after that, Imperials 5-8 appear in those same spots. - After being attacked by Franco, Halak and Duyere, Sadira's mood changes to sad, increasing her Defense. - Faulkner does not move in this battle, preferring his comfy position. Once you hit him down to 200 HP, he'll start to move around. - To win this battle, BASTION MUST DELIVER THE KILLING BLOW TO FAULKNER! Anyone else who attemps to do this will simply knock Faulkner back up to 150 HP. Bastion's killing blow simply has to do enough damage to kill Faulkner; even if the hit rate is 0.00001 percent, you will still win the battle. |
| Faulkner is ungodly powerful in this mission.. take a glance at his stats. And he's backed by some of the strongest combatants in the game, along with Imperial re-inforcements. The situation looks grim.... Relax. I have a great strategy for you, one that works very well. The key is to be aggressive... REALLY aggressive. That, and enter the battle prepared. Surrounding Faulkner and chipping away at his life a bit at a time (while having team members blasted into oblivion with Heaven's Gate) is the way to win. But before we can do that, we have to take care of our former friends and enemies who guard Faulkner. By the way, during the fight, if Bastion scores any kills, up his POW as high as you can so that you can do the final blow that much quicker. First, Franco and Halak will run at you. Franco will probably try to... Turbulence against Andrew. Good f***ing luck, Franco. Halak will probably hit Sadira. Then, it's your turn to attack. At this point in the game, Franco and Halak should be ridiculously easy to defeat. Just save your HP for the other guys. A few turns afterwards, Shion and Claire will advance at you (Sadira will run up and Turbulence them; atta girl!). Sadira will probably get beaten up a bit, but don't worry about her in this battle; rest assured she is going to get KO'ed. Move in towards the Sharkings and do the usual routine to rout them; or hit them from afar with Turbulence. Luckily, these Sharkings seem a LITTLE easier to defeat; maybe because your team is together for once! Duyere and Logan will come shortly after, or during the Sharking disposal if you're not fast enough. Duyere will come first, but he's not really much of a threat with your whole team taking him down ("banding close becomes a must" the song said..). Be careful though; his Gaia Blade counter is VERY strong, so you may want to Mirage Mist him. While dealing with Duyere, I recommend you send Zeira and maybe Andrew up the stairs (just a LITTLE bit up; stay 5 spaces away from Faulkner at all times) and use Turbulence on Logan to wear him down. The last thing you want is to be hit by Raging Heat. Before you get to wear Logan down, Sharkings will most likely come out to play. Wait for them to come to you, then wear them down with good ol' Turbulence and wait for them to advance. From there, use a team effort to take them down. Continue to keep Logan occupied with Zeira while you dispose of the Sharkings, or just let Logan descend from the steps, dodge his Raging Fire attack, and then beat the snot out of him with whatever team members you can spare. Do NOT, and I repeat, do NOT lose any characters; heal if you need to! Dispose of the Sharkings quickly, and heal up as much as you can once they're dealt with; more are coming!
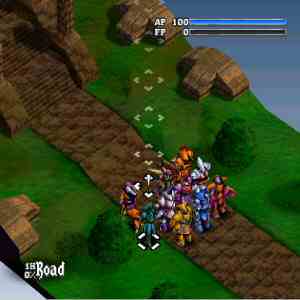
4 more Sharkings will come at you, but this time you're prepared. Group everyone up the best you can, preferably with the setup in the screenshot over yonder. Have Devlin, Nana and Zeira in the front, with Alden, Andrew, Bastion and Milea in the second row, and in the back, have Dionne, Barlow, and Reyna. By doing this, the Sharking gang will use up all their AP on their first turns by moving towards you! You will also be in an excellent setup to blast the Sharkings with powerful attacks! With Bastion in the center, heal as much as you can before the Sharkings appear. Stick together and let them come to you, then deal with them one at a time as a team. Keep everyone alive; this is crucial, as you will need everyone for the big fight ahead. Now, take a deep breath. We're going in. Move your entire team forward a bit, making sure not to touch the second staircase on the series of staircases leading to Faulkner. Make sure everyone is 5 spaces away from him, and bunch your team members up in the 3X3 (with one odd man out) formation. Put the odd man (Andrew) in the back, and put the close range guys in the front. Bastion goes in the center, with medium range attackers joining him. Understood? Now, since Faulkner does not move from his perch, and there are no more enemies coming, prepare for tough times. Take as many turns as you need to FULLY restore everyone's HP... you'll need it. When that is done, begin casting support spells on your team if you wish for that extra advantage. Wait for Faulkner to take his turn, and when Andrew or Zeira gets his turn... ATTACK! Start with Turbulence to get his FP up (Faulkner recovers FP phenominally fast, and his attacks have no FP cost). Faulkner will not attack if his FP is above 60, regardless of cost, so the key is to not let him attack. If he DOES attack, you might have to say goodbye to someone. Faulkner usually counters with Heaven's Gate, which is just too powerful to take; it's very highly damaging, almost never misses, has a range of 4, has Knockdown, and he uses it TWICE per turn. After Zeira has taken his turn, get everyone up to Faulkner and surround him, making sure Bastion is close to him. Attack him with everything you have that's Knockdown attribute, or if that's unavailable, anything that's very strong. You need to dizzy him before you'll be able to do respectable damage. In the meantime, Faulkner will continue to decimate your party with Heaven's Gate. Defend against it no matter what, unless defending will kill you. When Faulkner is dizzied, take advantage of it and throw EVERYTHING you have at him. Get Bastion up there, and have him do some serious hurt while Faulkner is dizzy (Bursting Fire works well too). When Faulkner is low on HP and you know you can do enough damage to kill him, simply have Bastion attack him with your strongest attack. Regardless of your hit percentage, this will win the game. A uber-cool story battle will play, showcasing some of the coolest attacks in the game, ultimately ending with Faulkner's demise. |
Now that the mission is complete..
- Kingdom Branch complete!
- Ballad, Fanfare and Bells unlocked on the End Credits section of the Options screen.
And with that, I congratulate you. You have completed a very difficult RPG, one that's even harder than the acclaimed Final Fantasy Tactics (and in this shriner's opinion, Vanguard Bandits is ultimately a more enjoyable experience and a bit better of a game.) At this point, you may want to go through it again on a different branch, and I highly suggest you do. The game is much different on the Empire and Ruin Branches, and it's VERY interesting to see how the story develops on the other branches (why can't EVERY RPG have this system?). Just make sure, MAKE SURE you load your stats after every mission, so that you don't wipe out your data.
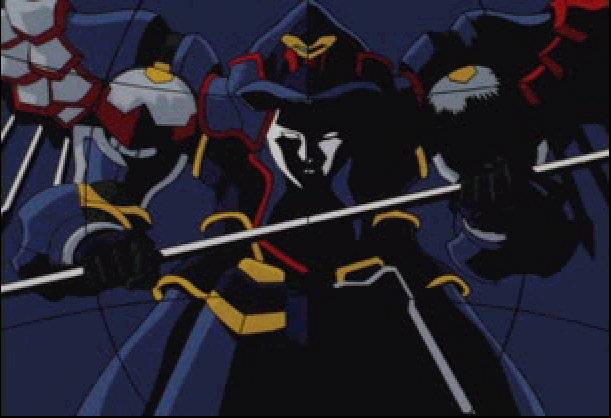
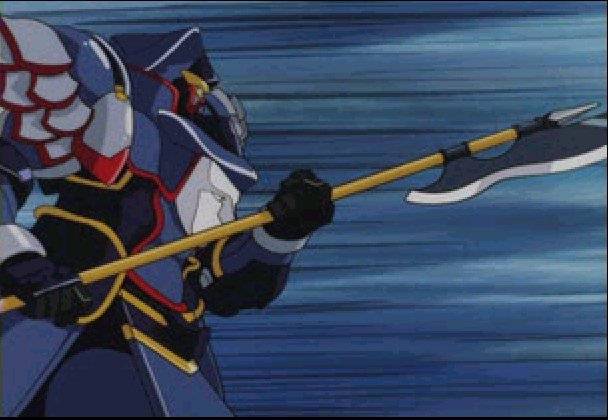
Below are some select slides from the opening movie.


|
|