 |
|
|
Mission 21: Zulwarn Unleashed
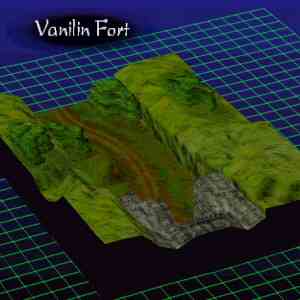
Damn it all! Just when we thought we were near the Imperial Capital, the Empire builds a fortress that blocks the way. We need to get through here. Maybe it's just me, but isn't it a little unguarded?
Annihilate all enemies. |
|
 |
Imperial 1 (Sharking ATAC) | HP: 232 | Level: 21 | Money: 18000 | |||||
| BAS: 15 | POW: 17 | DEX: 12 | AGL: 21 | DEF: 19 | WEP: 26 | Spirit: 78 | Range: 5 | Speed: 8.14 | |
| Equipment: Ginsunami, Dark Eye, Knight Coat-of-Arms | Attacks: Slash, Str. Slash, Cutting Wheel | Dormant Abilities: Mass Menace | |||||||
 |
Imperial 2 (Sharking ATAC) | HP: 232 | Level: 21 | Money: 18000 | |||||
| BAS: 15 | POW: 17 | DEX: 12 | AGL: 21 | DEF: 19 | WEP: 26 | Spirit: 78 | Range: 5 | Speed: 8.14 | |
| Equipment: Ginsunami, Dark Eye, Knight Coat-of-Arms | Attacks: Slash, Str. Slash, Cutting Wheel | Dormant Abilities: Mass Menace | |||||||
 |
Imperial 3 (Einlager ATAC) | HP: 145 | Level: 21 | Money: 5000 | |||||
| BAS: 17 | POW: 17 | DEX: 14 | AGL: 16 | DEF: 16 | WEP: 18 | Spirit: 78 | Range: 5 | Speed: 7.02 | |
| Equipment: Durandar, Tiger's Eye, Knight Coat-of-Arms | Attacks: Slash, Thrust, Tackle, Str. Slash, Kick, Quicksand, Earthquake | Dormant Abilities: Mass Menace | |||||||
 |
Imperial 4 (Einlager ATAC) | HP: 145 | Level: 21 | Money: 5000 | |||||
| BAS: 17 | POW: 17 | DEX: 14 | AGL: 16 | DEF: 16 | WEP: 18 | Spirit: 78 | Range: 5 | Speed: 7.02 | |
| Equipment: Durandar, Tiger's Eye, Knight Coat-of-Arms | Attacks: Slash, Thrust, Tackle, Str. Slash, Kick, Quicksand, Earthquake | Dormant Abilities: Mass Menace | |||||||
 |
Imperial 5 (Barbatos ATAC) | HP: 130 | Level: 20 | Money: 3500 | |||||
| BAS: 15 | POW: 14 | DEX: 16 | AGL: 14 | DEF: 13 | WEP: 20 | Spirit: 75 | Range: 4 | Speed: 6.46 | |
| Equipment: Durandar, Tiger's Eye, Assassin Cape | Attacks: Slash, Thrust, Tackle, Str. Slash, Kick, Quicksand, Earthquake | Dormant Abilities: Assassinate | |||||||
 |
Imperial 6 (Barbatos ATAC) | HP: 130 | Level: 20 | Money: 3500 | |||||
| BAS: 15 | POW: 14 | DEX: 16 | AGL: 14 | DEF: 13 | WEP: 20 | Spirit: 75 | Range: 4 | Speed: 6.46 | |
| Equipment: Durandar, Tiger's Eye, Assassin Cape | Attacks: Slash, Thrust, Tackle, Str. Slash, Kick, Quicksand, Earthquake | Dormant Abilities: Assassinate | |||||||
 |
Imperial 7 (Barbatos ATAC) | HP: 130 | Level: 20 | Money: 3500 | |||||
| BAS: 15 | POW: 14 | DEX: 16 | AGL: 14 | DEF: 13 | WEP: 20 | Spirit: 75 | Range: 4 | Speed: 6.46 | |
| Equipment: Durandar, Tiger's Eye, Assassin Cape | Attacks: Slash, Thrust, Tackle, Str. Slash, Kick, Quicksand, Earthquake | Dormant Abilities: Assassinate | |||||||
 |
Imperial 8 (Barbatos ATAC) | HP: 130 | Level: 20 | Money: 3500 | |||||
| BAS: 15 | POW: 14 | DEX: 16 | AGL: 14 | DEF: 13 | WEP: 20 | Spirit: 75 | Range: 4 | Speed: 6.46 | |
| Equipment: Durandar, Tiger's Eye, Assassin Cape | Attacks: Slash, Thrust, Tackle, Str. Slash, Kick, Quicksand, Earthquake | Dormant Abilities: Assassinate | |||||||
 |
Faulkner (Zulwarn ATAC) | HP: 658 | Level: 28 | Money: N/A | |||||
| BAS: 28 | POW: 29 | DEX: 31 | AGL: 23 | DEF: 27 | WEP: 29 | Spirit: 99 | Range: 5 | Speed: 9.14 | |
| Equipment: Soulstab, Black Diamond, Devil's Horn | Attacks: Slash, Tackle, Long Thrust, Str. Slash, Str. Thrust, Shadow Binding, Dark Thunder, Shadow Blade, Heaven's Gate | Dormant Abilities: Parry, Second Attack, Mass Menace | |||||||
| Important Battlefield Events: |
| - Faulkner "curses" your team at the beginning of the battle. Meaning, for the duration of this mission, each of your team members aside from Bastion gets only 50 AP per turn instead of 100. - Imperials 1 - 4 do not move. Faulkner doesn't move or attack, nor can he be hit. |
| Imperials 1 and 2 have the definite advantage in this mission, as they are backed against the wall and will attempt to destroy oncoming attackers with the Cutting Wheel attack. There is a fairly easy way to take them down, however.
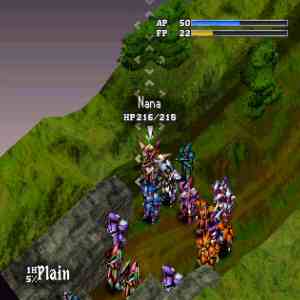
Begin the battle by rushing the first line of Imperials. This will be a LITTLE harder than usual due to the "curse", but you should be able to come through safely. Stay 4 spaces away from the Sharkings AT ALL TIMES, or you will be attacked. Now see those "corners" where the rock meets the wall? Move Andrew to one of them, Zeira to the other. From this point, you can Turbulence the Sharkings without being counterattacked! And since they do not move, they'll always take hits, right? Using this method (though you'll have to pick off the Einlagers first from afar), you can win the battle fairly easily. To speed up the process, get a Sharking's FP up fairly high (around 60) and rush it with the rest of your team. Cutting Wheel or no Cutting Wheel, even a Sharking can't deal with a well-thought out plan and a swarm of powerful attacks by your team. |
Now that the mission is complete..
- Dionne joins your team in the Roaring Lion ATAC! Holy crap! And he's controllable!
- You move on to Mission 22
Before beginning Mission 22, save your game and load stats from the Options screen, and head to the Interview screen to cure the after-Zulwarn-curse blues. Check the Briefing for an overview of what's next, and when you're ready, head to Mission 22: Capitol Clash.
|
|

