
 |
|
|
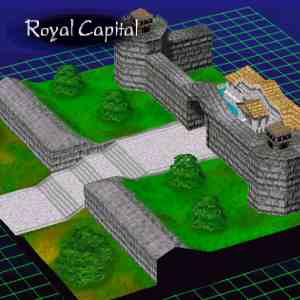
Mission 17: Faulkner's Ambition
It's time to take back the royal capital of Pharastia! Simply take out the soldiers blocking the entrance, and if the Emperor decides to make an appearance, take him out too!
Annihilate all enemies. |
|
 |
Imperial 1 (Barbatos ATAC) | HP: 116 | Level: 17 | Money: 3500 | |||||
| BAS: 13 | POW: 11 | DEX: 11 | AGL: 12 | DEF: 15 | WEP: 17 | Spirit: 66 | Range: 4 | Speed: 5.90 | |
| Equipment: Darkblade, Garnet, Warrior Coat-of-Arms | Attacks: Slash, Thrust, Tackle, Str. Slash, Kick, Quicksand | Dormant Abilities: Front Menace | |||||||
|
Imperial 2 (Barbatos ATAC) | HP: 116 | Level: 17 | Money: 3500 | |||||
| BAS: 13 | POW: 11 | DEX: 11 | AGL: 12 | DEF: 15 | WEP: 17 | Spirit: 66 | Range: 4 | Speed: 5.90 | |
| Equipment: Darkblade, Garnet, Warrior Coat-of-Arms | Attacks: Slash, Thrust, Tackle, Str. Slash, Kick, Quicksand | Dormant Abilities: Front Menace | |||||||
|
Imperial 3 (Barbatos ATAC) | HP: 116 | Level: 17 | Money: 3500 | |||||
| BAS: 13 | POW: 11 | DEX: 11 | AGL: 12 | DEF: 15 | WEP: 17 | Spirit: 66 | Range: 4 | Speed: 5.90 | |
| Equipment: Darkblade, Garnet, Warrior Coat-of-Arms | Attacks: Slash, Thrust, Tackle, Str. Slash, Kick, Quicksand | Dormant Abilities: Front Menace | |||||||
|
Imperial 4 (Barbatos ATAC) | HP: 118 | Level: 16 | Money: 3500 | |||||
| BAS: 14 | POW: 14 | DEX: 10 | AGL: 11 | DEF: 10 | WEP: 17 | Spirit: 63 | Range: 4 | Speed: 5.70 | |
| Equipment: Darkblade, Garnet, Warrior Coat-of-Arms | Attacks: Slash, Thrust, Tackle, Str. Slash, Kick, Quicksand | Dormant Abilities: Front Menace | |||||||
|
Imperial 5 (Barbatos ATAC) | HP: 118 | Level: 16 | Money: 3500 | |||||
| BAS: 14 | POW: 14 | DEX: 10 | AGL: 11 | DEF: 10 | WEP: 17 | Spirit: 63 | Range: 4 | Speed: 5.70 | |
| Equipment: Darkblade, Garnet, Warrior Coat-of-Arms | Attacks: Slash, Thrust, Tackle, Str. Slash, Kick, Quicksand | Dormant Abilities: Front Menace | |||||||
|
Imperial 6 (Barbatos ATAC) | HP: 118 | Level: 16 | Money: 3500 | |||||
| BAS: 14 | POW: 14 | DEX: 10 | AGL: 11 | DEF: 10 | WEP: 17 | Spirit: 63 | Range: 4 | Speed: 5.70 | |
| Equipment: Darkblade, Garnet, Warrior Coat-of-Arms | Attacks: Slash, Thrust, Tackle, Str. Slash, Kick, Quicksand | Dormant Abilities: Front Menace | |||||||
 |
Duyere (Sarbelas ATAC) | HP: 182 | Level: 16 | Money: 12000 | |||||
| BAS: 20 | POW: 16 | DEX: 18 | AGL: 19 | DEF: 10 | WEP: 19 | Spirit: 63 | Range: 6 | Speed: 7.86 | |
| Equipment: Mystaria, Sardonis, Power Tiara (haahaa, Princey is wearing a tiara) | Attacks: Slash, Str. Slash, Quicksand, Earthquake, Gaia Blade | Dormant Abilities: Assassinate, Mental Vision, Hoverjets, Second Attack, Stealth Motion, Forest Motion | |||||||
 |
B.G.Chief Matisse (Einlager ATAC) | HP: 147 | Level: 20 | Money: 5000 | |||||
| BAS: 18 | POW: 21 | DEX: 14 | AGL: 10 | DEF: 12 | WEP: 20 | Spirit: 75 | Range: 5 | Speed: 5.62 | |
| Equipment: Durandar, Tiger's Eye, Knight Coat-of-Arms | Attacks: Slash, Thrust, Tackle, Str. Slash, Kick, Quicksand, Earthquake | Dormant Abilities: Mass Menace | |||||||
|
Bodyguard 2 (Einlager ATAC) | HP: 145 | Level: 19 | Money: 5000 | |||||
| BAS: 18 | POW: 19 | DEX: 15 | AGL: 10 | DEF: 11 | WEP: 19 | Spirit: 72 | Range: 5 | Speed: 5.62 | |
| Equipment: Durandar, Tiger's Eye, Knight Coat-of-Arms | Attacks: Slash, Thrust, Tackle, Str. Slash, Kick, Quicksand, Earthquake | Dormant Abilities: Mass Menace | |||||||
|
Bodyguard 3 (Einlager ATAC) | HP: 135 | Level: 18 | Money: 5000 | |||||
| BAS: 16 | POW: 17 | DEX: 13 | AGL: 10 | DEF: 14 | WEP: 19 | Spirit: 69 | Range: 5 | Speed: 5.54 | |
| Equipment: Durandar, Tiger's Eye, Knight Coat-of-Arms | Attacks: Slash, Thrust, Tackle, Str. Slash, Kick, Quicksand, Earthquake | Dormant Abilities: Mass Menace | |||||||
|
Bodyguard 4 (Einlager ATAC) | HP: 137 | Level: 17 | Money: 5000 | |||||
| BAS: 17 | POW: 16 | DEX: 12 | AGL: 11 | DEF: 11 | WEP: 19 | Spirit: 66 | Range: 5 | Speed: 5.82 | |
| Equipment: Durandar, Tiger's Eye, Knight Coat-of-Arms | Attacks: Slash, Thrust, Tackle, Str. Slash, Kick, Quicksand, Earthquake | Dormant Abilities: Mass Menace | |||||||
| Important Battlefield Events: |
| - 15 turns after the battle begins, Duyere wonders where the re-inforcements he called for are. 7 turns after that, Duyere and his bodyguards join the battle. If either Matisse or Duyere are reduced to 50% of their HP, both will flee the battle. |
| For a mission so vital to the Kingdom, this one is a little easy. What you want to be careful of, however, is your level for Bastion. If his level is around 18 or 19, don't let him get any kills; just let him support the rest of your team with Holy Light. If you don't have this ability yet, then you should really be working towards it. Remember, if Bastion is less than level 20 at the end of this mission, Milea will join your party, so concentrate on getting everybody else up in level. Everyone except for Galvas should be around Level 17 or 18 at this point.
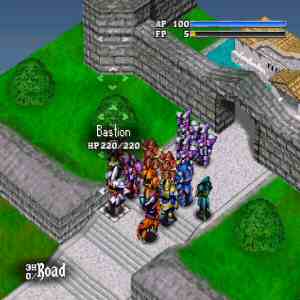
Start the battle by rushing at the wall of Imperials and taking them down with whatever you can. You'll want to do this quickly, so having characters like Zeira pick away at them with Turbulence to boost their FP is a good idea; then you can defeat them with your stronger character's big attacks. Just make SURE you watch your FP; getting dizzy with enemies at this level is fatal. As usual, spread your kills out so that everyone gets some levels. Try and have your characters learn their Level 4 attacks by the end of or during this mission, so that you can concentrate on earning the rest of their Dormant Abilities. When your party members have reached their full potential, they become much, much more powerful and useful. Duyere shows up after 22 turns of combat, near the door to the capital. Only this time, he has all of his attacks and a multitude of dormant abilities to boot. He's still rather easy to beat at this point, but the thing is, you shouldn't just launch your strongest attacks at him; rather, take it slow and get him dizzy with the weaker stuff. It's rather dangerous, but you want to get him dizzy, because he leaves the battle if he loses 50% of his HP. If he's dizzy, you can easily get a kill off him and score 12000 bucks, which will really come in handy in these times of need. Ignore Bodyguard Chief Matisse, as he will leave the battle when Duyere does. The other Bodyguards are a little tough, but at this point, after completing the Norze Castle mission, you should do just fine. Just keep Bastion at less than Level 20, and let your other characters besides Galvas get the kills. Increase their stats accordingly to get their special attacks; you will be able to buy the Level 4 stones you need after this mission. Zeira and Nana should be able to use their special attacks now, if you have the correct stats. After learning the special moves, concentrate on teaching Second Attack to everyone who can learn it, or work on learning any other Dormant Abilities. |
Now that the mission is complete..
- Galvas leaves your team
- Alden joins your team in the Altagrave ATAC!
- Milea joins your team in the Amphisia ATAC if Bastion's level is less than 20!
- You move on to Mission 18
Before beginning Mission 18, save your game and load stats from the Options screen, and head to the Interview screen. It's IMPERATIVE that you keep an eye on your morale now, as you have reached the endgame.
Head to the shop and purchase the new weapons you need first, then as many Level 4 stones as you can. You probably won't be able to buy them all, but another shop will be open soon, so buy the essential ones now (Andrew's and Devlin's) and the rest can wait. Check the Briefing for an overview of what's next, and when you're ready, head to Mission 18: Ice Cold Claire. Welcome to the big leagues, soldier. Things are really going to pick up now.
|
|