
 |
|
|
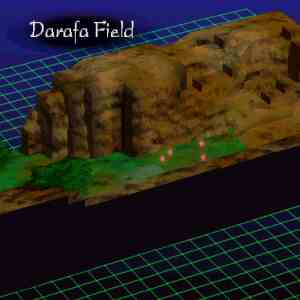
Mission 14: Thomson's Tragedy
General Thomson, leader of the Northern Division of the Pharastia Defense Corps, sent out a distress call, and we've arrived at the scene to help him out! He seems to be doing fairly well though...
Annihilate all enemies. |
|
 |
Imperial 1 (Barbatos ATAC) | HP: 82 | Level: 8 | Money: 3500 | |||||
| BAS: 9 | POW: 9 | DEX: 8 | AGL: 6 | DEF: 4 | WEP: 12 | Spirit: 39 | Range: 4 | Speed: 4.30 | |
| Equipment: Preshuze, Jasper | Attacks: Slash, Thrust, Str. Slash | Dormant Abilities: NONE | |||||||
|
Imperial 2 (Barbatos ATAC) | HP: 82 | Level: 8 | Money: 3500 | |||||
| BAS: 9 | POW: 9 | DEX: 8 | AGL: 6 | DEF: 4 | WEP: 12 | Spirit: 39 | Range: 4 | Speed: 4.30 | |
| Equipment: Preshuze, Jasper | Attacks: Slash, Thrust, Str. Slash | Dormant Abilities: NONE | |||||||
|
Imperial 3 (Barbatos ATAC) | HP: 70 | Level: 6 | Money: 3500 | |||||
| BAS: 7 | POW: 6 | DEX: 5 | AGL: 5 | DEF: 4 | WEP: 10 | Spirit: 33 | Range: 4 | Speed: 3.98 | |
| Equipment: Gladius, Onyx | Attacks: Slash, Thrust | Dormant Abilities: NONE | |||||||
|
Imperial 4 (Barbatos ATAC) | HP: 70 | Level: 6 | Money: 3500 | |||||
| BAS: 7 | POW: 6 | DEX: 5 | AGL: 5 | DEF: 4 | WEP: 10 | Spirit: 21 | Range: 4 | Speed: 3.98 | |
| Equipment: Gladius, Onyx | Attacks: Slash, Thrust | Dormant Abilities: NONE | |||||||
|
Imperial 5 (Barbatos ATAC) | HP: 98 | Level: 12 | Money: 3500 | |||||
| BAS: 11 | POW: 11 | DEX: 8 | AGL: 7 | DEF: 9 | WEP: 14 | Spirit: 51 | Range: 4 | Speed: 4.62 | |
| Equipment: Preshuze, Topaz | Attacks: Slash, Thrust, Tackle, Str. Slash, Kick | Dormant Abilities: NONE | |||||||
|
Imperial 6 (Barbatos ATAC) | HP: 98 | Level: 12 | Money: 3500 | |||||
| BAS: 11 | POW: 11 | DEX: 8 | AGL: 7 | DEF: 9 | WEP: 14 | Spirit: 51 | Range: 4 | Speed: 4.62 | |
| Equipment: Preshuze, Topaz | Attacks: Slash, Thrust, Tackle, Str. Slash, Kick | Dormant Abilities: NONE | |||||||
|
Imperial 7 (Barbatos ATAC) | HP: 96 | Level: 13 | Money: 3500 | |||||
| BAS: 10 | POW: 9 | DEX: 14 | AGL: 9 | DEF: 8 | WEP: 13 | Spirit: 54 | Range: 4 | Speed: 5.06 | |
| Equipment: Preshuze, Topaz | Attacks: Slash, Thrust, Str. Slash, Kick | Dormant Abilities: NONE | |||||||
|
Imperial 8 (Barbatos ATAC) | HP: 96 | Level: 13 | Money: 3500 | |||||
| BAS: 10 | POW: 9 | DEX: 14 | AGL: 9 | DEF: 8 | WEP: 13 | Spirit: 54 | Range: 4 | Speed: 5.06 | |
| Equipment: Preshuze, Topaz | Attacks: Slash, Thrust, Str. Slash, Kick | Dormant Abilities: NONE | |||||||
 |
Kingdom 1 (Glaive ATAC) | HP: 104 | Level: 11 | Money: 3000 | |||||
| BAS: 13 | POW: 10 | DEX: 8 | AGL: 8 | DEF: 5 | WEP: 10 | Spirit: 48 | Range: 4 | Speed: 4.94 | |
| Equipment: Gladius, Emerald | Attacks: Slash, Thrust, Tackle, Str. Slash, Kick | Dormant Abilities: NONE | |||||||
|
Kingdom 2 (Glaive ATAC) | HP: 104 | Level: 11 | Money: 3000 | |||||
| BAS: 13 | POW: 10 | DEX: 8 | AGL: 6 | DEF: 7 | WEP: 10 | Spirit: 48 | Range: 4 | Speed: 4.46 | |
| Equipment: Gladius, Emerald | Attacks: Slash, Thrust, Tackle, Str. Slash, Kick | Dormant Abilities: NONE | |||||||
|
Kingdom 3 (Glaive ATAC) | HP: 104 | Level: 11 | Money: 3000 | |||||
| BAS: 13 | POW: 10 | DEX: 8 | AGL: 6 | DEF: 7 | WEP: 10 | Spirit: 48 | Range: 4 | Speed: 4.46 | |
| Equipment: Gladius, Emerald | Attacks: Slash, Thrust, Tackle, Str. Slash, Kick | Dormant Abilities: NONE | |||||||
 |
Thomson (Haizuron ATAC) | HP: 115 | Level: 14 | Money: 4000 | |||||
| BAS: 13 | POW: 14 | DEX: 8 | AGL: 9 | DEF: 15 | WEP: 13 | Spirit: 57 | Range: 5 | Speed: 5.18 | |
| Equipment: Preshuze, Olivine, Armor Amulet | Attacks: Slash, Thrust, Tackle, Str. Slash, Kick | Dormant Abilities: Reflect Attack, Chivalry | |||||||
 |
Zakov (Einlager ATAC) | HP: 127 | Level: 16 | Money: 5000 | |||||
| BAS: 15 | POW: 16 | DEX: 11 | AGL: 9 | DEF: 15 | WEP: 14 | Spirit: 63 | Range: 5 | Speed: 5.26 | |
| Equipment: Preshuze, Sapphire, Rainbow Gem | Attacks: Slash, Thrust, Tackle, Str. Slash, Kick, Ice Shards, Ice Storm | Dormant Abilities: Reflect Attack, Hoverjets | |||||||
| Important Battlefield Events: |
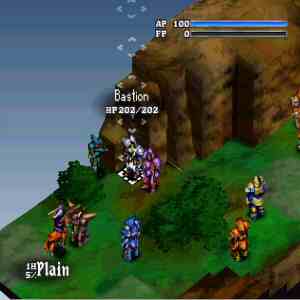
| - After Imperials 1-4 are defeated, Zakov and Imperials 5-8 appear in the western part of the map, near the shrubbery. At this point, Thomson and the remaining Kingdom soldiers become enemies rather than allies. |
| That's not a table-related error you saw there; Thomson and the Kingdom soldiers are enemies, not friends. The battle starts off with them battling the ridiculously weak Imperials 1-4 (notice Thomson remains idle), but once they are defeated, Thomson and his men turn to attack you. At this point, Zakov and his men appear from the other side. Trapped!
Actually, there's a very good way to prevent this from happening, and I call it the "Waiting in the Weeds" strategy. It involves waiting for a few turns, and I know the waiting game sucks and you'd rather play Hungry Hungry Hippos, but bear with me. Position your team so that they cover all the exits to the bush area, and have everyone end their turns. Make sure all your guys are facing each other, or this trick will work the opposite way. Allow the Kingdom and Imperial soldiers to decimate each other. The Kingdom soldiers will win no matter what, but this way, they will be a little softened up for the fight ahead. If Nana has just joined up with you, have her help the Kingdom guys out by stabbing the Imperials in the back. You can gain a few levels for her and catch her up this way! Now, when the Kingdom trounces over the Imperial guys, Zakov and his men appear. But with our unique positioning, you've trapped them! This will make them relatively easy to dispatch, and you will be a fair distance away from Thomson and his men, so you don't have to worry about interference. Nana should make a run for the rest of your team at this point. In fact, try and assure Nana gets most of the kills, and ESPECIALLY make sure she kills Zakov and Thomson. Through careful strategy, you can make Nana shoot up to Level 14 in this battle, and with clever stat raising, you can have you with her strongest attack, Terra Shock, before the battle is through! |
Now that the mission is complete..
- Andrew and Zeira will not be present for the next battle... bummer
- You move on to Mission 15
Before beginning Mission 15, save your game and load stats from the Options screen, and head to the Interview screen. At this point, I found that Andrew had a bit of a negative relationship with me. Maybe that's just me, though. Check the Briefing for an overview of what's next, and when you're ready, head to Mission 15: The Deadliest ATAC. Ulp.....
|
|