
 |
|
|
Mission 13: Kaidul's Revolt
We have a hostage situation in the capital of Avalon! Avalon troops are revolting against Zeira.. but who is the traitor in charge?
Annihilate all enemies. |
|
 |
Avalon 1 (Glaive ATAC) | HP: 100 | Level: 13 | Money: 3000 | |||||
| BAS: 11 | POW: 10 | DEX: 9 | AGL: 14 | DEF: 8 | WEP: 16 | Spirit: 54 | Range: 4 | Speed: 6.30 | |
| Equipment: Darkblade, Olivine, Warrior Coat-of-Arms | Attacks: Slash, Thrust, Tackle, Str. Slash, Kick | Dormant Abilities: Front Menace | |||||||
|
Avalon 2 (Glaive ATAC) | HP: 100 | Level: 13 | Money: 3000 | |||||
| BAS: 11 | POW: 10 | DEX: 13 | AGL: 10 | DEF: 8 | WEP: 16 | Spirit: 54 | Range: 4 | Speed: 5.34 | |
| Equipment: Darkblade, Olivine, Warrior Coat-of-Arms | Attacks: Slash, Thrust, Tackle, Str. Slash, Kick, Tornado, Turbulence | Dormant Abilities: Front Menace | |||||||
|
Avalon 3 (Glaive ATAC) | HP: 106 | Level: 12 | Money: 3000 | |||||
| BAS: 13 | POW: 12 | DEX: 6 | AGL: 7 | DEF: 10 | WEP: 9 | Spirit: 51 | Range: 4 | Speed: 4.70 | |
| Equipment: Gladius, Emerald, Warrior Coat-of-Arms | Attacks: Slash, Thrust, Tackle, Str. Slash | Dormant Abilities: Front Menace | |||||||
|
Avalon 4 (Glaive ATAC) | HP: 106 | Level: 12 | Money: 3000 | |||||
| BAS: 13 | POW: 12 | DEX: 6 | AGL: 7 | DEF: 10 | WEP: 9 | Spirit: 51 | Range: 4 | Speed: 4.70 | |
| Equipment: Gladius, Emerald, Warrior Coat-of-Arms | Attacks: Slash, Thrust, Tackle, Str. Slash | Dormant Abilities: Front Menace | |||||||
|
Avalon 5 (Barazaph ATAC) | HP: 79 | Level: 11 | Money: 2000 | |||||
| BAS: 8 | POW: 9 | DEX: 9 | AGL: 9 | DEF: 8 | WEP: 14 | Spirit: 48 | Range: 4 | Speed: 4.98 | |
| Equipment: Preshuze, Aquamarine | Attacks: Slash, Thrust, Str. Slash, Ice Shards | Dormant Abilities: None | |||||||
|
Avalon 6 (Barazaph ATAC) | HP: 79 | Level: 11 | Money: 2000 | |||||
| BAS: 8 | POW: 9 | DEX: 9 | AGL: 9 | DEF: 8 | WEP: 14 | Spirit: 48 | Range: 4 | Speed: 4.98 | |
| Equipment: Preshuze, Aquamarine | Attacks: Slash, Thrust, Str. Slash, Ice Shards | Dormant Abilities: None | |||||||
|
Avalon 7 (Barazaph ATAC) | HP: 85 | Level: 10 | Money: 2000 | |||||
| BAS: 10 | POW: 9 | DEX: 8 | AGL: 7 | DEF: 7 | WEP: 13 | Spirit: 45 | Range: 4 | Speed: 4.58 | |
| Equipment: Preshuze, Aquamarine | Attacks: Slash, Thrust, Str. Slash, Kick, Ice Shards | Dormant Abilities: None | |||||||
|
Avalon 8 (Barazaph ATAC) | HP: 85 | Level: 10 | Money: 2000 | |||||
| BAS: 10 | POW: 9 | DEX: 8 | AGL: 7 | DEF: 7 | WEP: 13 | Spirit: 45 | Range: 4 | Speed: 4.58 | |
| Equipment: Preshuze, Aquamarine | Attacks: Slash, Thrust, Str. Slash, Kick, Ice Shards | Dormant Abilities: None | |||||||
| Important Battlefield Events: |
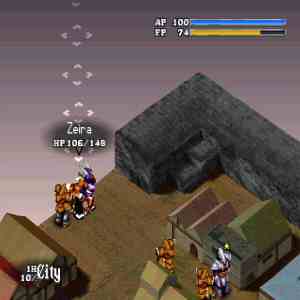
| Three turns after the start of the battle, Zeira becomes controllable. |
| Two options are present at the beginning of this suspenseful battle; either get Zeira out of his predicament, or run in with your team and save him. The latter is much better, as the Avalon troops will be facing Zeira, while you take them from behind. The downside to this (aside from your backs being uncovered as well) is that it will take a bit of time to reach Zeira. To counteract this vulnerable position, have the people who move in last face backwards to ward off any oncoming attackers. Also note that Zeira is in a terrain disadvantage here; the ground is made up of city tiles, which slows him down considerably.
The Glaive opponents are easily the stronger units; and are worth the most EXP. Therefore, have Bastion weaken them with his attacks, and let the other guys get some kills. One of the most important things to consider in this mission, however, is the small space you will be fighting in. It's easy for a teammate to take most of the oncoming attacks and have his FP shot up. Don't let this happen; keep your team grouped up, especially near Bastion. Bastion can use Holy Light to recover your party's HP and FP. That is, providing he has a high enough BAS stat (blue bars on the stat meter count, white ones do not). If Holy Light is unavailable, Reyna should have Cooling Mist, and that works pretty well too. |
Now that the mission is complete..
- If you completed Mission 9 on this file, Nana joins your party in the Bahamut ATAC!
- Galvas rejoins your party!
- You move on to Mission 14
Before beginning Mission 14, save, load stats from Options screen and then Interview. The Shop is open, so upgrade your weapons, then stones; sell your old crap, and spring for some Amulets if you have enough money. Check the Briefing for an overview of what's next, and when you're ready, head to Mission 14: Thomson's Tragedy.
|
|