
 |
|
|
Mission 12: Legendary Light
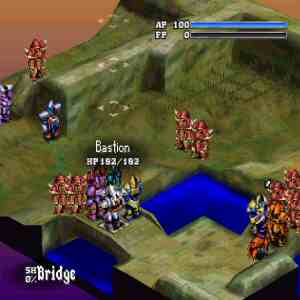
While Bastion is occupied in the temple, it's up to us to hold the fort and make sure no one attacks him. But there are lots of Imperials here, and even Faulkner himself! We have to hold them back!
Annihilate all enemies. |
|

 |
Imperial 1 (Einlager ATAC) | HP: 93 | Level: 11 | Money: 5000 | |||||
| BAS: 9 | POW: 10 | DEX: 12 | AGL: 8 | DEF: 9 | WEP: 13 | Spirit: 48 | Range: 5 | Speed: 4.78 | |
| Equipment: Preshuze, Sapphire | Attacks: Slash, Thrust, Str. Slash, Ice Shards, Ice Storm | Dormant Abilities: NONE | |||||||
|
Imperial 2 (Einlager ATAC) | HP: 93 | Level: 11 | Money: 5000 | |||||
| BAS: 9 | POW: 10 | DEX: 12 | AGL: 7 | DEF: 10 | WEP: 13 | Spirit: 48 | Range: 5 | Speed: 4.54 | |
| Equipment: Preshuze, Sapphire | Attacks: Slash, Thrust, Str. Slash, Ice Shards, Ice Storm | Dormant Abilities: NONE | |||||||
|
Imperial 3 (Barbatos ATAC) | HP: 86 | Level: 10 | Money: 3500 | |||||
| BAS: 9 | POW: 8 | DEX: 10 | AGL: 7 | DEF: 7 | WEP: 13 | Spirit: 45 | Range: 4 | Speed: 4.54 | |
| Equipment: Preshuze, Jasper | Attacks: Slash, Thrust, Str. Slash | Dormant Abilities: NONE | |||||||
|
Imperial 4 (Barbatos ATAC) | HP: 86 | Level: 10 | Money: 3500 | |||||
| BAS: 9 | POW: 8 | DEX: 10 | AGL: 6 | DEF: 8 | WEP: 13 | Spirit: 45 | Range: 4 | Speed: 4.30 | |
| Equipment: Preshuze, Jasper | Attacks: Slash, Thrust, Str. Slash | Dormant Abilities: NONE | |||||||
|
Imperial 5 (Barbatos ATAC) | HP: 76 | Level: 9 | Money: 3500 | |||||
| BAS: 7 | POW: 7 | DEX: 7 | AGL: 8 | DEF: 9 | WEP: 8 | Spirit: 42 | Range: 4 | Speed: 4.70 | |
| Equipment: Gladius, Turquoise | Attacks: Slash, Thrust | Dormant Abilities: NONE | |||||||
|
Imperial 6 (Barbatos ATAC) | HP: 76 | Level: 9 | Money: 3500 | |||||
| BAS: 7 | POW: 7 | DEX: 7 | AGL: 8 | DEF: 9 | WEP: 8 | Spirit: 42 | Range: 4 | Speed: 4.70 | |
| Equipment: Gladius, Turquoise | Attacks: Slash, Thrust | Dormant Abilities: NONE | |||||||
|
Imperial 7 (Barbatos ATAC) | HP: 76 | Level: 9 | Money: 3500 | |||||
| BAS: 7 | POW: 7 | DEX: 7 | AGL: 8 | DEF: 9 | WEP: 8 | Spirit: 42 | Range: 4 | Speed: 4.70 | |
| Equipment: Gladius, Turquoise | Attacks: Slash, Thrust | Dormant Abilities: NONE | |||||||
|
Imperial 8 (Dantarius ATAC) | HP: 75 | Level: 9 | Money: 2000 | |||||
| BAS: 8 | POW: 7 | DEX: 9 | AGL: 13 | DEF: 4 | WEP: 11 | Spirit: 42 | Range: 5 | Speed: 5.94 | |
| Equipment: Shimmerswrd, Olivine | Attacks: Slash, Thrust, Str. Slash, Str. Thrust | Dormant Abilities: NONE | |||||||
|
Imperial 9 (Dantarius ATAC) | HP: 75 | Level: 9 | Money: 2000 | |||||
| BAS: 8 | POW: 7 | DEX: 9 | AGL: 13 | DEF: 4 | WEP: 11 | Spirit: 42 | Range: 5 | Speed: 5.94 | |
| Equipment: Shimmerswrd, Olivine | Attacks: Slash, Thrust, Str. Slash, Str. Thrust | Dormant Abilities: NONE | |||||||
|
Imperial 10 (Barbatos ATAC) | HP: 66 | Level: 8 | Money: 3500 | |||||
| BAS: 5 | POW: 10 | DEX: 6 | AGL: 9 | DEF: 5 | WEP: 8 | Spirit: 39 | Range: 4 | Speed: 4.86 | |
| Equipment: Gladius, Onyx | Attacks: Slash, Thrust | Dormant Abilities: NONE | |||||||
|
Imperial 11 (Barbatos ATAC) | HP: 66 | Level: 8 | Money: 3500 | |||||
| BAS: 5 | POW: 10 | DEX: 6 | AGL: 9 | DEF: 5 | WEP: 8 | Spirit: 39 | Range: 4 | Speed: 4.86 | |
| Equipment: Gladius, Onyx | Attacks: Slash, Thrust | Dormant Abilities: NONE | |||||||
|
Imperial 12 (Barbatos ATAC) | HP: 66 | Level: 8 | Money: 3500 | |||||
| BAS: 5 | POW: 10 | DEX: 6 | AGL: 9 | DEF: 5 | WEP: 8 | Spirit: 39 | Range: 4 | Speed: 4.86 | |
| Equipment: Gladius, Onyx | Attacks: Slash, Thrust | Dormant Abilities: NONE | |||||||
|
Imperial 13 (Barbatos ATAC) | HP: 68 | Level: 7 | Money: 3500 | |||||
| BAS: 6 | POW: 8 | DEX: 6 | AGL: 6 | DEF: 5 | WEP: 9 | Spirit: 36 | Range: 4 | Speed: 4.18 | |
| Equipment: Gladius, Onyx | Attacks: Slash, Thrust | Dormant Abilities: NONE | |||||||
 |
Faulkner (Solarus ATAC) | HP: 140 | Level: 15 | Money: N/A | |||||
| BAS: 15 | POW: 15 | DEX: 11 | AGL: 10 | DEF: 13 | WEP: 15 | Spirit: 60 | Range: 5 | Speed: 5.50 | |
| Equipment: Darkblade, Ruby | Attacks: Slash, Thrust, Tackle, Str. Slash, Kick, Fireball, Melting Flare | Dormant Abilities: Parry, Mass Menace | |||||||
 |
Zeira (Toreadore ATAC) | HP: 148 | Level: 11 | |||||
| BAS: 14 | POW: 11 | DEX: 10 | AGL: 13 | DEF: 17 | WEP: 17 | Spirit: 48 | Range: 7 | Speed: 6.18 |
| Equipment: Gunganir, Royal Jade | Attacks: Slash, Thrust, Tackle, Str. Thrust, Tornado | Dormant Abilities: None | ||||||
 |
Alden (Altagrave ATAC) | HP: 144 | Level: 15 | ||||||
| BAS: 11 | POW: 10 | DEX: 19 | AGL: 11 | DEF: 14 | WEP: 19 | Spirit: 60 | Range: 5 | Speed: 5.58 | |
| Equipment: Fridgia, Hawk's Eye | Attacks: Slash, Thrust, Tackle, Str. Slash, Kick, Ice Shards, Ice Storm, Mirage Mist | Dormant Abilities: Parry, Mental Vision, Snow Motion | |||||||
 |
Melior (Amphisia ATAC) | HP: 95 | Level: 12 | ||||||
| BAS: 9 | POW: 8 | DEX: 11 | AGL: 12 | DEF: 13 | WEP: 14 | Spirit: 51 | Range: 5 | Speed: 5.74 | |
| Equipment: Trident, Lapis Lazuli | Attacks: Thrust, Long Thrust, Str. Thrust, Ice Shards, Ice Storm | Dormant Abilities: Snow Motion | |||||||
| Important Battlefield Events: |
| - 39 turns after the start of the battle, Bastion appears in the Ultragunner ATAC, ready for action! A suspenseful scene occurs, resulting in Imperial 13 appearing on the battlefield. - Faulkner leaves the battlefield if he is reduced to 50% of his HP. - 28 turns after Bastion joins the battle, Alden and Melior appear in the high eastern cliff to observe the battle. They cannot be reached and cannot be attacked, just so you know. |
| You'll notice that your team starts in front of 2 space bridges; a very good thing, indeed. The Imperials are all on the other side of the bridges, and you can block the bridges off with your team. Position Andrew, Galvas and Reyna on the northern bridge, letting Galvas do damage, but letting Andrew and Reyna get the kills. Place Barlow and Devlin on the southern one. Zeira will also head east, but we can't control him now, can we? Soon... soon.
Your main concern in this battle are the Einlager ATAC and Faulkner. The Dantarius Imperials are a little tougher than the Barazaphs, but they are fairly weak in constitution, and they aren't exactly equipped with great stuff. You shouldn't have much of a problem keeping the Imperials at bay until Bastion arrives, as the real threat of the battle doesn't start moving until then. At that point, stay one step ahead of Faulkner. As he moves in, be prepared for him and gather your ATAC into one spot. He'll come in for the attack, but he will also find himself surrounded and out of luck. Faulkner does LOTS of damage with his attacks, but those are no good when he runs his FP up to 100, right? Another good idea is to have Galvas run in (you'll have to clear out the bridge trolls first) and lure Faulkner into a trap. Rest assured, this DOES work; Faulkner does not simply target Bastion against all odds. If the bridge is still blocked and Galvas is standing in front of Bastion, you can pick Faulkner off with Lightning Strike from a distance, and Faulkner will not retaliate! Make SURE your team gets some swats at Faulkner. He's worth a LOT of EXP per hit, and there's no reason not to let your team grow and mature! The rest of the battle is extremely cut and dry, and should be absolutely no problem with the Ultragunner at your command. Just make sure to spread the kills; Bastion is only one soldier, and he can't be the only strong one! It's okay for him to be a level ahead of your team, just don't let him outclass everyone else; have him weaken the enemies for the kills. Also, from this point on, KEEP HIS STATS BALANCED; it's the only way to learn his awesome abilities. |
Now that the mission is complete..
- Bastion controls the FRICKITY-FRICKING ULTRAGUNNER ATAC!
- Zeira is a controllable character!
- Galvas leaves your team for one battle..
- You can transfer someone else into the Alba! Barlow is a great choice!
- You move onto Mission 13!
Before beginning Mission 13, save your game and load stats from the Options screen as done so many times before, and head to the Interview screen and chat. Check the Briefing for an overview of what's next, and when you're ready, head to Mission 13: Kaidul's Revolt.
|
|