
 |
|
|
Walkthrough Part II
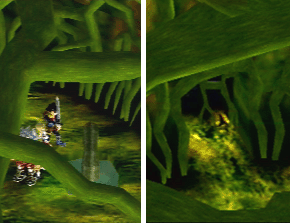
When everybody is reunited, leave the Crash Site and pick up the treasures lying on your path. In Lumir Forest Cavern 1, you must cut grey lianas that block the road in order to pass. The Giant Crabs jump randomly and are annoying; nothing to do with the crabs we all have learned to appreciate and love so much. From the entrance of the cave, the exit is found by going left, then straight. It gets a bit more complicated in Lumir Forest Cavern 2. There are five odd-looking green lianas coming out of suspicious pools in the first room. Each time you slice a liana, a "door" appears in the nearest green wall (as can be vaguely imagined on the picture). Those new passages lead to treasures, dead-ends or, obviously, the exit. Cut the liana right in front of the entrance and enter the newly created door. Then, whenever there is an intersection, go: left, left, straight and right. In the two caverns, some items are hidden in "secret rooms" closed by grey lianas. It is easier to find those rooms if you walk all the way back from the exit to the entrance of the caverns. In the last part of the forest, after the second cave, the road becomes smaller and foggy at some point. This leads to the Garden of Dreams, your next destination. This place is filled with flowers and fairies that some people might be tempted to qualify as being cute. But not me. :P A little girl with green hair and strange eyes appears and says stuff that freaks Elena out. The girl disappears behind the tree and as soon as you leave the Garden, the latter vanishes as well. Go in the opposite direction of the Garden entrance to enter Mirumu Village.Hatman: All Tutorials When they see your group, the villagers and the Chief jump at your neck because they think you are coming from the Cathedral to help them. In fact, they are waiting for Selene, the High Priestess. The village has been struck by a strange curse (looks like Liligue...): random people fall asleep, permanently, and dream about pretty flowers. Go to the Chief's place and then, to the Inn. The innkeeper's son has recently fallen ill. It happened when he was playing with a young girl named Aira. Everybody in town accuses the girl's mother, Sandra, of sorcery. If you want to learn more about it, talk to the townspeople. Go to Sandra's house to discuss with her. It seems that Aira is the girl you met in the Garden of Dreams. Come back to the entrance of the village. Selene and her Knights have finally arrived. A long conversation between her and your group ensues. Basically, she says that she wants to burn down the village to purify it from Valmar's evilness if the culprits do not show themselves. She forbids anybody to leave Mirumu until the problem is solved. Return to the Inn to eat and sleep. At night, everybody, except Elena, has strange dreams haunted by eyes. The truth is that there really are eyes in the village. Flying eyeballs! They are coming from a Fissure in the mountain close to Sandra's house. Confident that defeating those monsters will lift the curse on the village, you all agree to head for the Fissure. There is a Save Point near the entrance.
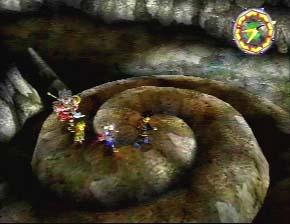 Choose the path on your right and walk until you reach a giant snail. Climb it and turn right.
A Save Point is standing only a few steps away from there. Another Seal of Lord Granas is inside the
Mysterious Fissure Depths... broken! Wow. However, you only have to defeat four Eyeball
Bats (no disgusting giant Valmar stuff...).
Try killing one of them as soon as you can or they will perform their dreadful Delta Attack on one of your
friends. It nearly kills the person who receives the blow. Nightmare Ball from Elena works, so you can
let two or three of them sleeping while beating up the other(s). They drop the Book of Warriors after
the battle.
Even after killing the Eyeballs, the villagers are still not healed. Actually, more of them have fallen ill. Go to the Town Hall to talk with Selene and then, return to Sandra's house. Aira is playing near the shed (behind her house) and looks strange, as usual. Follow her into the shed and jump down the hole in the ground. You find yourself at the exact same place where you fought the four Eyeball Bats. You are mysteriously teleported back to the Garden of Dreams with Aira. While talking with her, she suddenly gets scared and runs away. You must return to Mirumu all by yourself. Selene is at Sandra's house and wants to purify the mother and her child with fire. After a brief scene, Aira vanishes and Millenia "switches" with Elena. Go back to the Garden of Dreams (you may want to buy a few Lumir Flowers and Blueberries before) and enter Aira's soul, cleverly named Aira's Space.
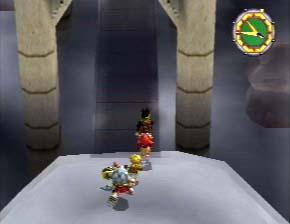
Aira's Space 1: This place really looks like a dream in white shades and transparency. Star Mirages move in large groups of six. Trying to save your MP for later is futile; use your strongest magic on them (fire-based spells work well). Do not lose track of where you are going or you will turn around in circles and come back at the entrance. At the end of some "peninsula", a bridge periodically appears and disappears (as badly seen on the adjacent picture). You may not see it the first time you pass there, though, so just be patient and pay attention. On the other side, there is, after a little walk, a bell which serves to call a taxi (a blue flying whale) that brings you to a brown place with weird machines. Those do nothing, so continue to Aira's Space 2. Aira's Space 2: All the bridges are blocked by huge eyeballs. Slice them if you want to cross. :P Sometimes, black holes appear on the ground and sharp fangs come out of them. They inflict damage. :P Explore all the paths; some lead to treasures. Next to an enclosure, in which you are forced to beat monsters, a Save Point is patiently waiting for you to use it. Then, approach the giant eye and enter it once the bridge is formed. Room of Solitude: Aira is standing in the middle of the room and is rather unhappy. The Eye of Valmar makes its entrance, taking the girl's place. I think this boss is one of the most unpleasant in the entire world. :P The Eyeball Bats do not necessarily hit hard, but they are everywhere and always ready to fight. Kill one of them at the beginning so they will not use their Delta Attack. Then, focus all your efforts on Valmar's Eye. It uses some special attacks that confuse (Polen Spew) or paralyse (Spellbinding Eye) your party members, but nothing really more devastating than that. You get three items from this boss, including the Gravity Egg. Millenia receives the move Spellbinding Eye. I repeat you should upgrade it as soon as you can (I said it on the walkthrough main page, but you probably have not read it :P). You are all back in the Garden of Dreams. Sandra is weeping at her daughter's side while a sad theme is playing. There is a lot of talking between Millenia and yourself before actually returning to Mirumu. Now that almost everybody is happy ("tearful" in the title is not there to make it all looks more tragic), you can leave for the Cathedral through the St. Heim Mountains with Elena. In case you are interested, a different scene takes place at the Inn if you spend the night.
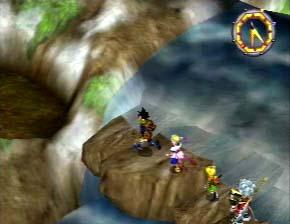
It seems like the road is endless in those mountains because it is divided in many little parts and there are a lot of goings-in-and-out of the caverns. A Save Point is on your right near the entrance. I suggest you explore the mountains and beat up a few monsters there. As usual, all paths bring you to treasures or the exit. In Base - Part 2 (just don't forget to count the parts :P), there is a SE-CRET cavern under the waterfall. Inside it are pretty treasures. You decide to camp in Caverns - Part 2 to regain some strength. Then, "they" try to trick you into thinking it takes more than two days to reach the other side of the mountains by making you camp again in Halfway Up - Part 1. Anyway. :P Not far from where you spent the night, there is a small lake and an axe at its bottom. To get it (and because you can not swim; the lake is sooo deep), push the boulder on top of the waterfall. If you search a little along the road in Halfway Up - Part 2, you might find a large door oddly carved. It is pointless. You will never use it. :P Stop wandering around and enter St. Heim.
Hatman: All Tutorials In St. Heim, a guardian priest near the entrance tells Elena that she can meet the Pope right away if she wishes. She prefers to go to the Cathedral later because she wants to take a rest at the Inn and wash herself. While eating, a priest comes in and announces that Zera requires Elena's immediate presence. Soon after, another priest (full'o them) enters and asks everybody else to come see the Pope as well. Visit the town (or not... the Squeak-Baas in the pastures are supposed to be cute) and go to the Cathedral. There are two staircases in the Lobby. The right one leads to the Balcony (useless for now) and the left one to the Guestroom, the Library and a Save Point. Talk to the priest in front of the middle door and he will allow you (only Ryudo) to enter the Audience Chamber and hear Zera's magnificent speech about Light and Darkness. His Holiness invites you to his private apartments and explains that in order to help Elena, you must find the Granasaber, the sword used by Lord Granas ages ago in the Battle of Good and Evil. No one really knows where it is, so all you will have to do is following the road on the map. :P After this little meeting, go to the Library to relate the recent events to Mareg and Roan. A few hours later, a guy comes in and says that Valmar is in the Cathedral, where Valmar = Millenia. She is on the Balcony, looking at the moon. Go there and have a discussion with her. The next day, return in the Audience Chamber to tell Zera you will search for the Divine Sword. He gives to Elena a special item, the Book of Priests. Then, before heading for the Pilgrim Road, buy a lot of those precious Butter Rolls at the General Store (you can spend the night at the Inn, if desired).
There are two ways to reach the exit of the Pilgrim Road. The easy one: use the main road with fountains and statues. The "hard" one: use the ladders on the sides of the road to put a feet on the ground, beat monsters and get treasures while slowly progressing toward the exit. It could be a good idea to gain some experience there and more importantly, MC and SC. Have fun. :P
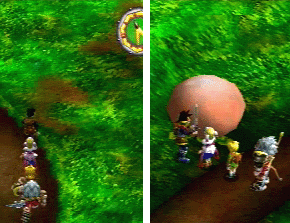
There is a road in Raul Hills 1, but it is a trick! If you follow it, it will only lead you to DEATH. Leave the main road by turning right after the second signpost (the signposts are on the left side of the road) and search for the ancient ruins entrance. If you talked to everybody in St. Heim, you should know how to find your way across the ruins. If not, then you must walk on the white (or light grey) tiles. Raul Hills 2 is amusing for its pink plants. Well, it is not really THAT amusing, but you can hit them to find treasures. Or Chameleons. The road is not as tricky as the one in the first part of the Hills because it truly brings you to the exit. Turn left at the first intersection and you should be fine.
Hatman: All Tutorials Cyrum is Roan's hometown, but he seems to be strangely embarrassed to return there. Visit the Kingdom if you wish. However, there is nothing much to do yet. Everybody is talking about the Bazaar that will be held in the Castle Square the next day. Go to the Inn to spend the night. Roan leaves before eating for some unknown reason, but who cares? Pwa ha ha! :P To obtain information about the Granasaber, the innkeeper suggests that you ask a guy named Hemble at the Bazaar. But! Because he is a pervert, you must be accompanied by Elena and present yourself as a schmaltzy couple. Hee-hee. At night, all sorts of things happen, starring various and new characters. The next morning, go to the Castle Square. Hemble's stand is next to the juice one (near the Square entrance). When inside his tent (also stupidly called "Informant's Tent"), you are introduced to the... first Grandia II mini game! You must play arm wrestle with the guy to extract the precious information from his ugly mouth. The instructions on how to play are given in the game, so I will not repeat them here. :P Anyway, it is impossible to lose that match. As expected, Hemble knows nothing about the Divine Sword, which means you lost your time faking to be Elena's boyfriend. For more crazy adventures in the Bazaar, read the corresponding section on the Miscellaneous page. Once outside the tent, Elena sits on a bench and asks for something to quench her thirst. Go get herself a drink at the juice stand, ya lazy bum! The clerk offers four juices, but the only one you can choose is the last, in the blank space. When you come back to give it to Elena, Millenia is standing there and jumps at your side, as usual. While trying to leave the Bazaar, Millenia forces you to take a short break at the MAU tribe stand. A few minutes later, Mareg and Roan joins you. The cute little boy is apparently anxious because there is trouble at the Castle. He tells you to take a boat to sneak in by the rear gate. Follow his indications and embark on the fair ship that mysteriously leads you to the correct place all by itself. Talk to the two soldiers near the dock to enter a not so Secret Passage.
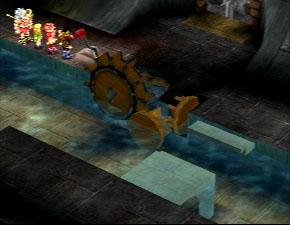
This cave holds a truly happy event: your long awaited reunion with Carro. If you have played correctly the game up until now or have read the Miscellaneous page when suggested to, you should have three Poff Nuts. :P If so, give them to Carro and it will jump in your arms with its lighted tail. A Save Point is a few steps away from there, to your right. Then, go in the other direction, push the box and continue straight. You must pull a few levers to cross the river and eventually open the large steel door. Behind the latter, the useless Carro leaves, but no worries. You will meet again. In the last room, push the wall where the "!" sign appears to finally sneak in the Castle. On the left side of the corridor, there is a Save Point. Enter the big door on the other side to see what is the terrible secret lying inside. A strange dude, Menory, and a large gate are all you can see, though. Turn back and climb the stairs next to the Save Point. They lead to the Castle Lobby. Go to the King's room. In the Lobby, a lady named Marie can give you directions if you are lost like a little school girl. After your discussion with the all powerful King, go back to see Menory and enter the Gate of Darkness (Underground Plant). (I know, I know. Very bad word play. :P)
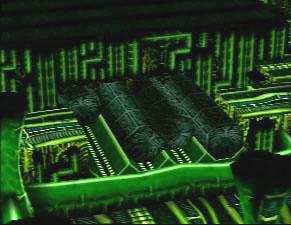 Underground Plant 1: As always, there is a Save Point next to the entrance. Look around for
treasures and get used to the foes there. Then, find the stairs leading to the lower floor and pull
the red lever. What could we do without nifty levers? Probably nothing, that was a stupid question anyway.
Pulling it created a new passage on your left: four green steel tubes (I am assuming it is steel) came
out of the wall. So, use them to enter the next part of the Plant.
Underground Plant 2: This place looks complicated, but it is only an illusion. All you have
to do is following the arrows on the beams. Who said you needed a Ph.D to play this game? Yeah, nobody.
Sometimes, there is more than one direction to choose from, but one of the two undoubtedly leads to a
treasure or a dead-end. You will have to play with a few levers again, but there is not even a pattern
to figure out. Pull them and continue on the new path revealed by their activation.
Underground Plant 1: As always, there is a Save Point next to the entrance. Look around for
treasures and get used to the foes there. Then, find the stairs leading to the lower floor and pull
the red lever. What could we do without nifty levers? Probably nothing, that was a stupid question anyway.
Pulling it created a new passage on your left: four green steel tubes (I am assuming it is steel) came
out of the wall. So, use them to enter the next part of the Plant.
Underground Plant 2: This place looks complicated, but it is only an illusion. All you have
to do is following the arrows on the beams. Who said you needed a Ph.D to play this game? Yeah, nobody.
Sometimes, there is more than one direction to choose from, but one of the two undoubtedly leads to a
treasure or a dead-end. You will have to play with a few levers again, but there is not even a pattern
to figure out. Pull them and continue on the new path revealed by their activation.Underground Plant 3: Walk around, explore and pick up treasures. Since it is the last place where you can fight enemies before meeting the boss, take this occasion to level up if you think you need to. The door to the Control Room is next to the Save Point. Control Room: Walk to the center of the room and prepare yourself for the big battle. This time, the Claws of Valmar are trying to beat you up. The Left Arm heals the Claw. Therefore, kill it as soon as possible. The Claw has its share of annoying attacks like Infernal Sigh (fire-based), Avenging Claw (ice-based) and Tail Piercer (physical/cancel attack), but the problem is solved easily by using Spellbinding Eye from Millenia (a lot of Butter Rolls are useful there). You acquire the Book of Gales after the fight and Millenia gains the move Grudging Claws (very powerful). You find out that the thing possessed by the Claws of Valmar was an Automata. The whole Plant's purpose was to create those robots to fight against Granas in the Battle of Good and Evil. Roan is shocked to learn that and hits on the nearest device, leading to the destruction of the Plant... Oh, please, that is SO cliché. Before escaping, Mareg takes the Automata with him because he is a nice guy. Aww. After your conversation with the Automata, go to the King's room. You come in just in time to hear a mysterious individual striking the King down. In case you still had not guessed, this guy is Melfice. You must fight him, but it is impossible to win. Let him hurt you to death. By the way, if you are playing the PS2 version, this battle is particularly painful to look at. :P You are saved by the Automata who uses her ring to block Melfice's attack. The bad guy escapes by the window, making a mess all over the place. Roan is more determined than ever to make his Kingdom grows stronger by taking pride in being called the People of Darkness. Yes, HIS Kingdom. He is heir to the throne. OMG, like, what a surprise. He is crowned King and with his new haircut, he gives an astounding speech in front of a cheering crowd. Then, leave by the main entrance of the Castle. You decide to head for the Island of Garlan to track down Melfice. Fortunately, Roan lends you a ship to go there. Outside the Castle gates, the Automata, known as Tio, is waiting for you. She has nowhere to go, so Mareg takes her under his wing, or axe. Whatever. Go to the Port (and to the Inn, if you want to spend the night). Talk to the guy near the ship in the Port. He is Captain Bakala, your new best friend. He likes to give all sorts of advice and to say "Arr." When you are ready (buying Move Blessings and Poison Antidotes would be a great idea), enter the spectacular vessel. On the trip, talk to everybody, including the Captain on the deck. Since Elena is seasick and there is not enough wind to cross the Granacliffs, the Captain stops at Ceceile Reef for the night.
|
||||||||||||||||||||||||||||||||||||||||||||||||||||||||||||||||||||||||||||||||||||||||||||||||||||||||||||||||||||||||||||||||||||||||||||||||||||||||||||||||||||||||||||||||||||||||||||||||||||||||||||||||||||||||||||||||||||||||||||||
| <<< Back to Walkthrough Part I | Back to Walkthrough Main Page | To Walkthrough Part III, please >>> |
|
|
