
 |
|
|
Millenium Puzzles
NOTE: The solutions to the puzzles were not written by me. Rather, they were kindly donated to the shrine by Sandra Oshields, who wrote the Millenium Puzzles FAQ that this page is built upon. If you have any questions about the solutions, feel free to email either one of us. And thank you, Sandra!
Jump to the Solutions
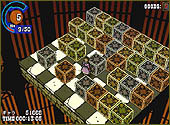
Need a break from the running (into random battles) and gunning (with the Shoot command)? Well then, why not test your smarts instead with a series of fun block pushing puzzles? If you can manage to solve them, there's sure to be rewards!
Millenium Puzzles are "dungeons" that you can find throughout the World Map. You can start opening them up and playing them once you have completed the Fortune Gear dungeon and defeated Balal Quo Naga. Simply head to Dune Canyon Station and Chat with Simon (the ticket booth guy), and he'll mention that he's been passing the time by doing puzzles. From that point forward, you can discover the puzzles on the World Map and try them as many times as you like.
The objective behind each puzzle is simple; eliminate all of the blocks by pushing or pulling them into other blocks of the same color. There are 4 colors of blocks; green, red, blue and yellow. Tools are not allowed, so no Mighty Gloves! And if you fall off the edge, you'll have to start over! And one more thing; make sure you have an even number of each block! If you end up with one block on a certain color, there is no way to eliminate it and you cannot win. If you find yourself in such a situation, take a leap off the edge to try again.
The locations of the puzzles are as follows, as well as the prizes you get for completing each one, and what you need to find each one (Sandcraft or Lombardia). You can complete them in any order! Complete them all, then talk to Simon one more time for an EX File Key!
| Puzzle #: | Co-Ordinates: | Required to Obtain: | Item Won: |
| 1 | X: 20500 Y: 10549 (near Fortune Gear) | None | Cait's Boots |
| 2 | X: 7320 Y: 21237 (east of Dim Root Path) | Sandcraft (but it's a VERY dangerous trek to the puzzle; wait until you get Lombardia) | Amulet |
| 3 | X: 1000 Y: 24839 (on a solitary island in the top-left corner of the World Map) | Lombardia | Pocketbook |
| 4 | X: 24890 Y: 22187 (on a solitary beach just north of Mimir's Well) | Sandcraft (but it's better to wait for Lombardia) | Growth Egg |
| 5 | X: 22550 Y: 10220 (down in the canyon that Fortune Gear is overlooking) | Lombardia | Holy Grail |
| 6 | X: 19240 Y: 15956 (just east of Dragon's Lair, up the hill) | Sandcraft (but you need to kill Balal Quo Naga) | Duplicator |
| 7 | X: 21420 Y: 19926 (on a solitary island northeast of Dragon's Lair) | Lombardia | Weather Vane |
| 8 | X: 8500 Y: 8779 (northeast of Little Twister) | None | LVL Apple |
| 9 | X: 20720 Y: 13336 (just north of East Highlands Station, west of the train tunnel) | None | LVL Apple |
| 10 | X: 16030 Y: 18899 (on a high up cliff a bit east of Laxisland) | Lombardia | Tracker |
| 11 | X: 7670 Y: 15856 (up on a high cliff just west of The World's Footprint) | Lombardia | Weather Vane |
| 12 | X: 24890 Y: 14675 (up on a high cliff just east of Leyline Observatory) | Lombardia | Pocketbook |
| 13 | X: 13110 Y: 2689 (on the far west reaches of the Southfarm or Boot Hill "island", in the area with lots of huge rocks protruding from the ground) | Sandcraft | Lion Shield |
| 14 | X: 21380 Y: 5749 (on a solitary island east of Jolly Roger) | Lombardia | Teleport Orb |
| 15 | X: 4500 Y: 18258 (near Yggdrasil or Greenlodge) | Sandcraft (head through Nidhogg Pass) | 10-Gal Hat |
| 16 | X: 14340 Y: 10256 (west of The Secret Garden, on a small beach area) | Sandcraft | 10-Gal Hat |
| 17 | X: 4430 Y: 13767 (travel south of the Yggdrasil area to spot two beaches. Take the west one and follow the path around the bend) | Sandcraft (but wait for Lombardia) | Arctic Blade |
| 18 | X: 9360 Y: 13678 (on a solitary island just north of Infinitum) | Lombardia | Migrant Seal |
| 19 | X: 11360 Y: 9062 (just north of Claiborne) | None | Vambrace |
| 20 | X: 7130 Y: 12288 (on Sunset Peak island) | (Lombardia, Teleport Orb) | Gunstar Sign |
To reach Puzzle 20, first obtain the Teleport Orb from Puzzle 14. Now, head to Southfarm Station and purchase a ticket for East Highlands, and you will be teleported to the Sunset Peak station. Outside is the area with the puzzle.
And now for the solutions, courtesy of Sandra. I'll let her take over from here.
For those who can't quite figure out how to do it, or just want an easy way out. I've created this helpful little guide for you. I don't think I should even explain how to do the first few, they are just that simple, but it won't be complete if I don't do them. So for those of you who don't want to think, you get lucky this time.
All the puzzles are drawn out looking north (the direction you land), and the directions are the way to do it looking north. Although it can be easier, sometimes necassary to move the angel around. Sometimes, you'll have to push one then pull the rest of the way, or pull and push several times to get it to the right square, without running into the same color and making the wrong one disappear. Just as easily as you can walk off the edge, you can push blocks over the edge, but it doesn't count as solving the puzzle. Sorry, but I didn't create the game, and that's just the way they made it. So if you really want the final reward for doing these things, then just follow the directions and take the time to do it. Remember, this is only a side-quest, you don't have to do it. It just makes some parts of the game harder.
By the way, puzzle 20 is a lot easier than every one says, getting there is harder than doing it. I think puzzle 18 is about the hardest, and really long.
If you do notice errors, please take the time to email me the correct way. Do Not email me saying that a puzzle is wrong without the directions. It doesn't do me any good, considering I don't own the game or even a PS2. I played the game while I was in Canada visiting my boyfriend (Jeff AKA Snoopy on gamefaqs), which is a very long way off from Miami, FL. So I can't play through it again till I go back up there. My email is sandra_172@yahoo.com
B's = Blue
Y's = Yellow
G's = Green
R's = Red
The numbers are there for you to know which one to move.
== means that the square is raised above or dropped below the rest
of the ground.
Puzzle 1 Difficulty - * of ***** Location (x:20500 y:10500) Reward - CaitSeth's Boot __________________________ | | | | | | | | | | Reds - 1 set of 3 -------------------------- Blue - 1 set of 3 |B |Y |G |B |R |Y |G |Y |B | | 1| 1| 1| 2| 1| 2| 2| 3| 3| 1. R7 up one -------------------------- 2. Y10 up one, left one | | | | | | | | | | 3. Y11 up one, left one -------------------------- 4. Y12 up one, left one |Y |G |Y |R |B |Y |G |B |R | 5. R9 up one | 4| 3| 5| 2| 4| 6| 4| 5| 3| 6. R8 up one, right two -------------------------- 7. B9 left three | | | | | | | | | | 8. G6 left six, up one -------------------------- 9. B6 up one |R |Y |G |Y |B |R |Y |B |R | 10. B7 up one | 4| 7| 5| 8| 6| 5| 9| 7| 6| 11. R6 up one -------------------------- 12. G4 up one | | | | | | | | | | 13. R1 up one -------------------------- 14. G3 up one, right one |R |B |Y |R |Y |B |R |Y |G | 15. Y4 up one | 7| 8|10| 8|11| 9| 9|12| 6| 16. Y5 up one, left one -------------------------- 17. Y6 right one, up two | | | | | | | | | | 18. B1 down one, right two -------------------------- 19. B3 down one, left five Puzzle 2 Difficulty - * of ***** Location (x:7320 y:21190) Reward - Amulet This might be a cheating way of doing it, but it works. Go to the corner of one of the blocks, push over and jump, like you would to get down, but instead you land on the block. (It's easier to do if you have the angle at NE, NW, SE, or SW so you just push directly over or up. Sometimes you can get lucky and walk from corner to corner, but it's not so simple to do. Push each block to the outside, without making any disappear. Your puzzle should now look like this... _______________________ Jump off and land where the X is. | | |R | | |G | | | 1. G4 down one | | | 1| | | 1| | | 2. Y9 down one ----------------------- 3. Y2 up one | |R |G |R |G |Y |G | | 4. B8 up one | | 2| 8| 3| 2| 9| 3| | 5. B3 right one ----------------------- 6. R5 right one |R |G |R | | |G |Y |G | 7. G5 left one | 4| 9| 5| | | 4| 8| 5| 8. G1 down one ----------------------- 9. R4 right one | |R | |R |G | |G | | 10. R1 down one | | 6| | 7| 7|\/| 6| | 11. B5 up one ----------------------- 12. B2 left one | |B | |B |Y |/\|Y | | 13. Y6 up one | | 1| | 7| 7| | 1| | 14. Y3 left one ----------------------- |B |R |B | | |Y |B |Y | | 2| 8| 3| | | 2| 9| 3| ----------------------- | |B |R |B |Y |B |Y | | | | 4| 9| 6| 4| 8| 5| | ----------------------- | | |B | | |Y | | | | | | 5| | | 6| | | ----------------------- Puzzle 3 Difficulty - * of ***** Location (x:1000 y:24790) Reward - Pocketbook This one is mainly about falling in the right spot to get the right blocks to disappear first. There are several ways to go about doing this. This way isn't even the way I did it the first time, but it is one way to get it accomplished. ____________________ Fall to the X first |B | |G | |G | |Y | 1. R6 up one | 1| | 1| | 2| | 1| 2. Y1 down four ---==----==----==--- 3. B2 up four | |\\|Y |\\|R |\\| | 4. Y3 right one | |\\| 2|\\| 1|\\| | 5. G2 left one ---==----==----==--- 6. R1 down one |R |B |G |B |Y |B |R | 7. Y3 right one, down one | 2| 2| 3| 3| 3| 4| 3| 8. B5 up one ---==----==----==--- 9. B1 right four, down two | |//|Y |//|R |//| | 10. Y3 down one, left two | |//| 4|//| 4|//| | 11. G5 up one, left one ---==----==----==--- 12. R5 right three, up one |Y |R |G |Y |B |Y |R | 13. Y5 right two | 5| 5| 4| 6| 5| 7| 6| 14. G3 down three ---==----==----==--- 15. Y10 right one | |\\|Y |\\|G |\\|\/| 16. Y2 down five | |\\| 8|\\| 5|\\|/\| 17. B6 left two ---==----==----==--- 18. B2 right one, down three |Y | |G | |B | |B | 19. R2 right four | 9| | 6| | 6| | 7| -------------------- Puzzle 4 Difficulty - ** of ***** Location (x:24890 y:22140) Reward - Grow Egg Since it's hard to draw so many stacked up and the ground squares, here's a diagram of the blocks that are in the stack. GR = Ground Red (one that isn't part of the stack) GB = Ground Blue GG = Ground Green GY = Ground Yellow ______________ |G |B |G |B |G | 1. Push GR down one, left to R1, then up. | 5| 8| 6| 9| 7| 2. Push GB right to B3, then up. -------------- 3. Change the angel so you are looking south. |B |R |B |G |B | 4. GG up one, left three. | 5| 5| 6| 4| 7| 5. GY up two, so it's in the middle of the -------------- other two. |R |B |Y |R |Y | 6. Pull and push B8 over to B7 | 3| 4| 3| 4| 4| 7. Push the greens together. -------------- |B |Y |G |B |G | | 2| 2| 2| 3| 3| -------------- |R |B |Y |G |R | | 1| 1| 1| 1| 2| -------------- Puzzle 5 Difficulty - ** of ***** Location (x:22549 y:10157) Reward - Lost Holy Grail This is another tricky one to draw. So the two sets one each side are side by side (on the ground), and the four in the middle are the ones that are stacked. Pillar 1 and 3 are the two you can see, pillar 2 and 4 are the ones directly behind 1 and 3. -- |GB| Pillar 2 -- Pillar 4 -- | 1| |Y | |Y | -- -- | 6| -- | 7| |GY| |R | -- |G | -- | 1| | 1| |G | | 6| |G | -- -- | 4| -- | 7| |GG| |Y | -- |B | -- | 1| | 3| |Y | | 5| |B | -- -- -- | 4| -- | 6| |GB| |B | -- |G | -- | 2| | 3| |B | | 5| |R | -- -- | 4| -- | 2| |GY| |G | -- |Y | -- | 2| | 3| | 6| -- Pillar 1 -- Pillar 3 -- |GG| | 2| -- 1. GY2 left three, up one 2. GG2 lef four, up three (3 G's together) 3. GB1 right one, down four, right two (3 B's together) 4. GY1 right one, down three, right two (3 Y's together) 5. R1 should be at the bottom 6. R1 right one, up two 7. GB2 up two, left three 8. G6 up one 9. GG1 right three 10. Y5 right one Puzzle 6 Difficulty - ** of ***** Location (x:19240 y:15910) Reward - Duplicator This is another complicated one to show, so I'll draw it out for each side. __________________________ Looking north, Looking west, | R| | | | | | | | R| in front of R1 in front of B1 |B | | | | | | | |B | -------- -------- -------------------------- |B |R |B | |B |Y |B | | | | | |Y | | | | | | 2| 3| 3| | 3|8 | 5| | | | | | 1| | | | | -------- -------- -------------------------- |G |Y |G | |G |G |Y | | | | | | | | | | | | 2| 4| 3| | 3| 7| 7| | | | | | | | | | | -------- -------- -------------------------- |Y |R |Y | |Y |B |R | | | | |\\|\\|\\| | | | | 2| 2| 3| | 3| 6| 6| | | | |\\|\\|\\| | | | -------- -------- -------------------------- | |G | |\\| |\\| |B | | Looking south, Looking east, | | 1| |\\| |\\| | 1| | in front of Y1 in front of G1 -------------------------- -------- -------- | | | |\\|\\|\\| | | | |B |Y |B | |B |G |B | | | | |\\|\\|\\| | | | | 5| 6| 4| | 4| 5| 2| -------------------------- -------- -------- | | | | | | | | | | |Y |G |Y | |Y |R |G | | | | | | | | | | | | 7| 6| 4| | 4| 5| 2| -------------------------- -------- -------- | | | | |R | | | | | |R |Y |R | |R |G |Y | | | | | | 1| | | | | | 6| 5| 4| | 4| 4| 2| -------------------------- -------- -------- | R| | | | | | | | R| |B | | | | | | | |B | -------------------------- Remember all directions are given looking north. 1. R1 up one, into R2. Should create a large domino effect. 2. G6 down one, into G5 3. G1 down two, right four. Another domino effect. 4. Y1 down three 5. All that should remain are four blues and one red in the middle. 6. Push each blue to the outside, to get rid of the blues below the reds. 7. There should be five reds left. 8. Get rid of two at once, and three at once by placing a space between two, and pushing the third one into the middle. There are a couple ways to do it, that's just the easiest way to explain. Puzzle 7 Difficulty - ** of ***** Location (x:21420 y:19880) Reward - Weathervane There are probably quite a few ways of doing this, but for me, the easiest solution is to move all the blocks to the outside without making any disappear. Then bringing the three of each color together. All of them must be done in groups of three, or else you have to start over. ______________ |R | |B | |R | 1. Y2 right one | 1| | 1| | 2| 2. G1 up one -------------- 3. Y1 right one | |G | |Y | | 4. B3 down one | | 1| | 1| | 5. Y2 left one, down one -------------- 6. B2 up one |B | |R | |G | 7. R3 left two | 2| | 3| | 2| 8. B2 right one -------------- 9. B3 up two, left one, up one | |Y | |B | | 10. G2 left one, down one | | 2| | 3| | 11. G1 down two, right one, down one -------------- 12. R2 left two, down one, left two | | |G | |Y | 13. Y1 down one | | | 3| | 3| 14. Y2 up one, right three -------------- Puzzle 8 Difficulty - *** of ***** Location (x:8500 y:8730) Reward - Level Apple _________________ |Y |B |Y |B |R |B | 1. Y8 down one | 1| 1| 2| 2| 1| 3| 2. Y9 down one, left two ----------------- 3. B7 down two, right three, drop |G |Y |B |Y |B |Y | 4. R2 down two, right three, drop | 1| 3| 4| 4| 5| 5| 5. R3 down two, right one, drop ----------------- 6. G2 down three, left one, drop |B |G |Y |G |Y |G | 7. Y7 down three, right one, drop | 6| 2| 6| 3| 7| 4| 8. G3 down three, right two, drop ----------------- 9. Y6 down three, left one, drop |Y |R |B |Y |R |B | 10. Y3, down four, left one, drop | 8| 2| 7| 9| 3| 8| 11. B6 down three, drop ----------------- 12. Y4 down one, left one | | | | | | | 13. B8 left two, up two R | | | | | | | G 14. Y4 up one - ----------------- - 15. G4 left five B | | | | | | | Y 16. Y5 left five - | | | | | | | - 17. R1 down five, left four, drop -Y- ================= -R- 18. B1 right three | - | | | | | | | - | | G | | | | | | | B | Puzzle 9 Difficulty - *** of ***** Location (x:20720 y:13290) Reward - Level Apple This is really hard to show at once, so each section will be drawn seperatly. While you are doing it, you should start to see how it is done. ______________ |R |B |Y |G |R | 1. B1 down two, left one, drop | 1| 1| 1| 1| 2| 2. R1 down two, left one, drop -------------- 3. Y1 down three, left two, drop | | | | |B | 4. G2 left five, drop | | | | | 2| -------------- D| | | | |Y | R| | | | | 2| O -------------- P| | | | |G | S| | | | | 2| -------------- Now you have the first part done. You should have the four blocks making a walk way to the two over on the left side. Should look something along the lines of this... -------------- | What | 1. Pull R3 over on top of R1. ----------- | you | 2. Pull G3 over on top of G2. |R | |R |B || see | | 3| | 1| 1|| above ^^ | 3. Now replace the R1 and G2, ----------- | | with R2 and G1. |G | |G |Y || | 4. Y2 left four, drop down | 3| | 2| 1|| | 5. B2 left three, down three, ----------- -------------- left two, drop down No more should be left up top, so jump down to go on to the next part. The blocks should look something like this... ----- |G |B | 1. B2 down one, right one | 1| 1| 2. R2 down three, drop ----- 3. B2 left two, down two, drop |R |Y | 4. G1 down three, right one, down one, drop | 2| 1| 5. Y2 down one, left one, down two, drop -------- 6. B3 up two | |B |Y | 7. Y3 up two | | 2| 2| 8. Y1 down one, right one -------- 9. B1 down four, right one, drop down | | | | 10. Y1 down three, drop | | | | -------- | | | | | | | | ========----- | | | | | | | | | | ------------- | | | | | | | | | | ========----- | | | | | | | | -------- |B |Y | | | 3| 3| | -------- All should be on the same level, once again. Looking like this... Jump off where the X is. ----------------------- Now from here, it should be simple. |R |G |B | | | |B |R | 1. Push Y1 over to Y4 | 2| 1| 1| | | | 4| 4| 2. Pull G4 next to G1 ----------------------- 3. Push B1 over to B4 | |\/|Y | | | |Y |G | 4. Pull and push R4 over to R1 | |/\| 1| | | | 4| 4| ----------------------- ... Finally glad this one is over. Can't wait to do Number 10... Puzzle 10 Difficulty *** of ***** Location (x:16030 y:18850) Reward - Tracker Each stack will be labeled a number, when there is only one left (that you can move), it'll become a color/number. -------------------------------- | | | | | | | | | | | | 1. GB left two, down three | | | | | | | | | | | | 9 turns into B1 -------------------------------- 2. GY down one | | | | | | | | | | | | 3. B1 right four | | | | | | | | | | | | 14 turns into G1 -------------------------------- 15 turns into G2 | | |1 |2 | | | |5 |6 | | | 4. GG left five, up one | | | | | | | | | | | | 3 turns into Y1 -------------------------------- 5. Y1 down three | | |3 |4 | |GR| |7 |8 | | | 6. GR down two, left three, up two | | | | | | | | | | | | 1 turns into B2 -------------------------------- 4 turns into B3 | | | | | | | | | | | | 7. B2 up one, right six | | | | | | | | | | | | 6 turns into Y2 -------------------------------- 8. Y2 up two | | | |GB| | | |GG| | | | 9. G2 right two, up five, left two | | | | | | | | | | | | 5 turns into R1 -------------------------------- 8 turns into R2 | | | | | | | | | | | | 10. R2 up one | | | | | | | | | | | | 11. G2 up three, left three, up three -------------------------------- 2 turns into Y3 | | |9 |10| |GY| |13|14| | | 12. Y2 down three | | | | | | | | | | | | 7 turns into B4 -------------------------------- 13. B4 down four | | |11|12| | | |15|16| | | 14. GY left three, up one | | | | | | | | | | | | 15. B3 down five, right four -------------------------------- 16. Bring the two yellows together. | | | | | | | | | | | | | | | | | | | | | | | | -------------------------------- | | | | | | | | | | | | | | | | | | | | | | | | -------------------------------- Puzzle 11 Difficulty *** of ***** Location (x:7670 y:15810) Reward - Weathervane Another one similar to Puzzle 7, just in a much tighter area. All have to be done in three's or you're toast and have to start all over. ----------- |\\|\\|\\|\\| 1. G3 left two |\\|\\|\\|\\| 2. R2 right two ----------- 3. G1 down one |\\|R |G |B | 4. G2 right one |\\| 1| 1| 1| 5. B1 down three, right one -------------- 6. Y2 left two, up one |\\|Y |R | | | 7. Y3 up one, left one, up two |\\| 1| 2| | | 8. R1 down one, right one -------------------- 9. R3 left two, up three |\\|G | | | |Y |//| |\\| 2| | | | 2|//| -------------------- | | |G |B |//| | | | 3| 2|//| -------------- |Y |B |R |//| | 3| 3| 3|//| ----------- |//|//|//|//| |//|//|//|//| ----------- Puzzle 12 Difficulty *** of ***** Location (x:24980 y:14630) Reward - Pocketbook -------- -------- |B |Y |B | |R |B |R | 1. R6 left three | 1| 1| 2| | 4| 6| 5| 2. B7 left three -------------------------- 3. Y6 up one |R |B |Y | | | |B |G |Y | 4. R6 right four | 1| 3| 2| | | | 7| 2| 4| 5. G1 right five -------------------------- 6. B6 down three |B |R |G | | | |R |Y |G | 7. R2 right one | 4| 2| 1| | | | 6| 5| 3| 8. B7 right three, down one, left five -------------------------- 9. Y2 right five |Y |B |R | |Y |R |B | 10. Y1 down three | 3| 5| 3| | 6| 7| 8| 11. R2 down one, right seven, up two -------- -------- 12. B2 down one, left two Puzzle 13 Difficulty *** of ***** Location (x:13110 y:2640) Reward - Lion's Shield ----------------- | |1 |2 |3 |4 |5 | 1. G2 right one, up four | | | | | | | That should get rid of all those stacks on -------------------- the top side, and right side. |G |R | | | | |6 | 2. R2 right three, drop down | 1| 1| | | | | | 3. R1 right three, down three, drop -------------------- 4. Y2 right three, down one, drop |Y |B | | | | |7 | 5. B2 right one | 1| 1| | | | | | 6. Y1 right three, down two, drop -------------------- 7. G1 right two, down three, drop |B |Y | | | | |8 | | 2| 2| | | | | | -------------------- |R |G | | | | |9 | | 2| 2| | | | | | -------------------- |12| | |11|10| | | | | | | -------------- ... And they call that a three... Puzzle 14 Difficulty **** of ***** Location (x:21380 y:5700) Reward - Teleport Orb I know it's a tid bit confusing to see at first, but you should be able to see it when you're looking at the puzzle. The three's and four's are stacked, but it was easier to give them color/numbers now, rather than numbers for stacks like I've done in previous ones. The reward out weighs the amount of time spent trying to do it. The teleport orb comes in handy for going any where you need, and a lot faster than trying to fly there (once you get Lombardia that is). -------- ----- |R | | | |B3|R4| 1. Y3 left three, up one | 1| | | |R3|G3| 2. G4 left five, up one ----------------------------- Jump on X |G |Y | | |G |Y |R |B |\/| | 3. B2 right one | 1| 1| | | 2| 2| 2| 2|/\| | 4. R2 right two ------------===========------ 5. B1 right one, up one, right six |B | | | | | | |Y3|G4| 6. Y1 pull right one, push right seven | 1| | | | | | |B4|Y4| 7. G1 pull right two, push right seven --------=-----------=----- 8. R4 down one, left eight | | | | | | | | | | =========== Puzzle 15 Difficulty **** of ***** Location (x:4500 y:18210) Reward - 10-Gall Hat As far as the location, it's in the mountain area. Which you can only access through the Nidhogg pass. There is no town either to use the teleport orb to get in (that is if you did puzzle 14 to get the teleport orb). _Top View_ Looking North You can walk on top of the blocks to the left, and you pull the four on the right side. As you go down, the blank spaces are the ones you can walk on, The colored/number ones are the ones you can work with. -------------------------- 1. R1 left four |B |Y |R |Y |G � | |R |Y | 2. B1 left five | 2| 2| 2| 3| 2� | | 1| 1| 3. G1 left four --------------=----------- 4. Y1 left four |R |B |Y |G |Y � | |B |G | | 3| 3| 4| 3| 5� | | 1| 1| -------------------------- -------------- Jump on X |B |Y | | |G | 5. Y4 left one | 2| 2| | | 2| 6. B2 right one -------------- 7. R3 right one |R | |Y |\/|Y | 8. G2 left one | 3| | 4|/\| 5| 9. Y5 left one -------------- -------------- Jump on X |Y | |Y | |Y | 10. G7 left one | 6| | 7| | 8| 11. Y7 left one -------------- 12. Y8 left one |G | |G |\/|G | 13. G8 left one | 6| | 7|/\| 8| -------------- -------------- Jump on X |R | |B | |B | 14. Y10 left one | 4| | 4| | 5| 15. B4 right one -------------- Then bring the reds together |Y | |Y |\/|R | | 9| |10|/\| 5| -------------- A lot easier than you might think once you get a hang of it. Puzzle 16 Difficulty **** of ***** Location (x:14340 y:10210) Reward - 10-Gall Hat This isn't as difficult as it is long. -------------------- Jump off where X is |//|//|//|//|//|//|//| 1. G5 down two |//|//|//|//|//|//|//| 2. G6 right four ==================== 3. B5 left one, up two |//|G |Y |R |G |B |//| 4. R5 left two, up one |//| 1| 1| 1| 2| 1|//| 5. G7 left three, down two ==----------------== 6. Y6 right one, up one |//|Y |R |B |Y |G |//| 7. R4 right three, down two |//| 2| 2| 2| 3| 3|//| 8. Y4 down three ==----------------== 9. Y7 left three, down one, left one |//|R |G |Y |B |Y |//| 10. Y6 down two, right three |//| 3| 4| 4| 3| 5|//| 11. B2 down one ==----------------== 12. Y5 left one |//|//|//|G |//|//|//| 13. G2 down one |//|//|//| 5|//|//|//| 14. R1 down one ========----======== 15. Y2 right one | | |//| |//| | | 16. G4 up two | | |//| |//| | | 17. R5 down two, left one ------------==----==------------ 18. R3 right two, down four |B |Y | | |//| |//| | |R |Y | 19. B4 right two, down one, right two | 4| 6| | |//| |//| | | 5| 7| 20. B3 up one, left two, pull four down ------------==----==------------ 21. B5 down two, left three |R |G | | | |\/| | | |B |G | | 4| 6| | | |/\| | | | 5| 7| ------------========------------ | |//|//|//| | | |//|//|//| | ---========--- | |R | |G | | | | 6| | 8| | ============== |//|//|//|//|//| |//|//|//|//|//| -------------- |//|//|//|//|//| |//|//|//|//|//| ============== Puzzle 17 Difficulty **** of ***** Location (x:4430 y:13720) Reward - Northern Blade Since everything can be seen looking south, so all direction are given looking south. -------------------------- | | | | | | | | | | 1. R1 right one | | | | | | | | | | 2. B1 down one, drop -------------------------- 3. R1 left one, down one, drop | | | | |Y | | | | | 1 = R2 | | | | | 1| | | | | 2 = G2 -------------------------- 4 = Y2 | | | |B | |R | | | | 5 = B2 | | | | 1| | 1| | | | 4. G1 drop down -------------------------- 5. Y1 left one, down two, drop | | | | |G | | | | | Jump to X now | | | | | 1| | | | | 6. G2 right two ================================ 7. B2 left four | | | |1 | | | |4 | | | | 3 = Y3 | | | | | | | | | | | | 8. Y3 right three -------------------------------- 6 = R3 | | | |2 | |\/| |5 | | | | 9. Y2 left two | | | | | |/\| | | | | | 10. R2 down one, right four -------------------------------- | | | |3 | | | |6 | | | | | | | | | | | | | | | | -------------------------------- Puzzle 18 Difficulty ***** of ***** Location (x:9360 y:13630) Reward - Migrant Badge This is a really hard one to draw. As you notice there is a ramp off to the side of the four platforms, this is so you can walk back up to continue. There's no way to complete it without going up the ramp and back down a hundred times (ok, maybe a little overegaderated but it sure seems like it). As we work our way down, I will draw a picture of the platfrom you should be working, and tell you how to move the blocks. Since you cant move the stack that is at the bottom, the blocks won't have numbers. Now as you go through this, you will have to pull a block two times, then walk around the center thing to push it over once more. It will take you more than just a couple mins to finish, so be patient. I hope after all this trouble you can get through it. Red Platform Blue Platform Yellow Platform Green Platform ----------- ----------- ----------- ----------- |R | | | | | | | |R | | | | |Y | | | |\/|Y | ----------- ----------- ----------- ----------- | |//|//| | | |//|//|\/| | |//|//|\/| | |//|//| | ----------- ----------- ----------- ----------- | |//|//| | | |//|//| | | |//|//| | | |//|//| | ----------- ----------- ----------- ----------- | | | | | |B | | | | | | | | | | | | |G | ----------- ----------- ----------- ----------- 1. Red down 2. R down two 4. Y down three, 5. G left two three, drop 3. B right two left three, drop On down to On down to B On down to Y On down to G the last one Now then, the Blue Platform will be B-plat, Yellow is Y-plat, Green is G-plat, and the big one on the bottom will be L-plat for Last platform. You should be on the L-plat, nothing you can do here, so high-tail it on up to the top (first of many times to come...). B-plat Y-plat G-plat ----------- ----------- ----------- | | | | | |B | | | | | | | |Y | 9. Y down three, ----------- ----------- ----------- left four, | |//|//| | |\/|//|//| | | |//|//|\/| drop ----------- ----------- ----------- Jump down from G | |//|//|R | | |//|//| | | |//|//| | onto L-plat ----------- ----------- ----------- 10. Pull G down one | | |B | | | | | | | | |G | | | And on up we go again... ----------- ----------- ----------- 6. B right one, 7. B down two 8. G left one, drop drop On down to Y On down to G Since I can't play the game any longer, and I never drew out each platform again, I hope you can read and understand well. Just as you go along, read the directions so you know where to jump down from, and where to go next and so you don't mess yourself up and have to start all over again. R down one, drop right to Y-plat Jump behind the Blue Push onto G-plat B down three, left three, drop Jump to the L-plat, and up the ramp On to Y-plat R down three, drop to G-plat On to G-plat R down three, left five, drop On to L-plat R left one Up the ramp again, and all the way back down. Now jump down behind the Red Push Red left one Y left two Up the ramp, and all the wee way back down, again. Y left one, down one B left three Up, over, and back down, AGAIN. (Told you, you'd be going up this thing a hundred times, especially when you're so close to the end...) B left one Y up one G up one, left four Now hopefully you were able to understand all that blabber to complete it. Or just did your own thing... which I could probably reason with you on that. Puzzle 19 Location (x:11630 y:9016) Difficulty ***** of ***** Reward - Vambrace They seem to love doing these... Third and thankfully last time you have to worry about these sorts. -------------- |G |B |Y |R |Y | | 1| 1| 1| 1| 2| -------------- |Y |R |G |B |G | | 3| 2| 2| 2| 3| -------------- | | | |R |B | | | | | 3| 3| -------------- | | | | | | | | -------- 1. Y3 down one, right two 2. R2 down two, right one 3. G2 left one, down two 4. Y3 left two, down one 5. Y1 down one, left two 6. B1 down two, left one 7. R1 left one, down two 8. Y1 right one, up one 9. B1 right three 10. G1 down one 11. G2 up one 12. G3 left three 13. Y2 right one 14. Y3 right two, up three Puzzle 20 Location (x:7135 y:12286) Difficulty ***** of ***** Reward - Gunster Sign To get to the area. Go to Southfarm and buy a ticket to East Highroads. Talk with the guy before boarding, and he will mention that strange disappearnces have been happening on the route. When you get off, you will end up in Sunset Peak. There's no one at the station, so you have to have the Teleport Orb (reward from Puzzle 14) to get out there, or else you have a big problem on your hands. -- |1 | | | -- | | | | ----- |2 | | | | | =====------------------ Start where X is |\\|\\| |\/|R | | | | 1. R1 left one |\\|\\| |/\| 1| | | | 2. Y1 right one ---------==-------==--- 3. R1 left one, up two |\\|\\| |\\| |B |\\|G | 4. G1 down one, left one |\\|\\| |\\| | 1|\\| 2| 5. Y1 down one ---------==------------ 6. B1 up one, left three, up two |\\|\\| | |Y | |\\|Y | 7. Y1 up three, left three, up two |\\|\\| | | 1| |\\| 2| 1 = G3 ------=====-------==--- 8. G3 down two (key to solving the puzzle) |\\|\\|\\|\\|G | |B | | 9. G1 right one, up four, right three |\\|\\|\\|\\| 1| | 2| | 10. B2 left one, down one ------=====-------==--- 11. Y2 up two, left five, up one |\\|\\| | | | |\\|R | 12. B2 up four, left three, up one |\\|\\| | | | |\\| 2| 13. R2 up four, left five, up one =====-------------==---