
 |
|
|
Gunner's Heaven
Strategy
Owned by the disgustingly wealthy and immeasurably snooty Lord Begucci, Gunner's Heaven is a place where only the strong survive, only the brave dare enter, and only Pegucci gets his own balcony seat!
No, seriously, Gunner's Heaven is an location on the World Map that's kind of an arena of sorts. You pay some money to enter a division of 5 battles, and you must complete it within a limited time! If you win, you will get fabulous prizes! If you fail to meet the time requirements... well, you just wasted a good couple of thousand Gella!
To find the Gunner's Heaven (you have to go there in-game eventually), talk to Putnam in Boot Hill after the Yggdrasil dungeon to learn the location, then search co-ordinates X: 2030 Y: 15860 on the World Map to discover it! You will be able to find Gunner's Heaven during Chapter 2, and you must be at least Level 25 to enter the events.
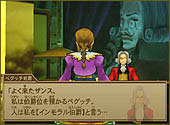
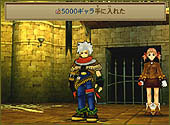
The actual location is a fairly nice place, so let's get acquainted with it. In the first room, you will find the ARMsmith Galey, as well as Ortega and Little Coney. Ortega handles registration as well as innkeeping, so he's the one you want to talk to if you want to give Gunner's Heaven a try. Coney dispenses general information and "motivation" for would-be contestants, and you may even see Roykman or Travis from the Black Market here from time to time! Head through the big door past the red carpet (red for a good reason!) and you'll find the arena itself. To the left, head up the stairs and you'll meet the man behind Gunner's Heaven; Lord Begucci!
And now, for the rules and such.
|
|
And now, a list of information regarding each division.
| Novice Division | Journeyman Division | Master Division |
| 2000 Gella to enter | 5000 Gella to enter | 10000 Gella to enter |
| The turn limit is 25 rounds | The turn limit is 20 rounds | The turn limit is 15 rounds |
| The prizes are:
|
The prizes are:
|
The prizes are:
|
And now, the most important section of the page. Here I will list my strategies for completing each of the divisions of Gunner's Heaven. Seeing as that you are on a strict time limit for each division, Gunner's Heaven is sort of a puzzle in a way; you must learn to use your FP at the right time, switch your Mediums around if the situation calls for it, and most importantly: you must know what to expect.
However, the "puzzle" can be solved in many different ways, and that's why I am calling out to any Gunner's Heaven gurus out there; please email your strategies to me. I will be posting alternate strategies here on the shrine underneath mine (you will be fully credited should you choose to submit), but I will only accept them if they work well, and/or if they don't require too much to work properly (you don't need a Level 100 party with all Personal Skills to win at Gunner's Heaven). Also, I don't need strategy for Novice League; it's much too easy. That being said, here we go!
The first division of Gunner's Heaven is very easy to win in the time alloted, assuming you attempt it during the part of the game where you have to get the Item Scope. Trying it earlier may be a bit more difficult, but with these tactics, you should be able to pull through.
First Round: Use Grav to wear down the Gangas for easier killing. They are not at all difficult to defeat, but they have an annoying habit of cancelling turns for your characters. Normal attacks and any type of attack Arcana will do fine in disposing of them, and it shouldn't take you more than 3 turns to win. Just don't use any FP yet.
Second Round: Wendigo is weak to Wind, so use Vortex Arcana to wear him down and cast Fragile and perhaps Extension + Valiant to give your attacks a bit more punch. He won't last too long; maybe 3 turns.
Third Round: You've been saving FP, right? At the start of the battle, summon Moor Gault to wipe them all out at once. I did it with about 70 FP and a MAG stat of 109, so it doesn't take much.
Fourth Round: Balor causes status ailments, but they're nothing to worry about unless your HP begins to bottom out a bit. Use Inspire because he's weak to Lightning, and use Valianted attacks.
Fifth Round: Armordrake begins with a defensive boost, so cast Eraser on him. He'll recast Shield, but here's the beauty part; he won't attack if you take out his shield every turn! Hit him with Vortex because he hates wind, and try and hit him when his defensive boost is off.
Geist Gust (physical damage to one target, usable only with the aforementioned RFX boost),
Quicken (raises speed for 3-5 turns)
Screaming Mad (darkness-elemental magic damage to one target)
I'm well aware that there are easier ways to win this division of Gunner's Heaven, but with my method, you will not have to use any Full Carrots. 8P
Depending on when you choose to enter this division, the enemies may take longer to defeat, or they may be easier. I like to finish the last two divisions late, so I was an average level of 73 when I tried this.
First Round: Don't let this battle drag on. On the first round, set Love Charm, Lust Jaw and Aqua Wisp to Gallows. Equip him with the Weakness personal skill, set it up all the way, then have him Extend a Weakness spell to place a Darkness weakness on all 4 of the Mercurius enemies. On the next turn, have him summon Lust Jaw (Luceid) while Virginia gives him a Mini Carrot.
Second Round: On the first round, Mystic a Mini Carrot and have Jet, Clive and Gallows use Mini Carrots on Gallows. On the next turn, equip Flash Hit on Gallows (making sure to keep Lust Jaw with Weakness on), and summon with Flash Hit (Stare Roe) to win.
Third Round: Equip Fiery Rage and Hope Shard on Clive, and also set him up with the ATT Plus and DEF Null skills. On the first round, use Attachment to add fire-elemental properties to Clive's attack, then on the second round, simply shoot the boss for massive damage, most likely winning the battle.
Fourth Round: You might want to add some instant death protection here. Clive should still have a fire-elemental attack, so have him shoot Sleipnir to hit his weak point. Meanwhile, have Virginia Mystic Mini Carrots every round while Jet uses Mini Carrots on Virginia to get her FP up to 100, and have Gallows use Refrigerate on Audhulma. Once Sleipnir bites the dust, just attack Audhulma until he dies, making sure everyone has a high FP total for the next round.
Fifth Round: Here's another fight you'll want to end ASAP. Equip everyone with their Mediums, and have everyone use their most powerful summons. This should take out all of the Egregoris.
You'll want to bring along a few Full Carrots and the ATT Plus Personal Skill for this one. If you set your Mediums up right, even the two most dreaded battles in this division (Daredevils and the Doll Drone) can be won with relative ease! Let's get going!
First Round: Equip Gallows with Love Charm, Terra Roar, and Lust Jaw, and set the Weakness skill up to full. Have Virginia uses Mystic on a Full Carrot, then have Gallows summon Grudiev. This will ensure the Daredevils die on the first round.
Second Round: Gallows is out of FP now, so equip the Lust Jaw on Virginia and set the Weakness skill to her. Now summon Lust Jaw for another easy victory. 2 turns taken, 13 left!
Third Round: Set Fiery Rage to Jet, and make sure Clive has the ATT Plus skill on. Give Gallows Stare Roe and have him Extend a Valiant Spell while Jet casts Fragile, Clive attacks and Virginia uses a Mini Carrot on herself. Try and set a few characters up with Fallen Ward, if you can. On the second turn, have everyone attack until Death Mask perishes.
Fourth Round: Assuming Clive has a low bullet amount, he SHOULD be completely out of ammo now with 100 FP. If he's not, simply Shoot until he runs out, and then set him up with Finest Arts and use that for an easy win. You might want to Status Lock Clive to keep him protected.
Fifth Round: Doll Drone is impervious to normal attacks, so you'll have to hit him with Arcana or with Clive's Lock On shot. We're going to go with the former. Make sure Clive has ATT Plus on, and try and set as many characters as possible with Fallen Ward or Status Guard, because Doll Drone will attempt to instantly kill a team member every round. Now, have Clive reload for the first round, while Virginia uses Mystic on a Mini Carrot, and Jet uses a Mini Carrot on Clive and Gallows uses a Mini Carrot on himself. Next round, equip Cosmic Cog on Jet, then have Jet cast Replay on Clive while Clive uses Lock On to shoot the Doll Drone, while one of your party members blocks and the other casts Arc Impulse. This should win the battle. Congrats!
But wait! There's more! Once you've completed each division of Gunner's Heaven, save your game, then head upstairs and speak to Lord Begucci for a surprise!
The primary source of damage here is going to be Finest Arts, as usual, so we want to get Clive's ammo count down as soon as possible. Once you hit 0 ammo, have him attack until he reaches 100 FP, and once he does, hit Marduk with Finest Arts. Then, if you don't mind using a Full Carrot, have Virginia Mystic a Full Carrot, and have Clive do something other than reload to pass a turn and NOT reload. Next turn, you'll be able to Finest Arts again. After about 3 or 4 Finest Arts moves, you'll emerge victorious.
But watch your HP! Keep Virginia's FP up to at least 25 at all times, so that you can Mystic a Potion Berry if the need arises.
After that, rest up and save. If you're interested in ANOTHER battle, speak with Ortega and choose Chat. He's worth an EX File Key!
Next, Mystic a Lucky Card if you have it, and simply do what you did to win the last fight. Keep Virginia on 25 FP for emergency Potion Berry healing, and simply shoot until Clive's ARM is out of ammo, then pull off Finest Arts. Lather, rinse and repeat until you emerge victorious!
Novice League
Round 1: 3 Gangas
HP: 1600
Halved: NONE
Resistant: NONE
Weakness: NONE
Active: NONE
Absorbed: NONE
Ganga's Attacks:
Knuckle Punch (physical damage to one target),
Power Smash (cancels target's command, but only if they haven't acted yet),
Thumbing (physical damage to one and HIT stat reduction),
Corkscrew (big physical damage to one target)
Round 2: Wendigo
HP: 5000
Halved: THUNDER
Resistant: EARTH
Weakness: WIND
Active: NONE
Absorbed: NONE
Wendigo's Attacks:
Hammers away (physical damage to one target),
Hammers away in return (counterattack)
Round 3: 6 Shambling Mounds
HP: 1100
Halved: WATER
Resistant: EARTH
Weakness: FIRE
Active: NONE
Absorbed: THUNDER
Shambling Mound's Attacks:
Bronze Powder (causes Bronze status),
Fungus Power (physical attack to one)
Round 4: Balor
HP: 6000
Halved: NONE
Resistant: NONE
Weakness: THUNDER
Active: NONE
Absorbed: NONE
Balor's Attacks:
Grasper Mash (physical damage to one target),
Noxious Stream (causes Disease status to target, also used as a counterattack sometimes)
Harmful Wave (causes Poison status to target)
Round 5: Armordrake
HP: 7000
Halved: EARTH
Resistant: NONE
Weakness: WIND
Active: NONE
Absorbed: NONE
Wendigo's Attacks:
The giant groans (physical damage to one target),
Shield (increases his DEF stat)
How To Win:
Journeyman League
Round 1: 4 Mercurius
HP: 6000
Halved: NONE
Resistant: NONE
Weakness: NONE
Active: THUNDER
Absorbed: NONE
Mercurius's Attacks:
Gimlet (physical attack to one target),
Superconductive Gimlet (powerful physical attack to one target),
Thunder Zone ("electrifies" the field, making thunder-elemental attacks deal more damage for 3 turns. Cast every 3 turns. Allows Mercurius to utilize Superconductive Gimlet)
Round 2: 3 Gasher Skeletons
HP: 8500
Halved: EARTH, WATER, WIND, THUNDER, ICE
Resistant: DARK
Weakness: LIGHT
Active: NONE
Absorbed: NONE
Gasher Skeleton's Attacks:
Note: Gasher skeletons begin battle with a RFX boost. You can negate this boost by casting Eraser.
Round 3: Bamulvris
HP: 22000
Halved: NONE
Resistant: NONE
Weakness: FIRE, ICE
Active: NONE
Absorbed: NONE
Bamulvris' Attacks:
Mow Down (physical attack to one),
Baking Breath (fire-elemental magic attack to one),
Blizzard Breath (ice-elemental magic attack to one)
Round 4: Audhumla, Sleipnir
Audhulma HP: 12000
Halved: NONE
Resistant: NONE
Weakness: WIND, ICE
Active: NONE
Absorbed: NONE
Sleipnir HP: 12000
Halved: ICE
Resistant: NONE
Weakness: FIRE
Active: NONE
Absorbed: NONE
Audhulma's Attacks:
Out of Control (physical attack to one target),
Hyper (doubles his or Sleipnir's attack for 3-5 turns)
Sleipnir's Attacks:
Lance Swing (physical attack to one target),
Lance Thrust (instant death to one target, used as a counterattack to physical attacks),
Fragile (lowers one target's defense for 3-5 turns)
Round 5: 6 Egregori
HP: 5000
Halved: NONE
Resistant: NONE
Weakness: NONE
Active: NONE
Absorbed: NONE
Egregori's Attacks:
Looks like I'm up! (physical damage to one target),
I will pretty you up! (physical attack that causes glass status),
Go back to sleep! (physical attack that causes sleep status),
Kick back and relax! (physical attack that causes paralysis status),
Here I go! (physical attack to one target),
You won't feel a thing! (physical attack that kills target instantly),
Repent! (physical attack to one target),
Leave it to me! (physical attack to one target),
I'll make you see stars! (physical attack that causes confusion status),
Don't move! (physical attack to one target),
This should keep you quiet! (physical attack that causes bronze status),
How To Win:
Master League
Round 1: 3 Daredevils
HP: 12000
Halved: NONE
Resistant: NONE
Weakness: EARTH
Active: WIND
Absorbed: NONE
Daredevil's Attacks:
Turbulence (increases evade of entire enemy party),
Quick (raises speed of entire enemy party),
Storm Blade (wind-elemental magic attack to your entire party),
Paralysis Tail (physical attack to one target that causes Paralysis)
Round 2: 6 Spheres
HP: 10000
Halved: NONE
Resistant: LIGHT
Weakness: DARK
Active: NONE
Absorbed: NONE
Sphere's Attacks:
About to burst open (wastes a turn),
Bursts open (physical attack to one),
Bright Blast (light-elemental magic attack to one),
Round 3: Death Mask
HP: 25000
Halved: NONE
Resistant: NONE
Weakness: LIGHT
Active: NONE
Absorbed: NONE
Death Mask's Attacks:
Penetrating Scissors (physical attack to one, reduces target's DEF, also used as a counterattack),
Asphyxiation (instantly kills one team member),
Spin Storm (very powerful physical hit to one, only used once Death Mask loses around 22500 HP),
Round 4: Dantalion
HP: 28000
Halved: NONE
Resistant: NONE
Weakness: NONE
Active: NONE
Absorbed: NONE
Dantalion's Attacks:
Evil Gaze (paralyses one target, used only in closed form),
Bull's-Eye (confuses one target, used only in closed form),
Shelter Charge (physical attack to one, used only in closed form),
Scissors Attack (physical attack to one, used only in open form),
Luminous Impact (light elemental magic damage to all team members, used only in open form)
Round 5: Doll Drone
HP: 20000
Halved: NONE
Resistant: NONE
Weakness: NONE
Active: NONE
Absorbed: NONE
Doll Drone's Attacks:
Blackout (instant death to one target),
How To Win:
Boss Battle: Emperor Marduk
Boss Name:
HP:
EXP:
Gella:
Halved:
Resistant:
Weakness:
Active:
Absorbed:
240000 90000 108000 NONE NONE NONE NONE NONE
Boss' Attacks:
Screaming Mad (dark-elemental magic damage to one target)
Agony Effect (non-elemental magic damage to all team members)
Satellite Extinction (non-elemental magic damage to all team members)
Restoration (heals him for about 3000 HP)
How To Win:
Boss Battle: Bad News
Boss Name:
HP:
EXP:
Gella:
Halved:
Resistant:
Weakness:
Active:
Absorbed:
325000 100000 120000 NONE NONE NONE NONE NONE
Boss' Attacks:
Power Mountain Load (physical attack to one character)
Counter Tomahawk (physical attack, used as a counterattack to all physical attacks)
Rocket Bazooka (physical attack to one character that causes amnesia status)
Hatchet Blow (physical attack to one character that causes confusion status)
Believe in yourself (heals him for about 3000 HP)
How To Win:
(c)2006 RPGClassics.com. All materials are copyrighted by their respective authors. All games mentioned in this site are copyrighted by their respective producers and publishers. No infringement on any existing copyright is intended. All rights reserved.