
 |
|
|
Walkthrough
Side Quest: Hard Dungeon
Welcome to one of those optional battles that requires you to be WAY stronger than necessary to beat the last boss, and gives lots of good rewards except for the fact that you don't need them because to be able to beat this battle you need to be uber-strong anyway. 8p To give you an idea of the difficulty level here, the weakest enemy has a higher level than the final boss, and can kill you in two hits. This sidequest is available from chapter 20 onwards, but wait at least until chapter 21 so you can buy more items.
Preparation for battle: First of all, you'll either need to be in Ex-Play, or have done about a gazillion side quests. The Alexander Summon is invaluable here. Also, you'll need to have six Master Dragons, each with 9999 HP and at least 450 (preferably up to 550) MP. You'll also need at least 40 Litancibles, 60 Royal Drugs, 75 High Drugs, 99 Heals, and preferably 99 Magic Gins. (You can buy all of this stuff at the item shop.) Try to have even more than what I put down here, because you do not want to worry about skimping on item usage! You'll also want a Behemoth (i.e. five Princess's ??? items). Your average experience level for characters should be at least 55 (60 if you're not in Ex-Play). Dragons should have average level of 60.
Battle Formation: Here's the formation that worked for me. This dungeon is crazy hard (as it says), so you need a very specific strategy to get through it. It'll take you probably close to an hour to finish without frameskipping (thankfully you can save in the middle).
Two parties of Cross Knight, Knight, Heavy Armor, and Light Armor
One party of Royal Guard, Lancer, and two Assassins. They're not as useful as (say) four Wizards, but the Pax Kahna equipped on Matelite will prove a lifesaver.
Three Mini-Devils and a Light Armor, paired with a Behemoth (or failing that, a normal dragon, NOT a Black Dragon): this should be PARTY 4 (this is important for the very start of battle).
Four Priests. Big Burst does as much damage as Armageddon, and White Drug and Cleanup are invaluable in a pinch.
Summoner, Dragnar, and two Wizards, with the first two equipped with Royal Gowns and Empress Kahnas.
General Tips:
- Keep your dragons on Come! at all times. This is incredibly important, because the major thrust of the strategy I present here consists of you luring enemies away from their friends. A misplaced dragon can screw everything up.
- Use items to heal up at the start of every player phase. This way your dragons won't waste any precious moves on healing.
- Always use your strongest possible attacks against enemies. Just keep using Magic Gins every few turns to keep your MP high.
- Note that I divide your parties above into two types: up-close (those without Light Armors) and long-range (those with Light Armors). I'll be referring to them below.
- The Cross Knight parties can do far more damage inside melee battles; however, melee battles are incredibly dangerous in this dungeon. I'll let you know when it's more-or-less safe to go in melee.
- Keep your Priests for the last move in a phase; if something backfires (the Mini-Devils do Damage All or a melee battle ends up with badly hurt comrades) they can use White Drug to prep everybody back up.
- All you need for any unit is to survive the Enemy Phase with one character at 1 HP. If you have that, you can use items to restore it to full fighting spirit instantly. You'll have to carefully figure out how much punishment you can take without dying. Generally, the main characters (Byuu, Yoyo, Matelite) can take just a little bit more damage than the others, which means you'll have that extra edge you need to survive.
- Every single enemy here is Poison-elemental, which means they're healed when they walk on Poison Swamps. Use White Drug liberally to change Poison Swamps back into normal Swamps. Also note that Poison attacks will heal enemies as well. And be careful: if a Swamp is hit by a Poison spell, it'll return to being a Poison Swamp.
- Many enemies are also Death-elemental. This means that neither Poison nor Drug attacks will work on them; however, healing attacks will indeed damage them (albeit with far less damage than a normal attack). One good thing about this is that the Mini-Devils can Dance near them without any real fear of healing them.
- Speaking of which, always have the Mini-Devils Dance in the field near the enemies. If you have your Behemoth you may heal them for about 3000 HP, but you also have a good chance of doing over 9000 HP damage to them, which can really turn the tides in this battle.
OK, now a rundown of the enemies. Fighting each enemy by itself isn't all that tough; the problem is when they gang up on you.
- Strider: The easiest enemy. They have an instant-kill attack, but the chances of it getting everybody at once are very slim. Go up close and personal with them.
- Overlord: Has the least MP but can be absolutely deadly, especially since you have to deal with four parties at once; probably the most dangerous part of the battle. NEVER go in melee battle with them. See the walkthrough for how to deal with them.
- Moth Queen: Not too bad, but has an annoying ability to poison you. Don't bother going in for a melee attack since it has a very high evade stat and will duck most attacks.
- Schwarzen: Pretty nasty. If you're equipping Fire- or Poison-resistant armor, you'll have an easier time with him. Go up close to get rid of him quickly.
- Naga: The easiest of the three nasties just listed. None of its attacks can do major damage by itself... but coupled with two Infernos from the King of Pain is a ticket to a painful death, so watch out!
- Judit: Incredibly annoying. By themselves they don't do much, but they're helpers to the King of Pain. They can give him an extra turn, or heal him. If you're damaging the King of Pain, that'll basically nullify their turns, since they'll keep trying to heal him (and only getting about 1500 HP healed each time) instead of giving him a deadly extra turn.
- King of Pain: The final boss is death if you leave both Judits alive. Once he's by himself you'll have no real problems. But that's the hard part. 8-)
(Strider x3) x2
(Overlord x2, Strider x1) x3
(Overlord x1, Strider x2) x1
(Moth Queen x1) x1
(Schwarzen x1) x1
(Judit x1) x2
(Naga x1) x1
(King of Pain[BOSS] x1) x1
Treasure: Elixer x9, Reconquista x4, Chobham Armor x4, Royal Gown x2, Empress Kahna x1, Kaiser Rin x4, Powered Suit x4, Energy Suit x2, Dreadnaught x4, Iron Duke x4
OK... the first part's tough. The Striders aren't too bad (you can even take them on in melee battles) but do NOT ever attack the Overlords inside battle; they'll make mincemeat of you. Use field techs and keep up your MP with Magic Gins. Now... the major danger comes when the Overlords gang up on you. Basically, you can (barely) survive a Bagdem from a total of two Overlords, but not three. So if there are more than two (e.g. one party of two and one of one), it's very dangerous. Bagdem has huge range, too! So you want to get rid of the two-Overlord parties as quickly as possible. Make sure you SPREAD OUT while doing this; it raises the chance that the different Bagdems will strike different parties, so everyone can survive.
The problem is that there are four Overlord parties. You really have to get them quickly. The best way to do this is to have your Priest party use Starfall on the crumbled wall and break it, then take your Mini-Devil party up to the two leftmost Overlord parties and Dance. If you're lucky you'll do over 9000 damage to both parties, and your other characters/dragons can then finish them off. (Even if you just beat the two-Overlord party this way, you should be able to survive the others for the first round.) If you don't do the right dance (i.e. an attack dance), just take Byuu up there and die quickly so you can retry from the beginning.
Now, take your long-range parties (those with Light Armors) up the left side and finish off those three Overlord parties, one by one (if you haven't already). Try using Trick with your Matelite/Assassin party; it seems to work pretty well (but make sure not to use a Swordtech afterwards, or they'll wake up again). DO NOT take the chest; it's a trap. In the meantime, take the short-range parties to the right, beat the Striders and grab the chest with 9 Elixers (keep as far south as possible so as not to attract the last Overlord party). While the short-range parties are working, the long-range parties should finish up what they're doing and head right to beat the last Overlord party.
OK, now the next bit is different, but no less dangerous. Basically, you can't deal with more than one or (possibly) two of these enemies at once, or you're fried. The only exception is the Naga, who isn't too bad, and the Judits. The Judits aren't too dangerous in and of themselves, but they can be deadly in that they let the King of Pain have an extra turn! Your primary goal is luring the nasties AWAY from the King of Pain. Attack the nasty guys Moth Queen, Schwarzen) from the field; don't go into battle. The main problem is that all of these guys have ASTRONOMICAL HP.
OK. Start by bringing everybody to the top right. At this point, the Moth Queen and Schwarzen should start coming towards you. Let them come (if you're lucky a Judit will join them). Lure them down towards the south (don't go trigger-happy and start beating up on them until you're well to the south, or they'll start going back north and sniping from afar, and you DON'T want that.) In fact, make sure you're all the way to the bottom of the screen before you start hitting them; if you're even hugging the top wall of the bottom part, they can hit you from above the wall. Even all three of them together shouldn't be enough to instantly kill any party, so heal up at the start of each Player Phase. Wail away with Dances and Alexander Summons against them; you can go up close with the Schwarzen, but I don't recommend doing so with the Moth Queen, since it has a high evade rate. It'll take a LONG time until they're defeated, but hang in there with the Drugs and Gins. Don't forget to use White Drugs to clean up the poison swamp, or it'll heal them.
Once that's done, have everybody go back to the right, just below the crumbled wall. Break the wall and go up. Fight the Naga and (when she comes down to you) the Judit. Don't venture to the left at ALL until they're defeated! Again, it'll take a while, but since it's only two of them you shouldn't have as many problems. Even if you didn't manage to get a Judit follow you south before, the Judits themselves aren't too bad; you can even take them on in melee battle if you like. First go after the first Judit (if you didn't get her yet), then the Naga. After that, go after Judit and the King of Pain at the same time. If you keep damaging the King of Pain, Judit will just cast White Drug on him for her turn! However, concentrate on Judit first. Once she's out of the way, take your long-range parties around to collect treasure (you'll need to use earth techs to break down the crumbled walls to get to them). Put their dragons on Go! in the meantime. When all the treasure's collected, just go whole hog on the King of Pain. Just use Royal Drugs or Heals at the start of battle and you'll be just fine. You're done!
Just a listing of the treasure:
Bottom-right chest: Elixer x 9
Bottom left chest: Trap (Nightmare 99)
Mid-left chest: Reconquista x 4
Mid-right chest: Chobham Armor x 4
Left enclosure, left to right: Royal Gown x2, Empress Kahna x1, Kaiser Rin x4
Middle closure, left to right: Powered Suit x4, Trap (Silent Voice), Energy Suit x2
Right closure, left to right: Trap (Bionics), Dreadnaught x4, Iron Duke x4
| Pic | Name | Element | Level | HP/MP | Range | Spells/Techniques | |
|---|---|---|---|---|---|---|---|
| ATK | DEF | SPD | MAG | EXP | PR | ||
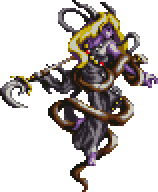 | Judit | Poison | LV.93 | 40,000/999 | 5 sq. | Quick L.10, White Drug L.10, Randomizer L.10, Gigashock L.10 | |
| 185 | 223 | 122 | 185 | 10 | 50,000 | ||
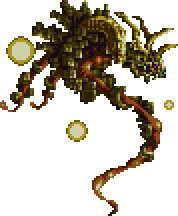 | King of Pain | Poison | LV.99 | 60,000/999 | 2 sq. | Inferno L.10, Randomizer L.10 | |
| 195 | 252 | 86 | 253 | 10 | 60,000 | ||
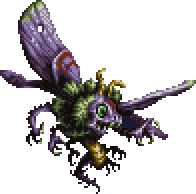 | Moth Queen | Poison | LV.97 | 55,000/99 | 5A sq. | Poison Powder L.10, Diffuse Beam L.10, Breath Wing L.10 | |
| 233 | 231 | 152 | 192 | 10 | 60,000 | ||
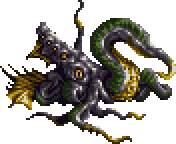 | Naga | Poison | LV.96 | 58,000/999 | 3 sq. | Tidal Wave L.10, Toxic Ink L.10, Halley Gazer L.10, Tentacle L.10 | |
| 253 | 251 | 88 | 163 | 10 | 60,000 | ||
 | Overlord | Death/Poison | LV.88 | 10,000/420 | 4 sq. | Bagdem L.10, Nightmare 99 L.10 | |
| 98 | 186 | 73 | 205 | 5 | 10,000 | ||
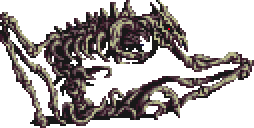 | Schwarzen | Death/Poison | LV.98 | 55,000/999 | 3 sq. | Magma Storm L.10, Dark Breath L.10 | |
| 248 | 242 | 38 | 231 | 10 | 60,000 | ||
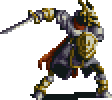 | Strider | Death/Poison | LV.84 | 12,000/175 | 5 sq. | Hand Grenade L.10, Unsheathe L.10 | |
| 232 | 215 | 124 | 173 | 5 | 10,000 | ||
Technique Info
| Name | MP | Melee | Field | Comments |
|---|---|---|---|---|
| Bagdem | 19 | All | 9/2 | Non-elemental damage. |
| Breath Wing | 0 | All | 2/1 | Non-elemental physical damage. |
| Dark Breath | 5 | All | 7/2 | Poison-elemental damage. |
| Diffuse Beam | 6 | All | N/A | Non-elemental damage(?). |
| Gigashock | 21 | All | 8/2 | Magical neutral damage. |
| Halley Gazer | 22 | All | 5/3 | Magical dark damage. |
| Hand Grenade | 8 | All | N/A | Fire-elemental damage. |
| Inferno | 8 | All | 10/2 | Fire-elemental damage. |
| Magma Storm | 10 | All | 7/2 | Fire-elemental magical damage. |
| Nightmare 99 | 10 | One | 6/1 | Attempts to take off 75% of current HP in-battle, and about 1/3 of it on the field (Death-affinity). |
| Quick | 28 | N/A | 6/0 | Gives ally unit an immediate attack even if its turn is already used up. |
| Poison Powder | 27 | All | 8/2 | Poison-elemental damage. |
| Randomizer | 8 | All | 10/1 | Causes randomly stone, rabbit, sleep, poison, or death on targets. |
| Tentacle | 0 | One | N/A | Drains HP from target. |
| Tidal Wave | 0 | All | N/A | Ice-elemental damage. |
| Toxic Ink | 0 | All | N/A | Non-elemental damage(?). |
| Unsheathe | 10 | All | 0/4 | Attempts to kill targets. |
| White Drug | 10 | One/All | 5/2 | Heals HP. |
|
|