
 |
|
|
Area
2:
Rolick Desert Walkthrough
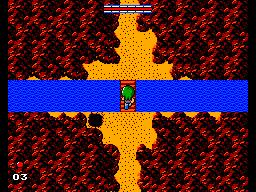 |
This is what you'll see upon leaving Despa Valley and
before entering Rolick Desert. You will come back to this
screen once you obtain the Aqua Boots. First thing you should do is kill a few blue snakes in the next screen and enter the hole that appears. Inside you will find a Wise Woman that will sell you another Life Potion. In total you should find 2 life potions (this one is included), 2 bibles (6,000 gold max) and 1 green mea. See the Rolick Desert Spoiler map in the maps section for pricing and locations. If you are in need of gold, the green snakes yield 180 gold per kill, but they take 3 strikes to bring down and they hit pretty hard. Be careful and position yourself in a safe place on the screen to farm. |
| From the screen where you found the life potion, move
one screen right and one screen up. Kill a couple
porcupigs to reveal a hole. Enter and a Wise Woman will
ask you to buy the Aruzasu Shield for 8,000 gold. This
shield will deflect bullets thrown by bees and water
spirits (And change the overworld music!). Unfortunately,
the max gold you can carry right now is 6,000. You'll have
to come back later. The Wise Woman will label you a "moron
of the first class." |
 |
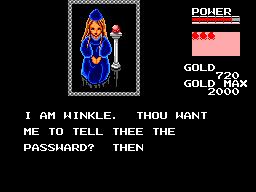 |
It would be a good idea to save your progress before going to fight Rolick. Just visit Winkle (from the entrance: one screen right, one screen up, then one screen left) and write down your password. |
| Two screens to the left of the entrance to the desert you will find a clearing with a bunch of blue rocks, set up as a small circle within a larger circle. Strike the rock you see Kelesis stabbing in the picture to the right 5 times to reveal the entrance to Rolick's lair. Make sure your max gold is 6,000 because when you kill Rolick, he will fill your purse to the max! | 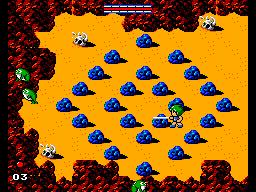 |
 |
Rolick's dungeon is another simple platformer. You must
kill 2 giant snakes this time and be careful towards the
end of the dungeon not to fall to the floor because you
will have to start the dungeon again if you do.
Rolick will curl up and spin very quickly following Kelesis around the room. Dodge the demon while it is spinning. When Rolick slows down/stops, get as many stabs in as possible before it begins spinning again. |
| Once Rolick is defeated, journey all the way to the farthest Northeastern part of the desert to find the screen filled with animal skulls pictured on the right. Enter the hole that appears and buy the second crystal for 3,000 gold. | 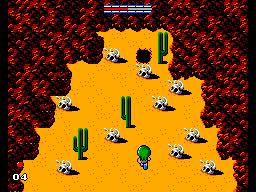 |
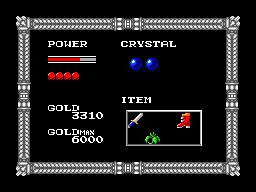 |
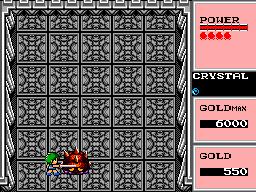
Item check! Make sure you have all the same items I have pictured on the left before moving on. The journey gets more challenging in Bachular Graveyard. 4 Life potions, 6,000 gold max, 2 crystals, and 1 green mea. |
| Once you are ready to move on, journey to the farthest Northwestern portion of Rolick Desert (pictured on the right) and a bridge will appear that was not there previously. Cross the bridge into Bachular Graveyard. | 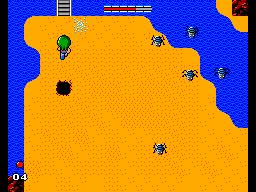 |
<-- Back to Area 1:
Despa Valley  To Area 3: Bachular Graveyard
-->
To Area 3: Bachular Graveyard
-->