
 |
|
|
 |
The Shadow Medallion
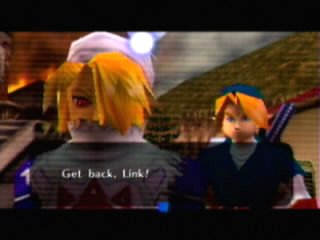 |
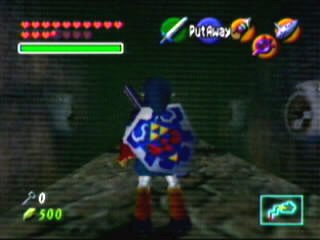
Head to Kakariko Village. Once you enter, Link will see that the town is on fire. He runs in and see Sheik standing by the well. The well pops open and a spirit is released that attacks Sheik and Link. When they come to, Sheik says that Impa (Zelda's Caretaker) has gone to the Shadow Temple to stop the evil spirit. Impa is one of the Sages, and needs Link to help her. Sheik then teaches Link the Nocturn of Shadow, which will warp him to the Shadow Temple, right behind the Graveyard. Sheik then disappears. Make sure you have the Lens of Truth befor going on (refer to Fire Medallion section) |
| Play the Nocturn of Shadow to warp to the temple. Go into it and you will see a bunch of unlit torches. Use Din's Fire to light them all at once which will raise the door. Prepare yourself for the Shadow Temple. Enter and there will be a pit. Use the Longshot to go across. The spirits will then say that they will only yield to those with the eye of truth (you have the Lens). Go in and you will see a bunch of poles with skulls and a compass (not the one you can get). Use the Lens of Truth and see which one of the skulls is real. Point the compass to the real one and the door across the pit will open. |
 |
 |
In the compass room, use the Lens of Truth to reveal a fake wall. Go through it. Open the door and go through another false wall. Take a right and 'eye' the false wall. Go through it and kill the ReDead and the Keese and take the Map. Go back out and take another right. 'Eye' the false wall and go through it. There will be another room similar to what you were just in. Go around and at one of the corners is a false wall. Go through it and open the door. |
| You will now be in a room similar to where you were in the Bottom of the Well with the Dead Hands. This is easier. Use the Lens of Truth to look for a shadow on the ground. When you find one, place a bomb there. The Dead Hand will appear. Attack it and repeat. It will die and leave behind the Hover Boots. Now head back to the compass and with the Hover Boots on, run across the pit to the door. If you make it, keep on running down the slope and to the lower levels. |
 |
 |
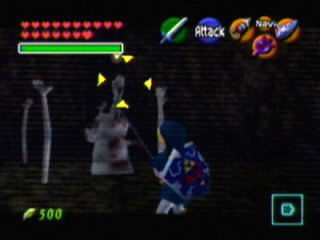
Blow up the Beamos in here. There are now two ways to go. Go left and there will be a room with 5 Silver Rupees, a Death Blade (similar to the Spinning Ice Blade), and a Key (once you collect the Rupees). Go right to fight 2 Gibdos and get a Compass. Now the only wall that isn't fake can be blown up. Blow it up and unlock the door. Make your way down, killing the Big Skulltulas. Near the end are Guillotines. Be quick and go under them as they pull back up. Continue and Navi will warn Link about the Wallmasters (not again). |
| More guillotines. These ones come down faster. With the Hover Boots, run by them and at the end, you will have to fight a Stalfoe. Once it is dead, head to the right. Wait for the platform to drop so that you can jump onto it. When it raises to the top, jump to the floor with the Silver Rupees. They are all there, and the 5th one is under the Beamos. Blow it up to get the Rupee. Go through the door that it opens. |
 |
 |
After following, you should be in this area. Can be tough if the spikes fall on you. 'Eye' the wall to the right before the first spike and you will see a stone block. Pull it out and then push it under the spikes. After it is under both of them, go around and pull on it to the end. Climb it and jump to the ledge. Hover over to the other side and jump on top of the first spike. Go to the other side and press the button, which will drop 2 treasures. Go back over past the spike to get the Key. |
| Go back out. Blow up the Beamos and go to the narrow strip of land to the guillotine. 'Eye' the hidden floor beyond the guillotine and go there. 'Eye' another platform that is moving back and forth along the chain. Go there and across to the locked door. Open the door, kill the ReDeads, 'Eye' the spikes, collect the Silver Rupees, and go through the door it opens. On kill the Keese on the other side to reopen the door. Throw a Bomb Flower into the Skull Jar to break it open and drop a Key. Go back to the other room, 'Eye' the target above the locked door, Longshot there, and open the locked door. |
 |
 |
Now you have to navigate through strong fans. Use the Iron Boots to prevent you from being blown away. When you get to the pit, wait for the fan across from you to blow and then Hover over. When you get to the door, DO NOT enter it. It is not important. Instead, turn left before the door and 'Eye' the false wall. Equip the Hover Boots and let the fan blow you to the other side. Open the door, kill the Gibdos, and blow up one of the mounds in the corner to reveal a chest with a Key. Open the locked door. |
| Pull the block to the left over to the drop in the
floor. Climb the ladder and jump onto the farry. Play Zelda's Lullaby at the Triforce symbol to start the farry going. In the mean time, you have to fight 2 Stalfos. Near the end, the farry will start to sink. When Navi warns you, immediatly jump off to the left side. From there, head west and open the door. Make your way around the maze (the Lens of Truth tells true walls). At the south corner, go through the door. 'Eye' an invisible Floormaster. You have to do a manual spin attack to kill the little ones. Grab the Key and go back. |
 |
 |
Make your way to the North Room. You will have 2 spiked walls come at you. Notice that they are made of wood, so use Din's Fire to destroy them with ease. Kill the ReDeads and grab the Boss Key. Now work your way back to the east corner and go back to where the boat sank. Find the clump of Bomb Flowers on the other side. Shoot one with an arrow and a statue will fall and form a bridge. Cross it and open the locked door. 'Eye' the hidden floors and make your way across to the Big Door. Unlock it. |
| You will fall through a hole and land on a huge bongo, where the evil spirit starts to pound on it. You now have to face in my eyes the toughest boss in the game, Bongo Bongo. Get out the Bow, the Lens of Truth, and the Hover Boots. Back to the edge of the bongo. Shoot one hand, then as the other hand attacks, shoot it. When both hands are stunned, use the Lens of Truth and eye the main body. Let it get close and then shoot the eye. Quickly jump attack it a few times. It will recover and attack again. Repeat and it will die out quickly, leaving a Heart and a Warp. |
 |
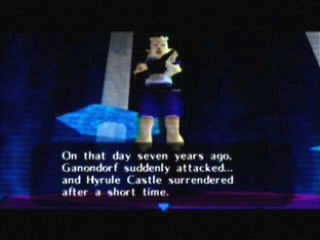 |
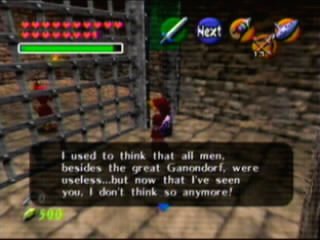
You will warp to the Chamber of Sages, where Impa stands at the purple platform as the Sage of Shadow. She explains what happened when Ganondorf attacked 7 years ago. She then says that Zelda is safe and that Link will soon meet her face to face. Impa then gives Link the Shadow Medallion. You will then be sent outside the Shadow Temple. |
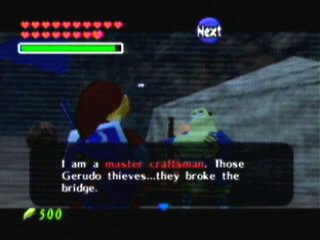
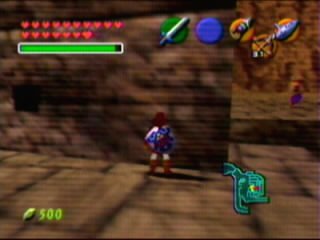
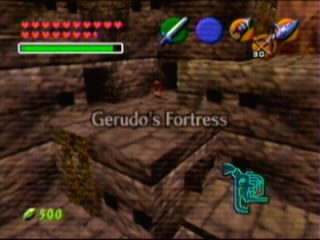
| This next part is not part of the Shadow Medallion walkthough, but I needed to shorten the Spirit Medallion up and lengthen this one. Head to Gerudo Valley and talk to the Carpenter. He will say that his men quit and went to become a Gerudo Thief (must be hard considering they are all women). He asks Link if he can help out. Go into the fortress and purposly get caught. They will throw you in a pit. Easy to escape if you have the Longshot. Look for a board and Longshot out. Then, once at top, start aiming for the guards and shoot them. Enter the nearest door to the wall at the bottom. |
 |
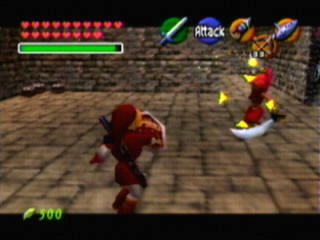 |
Talk to the man in the cell. He will say that guards are watching, like the one right behind Link. The Guard attacks. This can be rather tough, but if you move quickly and attack, it shouldn't be too tough. Keep close and when it gives up, it will drop the Key. Free the man and exit out the other side. Once out, enter the door near the exit. Go right and keep an eye out for the patrol guards. When the coast is clear, run to the right path and up to the outside again. |
| Ever want to be like Bond? Now is your chance. Hide around the corner and when the guard's back is turned, go out and quickly shoot it. Now head to the door on the left of where the guard was standing. You will be in another cell room, and another guard to fight. Defeat it the same way and free the man. Exit out the opposite side. |
 |
 |
From here, go right down and into the door on the other side. Talk to the man, fight the guard, get the Key, and free the man. Go back out the door you came in. Climb the vines and take the door to the left. Shoot the guard and Longshot over to the beam on the other side of the gap. Exit out the door and jump down to the roof to the left of where you exit. Enter the door. Wait and shoot the guard as she walks by. When she is stunned, run to the right and then left. Follow the path, talk to the man, fight the guard, get the Key, and free the man. |
| Once you free the last carpenter, a Gerudo woman comes out and talks to Link. She mentions that the 2nd in command behind Ganondorf, Nabooru is at the Spirit Temple. She will give Link the Gerudo Membership Card, which will allow Link to wander around the fort as free as he wants. |
 |