
 |
|
|
Side Quests
Click on the side quest you want info on.
Ninja Town
Euclid Coliseum
Graham's Treasure Hunt
Morlia Gallery
Ninja Town
- Before going to the Treant Forest, if you want to get access to the secret Ninja village, make sure you've talked to the man standing on the platform to the right of the southern Alvanista entrance. Now head to Ymir Forest, and into the Treant Forest.
- From the start of the Treant Forest maze, go up, up, up, left, left, down, left, up, up, up, and you'll see a small child. Talk to her to trigger a longish event, after which you'll get the Muramasa, a powerful sword.
- You are now free to wander around the village. Stepping in the spa will restore your HP/TP/status.
- In Lanzo's Dojo, a person will sell you a Painting for 30,000 gold. If you sell it (best place is Elven Town) and come back, he'll sell it to you again. You can make 19,500 gold each time you go back and forth. He won't sell you another painting unless you don't have any more in your inventory.
- If you go to the wooded area left of the village, head left and down and you can get the Blue Crystal Rod for Mint.
- If you go to the eastern woods, and head east, you can find the Flare Tornado spell for Arche. This is a great place to build up levels.
- This town is the only place where you can make the Oden special food. See Secrets for more info.
- Besides for Oden, you can stock up on Japanese Apples here - they're cheap and worth 1000 Food each. First fill up your Food with Japanese Apples, then buy as many as you can carry.
- If you attempt to leave the village to the south, Suzu will take you to your choice of: 1. Treant Forest (where you met Suzu), 2. Elven Village, or 3. Ymir Forest Entrance.
- Go back to the Coliseum in Euclid to finish this sub-quest. (You can wait until after getting the two magical swords if you think it'll make the fight easier.) Fight past the first 8 enemies like you normally would.
- Instead of fighting the Wyvern, you'll fight Dozo and Okiyo.
- You don't have to win the fight, but if you do you'll get another Painting and a Sake, and the ensuing scene will be different.
- Go back to the Ninja Village and talk to the elder, and you'll get the Lion Claws combo.
Euclid Coliseum
The Coliseum in Future Euclid is home to some nasty monsters and some great prizes. I don't recommend trying it until you're at least level 70, and preferably not until you've gotten through the Future Morlia Gallery. Here's how it works: You go to the far left of the castle and talk to the middle of the three soldiers. Say Yes twice to begin battles. This will just be Cless against one baddie at a time. Your Apple, Orange, and Mixed Gummies, and Remedy Bottles, will be taken away for these battles; you get three Apple Gummys and one Orange Gummy. Use them wisely! (You can still use any Lemon, Pine, or Miracle Gummies you have.) You'll fight 8 battles in succession, followed by a boss battle. You have a choice to not fight the boss battle (say No twice); if you choose it, you'll get 30,000 gold. (Besides for the very first time, when you'll still get your Combo.) If you say Yes twice, your HP and TP will be healed before the fight. For the first nine times you fight in the Coliseum and win, you'll get a different set of items and fight a different set of enemies.
Before you enter, make sure you've got a Body Amulet or Gorgon Amulet equipped, preferably both; you'll need them. The other option is to use a Medecine Bottle at the start of each battle, but that'll drop your attack power by 20%. Here's the list of enemies and prizes!
If you've done the first part of the Ninja Town subquest, you'll fight Okiyo and Dozo at the end of your current battle instead of Wyvern. If you beat them, you'll get a Sake and a Painting. If you lose, a scene will still play out (and you'll still finish the Ninja Town side quest). The next time you start the Coliseum, you'll continue as if you'd never fought that set of battles.
The techs I used the most were Tiger Teeth, Mecha Blade, Soul Edge, and Soul Wave.
BATTLE 1
Enemies: Bugbear, Krakken, Mandrake, DarkVine, Draygen, Oak Root, Fe.Golem, Gorgon
Prizes: Cless gains the Lion Teeth combo
This one starts you off fairly easy. Don't hold back your techniques for the Mandrake; it can drain your TP anyway. Get the DarkVine as quickly as you can before it drains your HP. Be patient with the Fe.Golem; he can pack a nasty punch and leave you senseless. Unless you've got both Checks equipped, use Long Range techs for the Gorgon. Teleport works nicely for him.
BATTLE 2
Enemies: Bugbear, EvilWeed, Krakken, Fe.Golem, Gorgon, Komodo, Mandrake, BearMan
Prizes: Soup Pot, Guiness, S-Flag
Play the EvilWeed the same way you did the Mandrake, but be extra careful; it can paralyze you and turn you to Stone.
BATTLE 3
Enemies: Udkala, DarkVine, Krakken, Gorgon, Fe.Golem, Komodo, Mandrake, BigFoot
Prizes: Body Amulet, Gorgon Amulet, Poison Amulet
The Udkala is like the Oak Root; stay far away and use your jumping slash. Don't get too close to the BigFoot. If he starts throwing snowballs, go after him; otherwise, keep your distance. If he puts out his icicles, you can't come near him without getting majorly hurt. Just wait till they go away, then (carefully!) smash him.
BATTLE 4
Enemies: Draygen, EvilWeed, Krakken, BearMan, Fe.Golem, Komodo, Bugbear, FastStar
Prizes: Veal, Boar Roast, Pork Roast, Sirloin Steak, Beef, Dragon Steak, Chicken, Steak
The FastStar is a souped-up archer; he doesn't have a lot of tricks.
BATTLE 5
Enemies: Oak Root, BlueSoup, Krakken, Gorgon, Fe.Golem, Komodo, DarkVine, Solomond
Prizes: Verbena, Red Lavender, Sage, Savory, Red Verbena, Red Lavender, Red Sage, Red Savory
BlueSoup is invincible against Dark attacks, so none of the weapons found in the Morlia Gallery will work against him; you'll have to use the Eternal Sword. The Solomond is Efreet's twin; he'll use a fire attack a lot and teleport around. If you have the Golden Armor, just use regular attacks and let him heal you! 8-) Otherwise, go at him as fast as you can, so he doesn't get a chance to attack.
BATTLE 6
Enemies: Draygen, Udkala, Krakken, Gorgon, Fe.Golem, Komodo, Oak Root, Kemazotz
Prizes: Remedy Bottle, Medecine Bottle, Rune Bottle, Flare Bottle, Charm Bottle, Life Bottle
Kemazotz is a clone of Gnome. However, this time you don't have Mint to heal you! This is a tough battle. Like before, wait until you see the four shadows come together, then smash it before it can start turning into missiles again. If you're lucky, you'll get it dizzy. Don't come too near to it; stay far away then let loose with a fast long range tech. The prizes for this battle are crappy (besides for Charm Bottle) but the next ones are nice.
BATTLE 7
Enemies: FastStar, BlueSoup, Solomond, BigFoot, Komodo, BearMan, Gorgon, Mimm
Prizes: Lipstick, Magical Broom, Mage Ribbon, Magical Pouch
This is the toughest battle you'll have. Again, you'll have to equip the Eternal Sword because of the BlueSoup. If you're wearing the Golden Armor, heal yourself when you reach the Komodo by letting him breathe fire on you. Mimm is an extremely nasty enemy. Use your long-range techs and don't try to get close at all! She'll put up her shield and you're almost as good as dead. Also, her dive attacks seem to have an excellent chance of making you dizzy. Keep away! The prizes for winning are super-cool, though. *^_^*
BATTLE 8
Enemies: Kemazotz, Komodo, BearMan, Udkala, Fe.Golem, EvilWeed, BigFoot, Mimm
Prizes: Star Cap, Star Cloak, Star Broom, Star Rod
This one is a bit easier than the last one; try to keep all your Gummys till the last two battles.
BATTLE 9(...)
Prizes: Star Gloves, Star Helm, Star Shield;
Prizes: Apple Gummy, Orange Gummy
After the first eight battles, the game will choose your opponents randomly from the first nine sets. The first time you win this battle you'll get the Fighter's Star set; after that, your prizes are always just two crappy Gummys. It'd make more sense to skip the boss and claim the cash. The only point of doing any more battles is to raise Cless's EXP.
Graham's Treasure Hunt
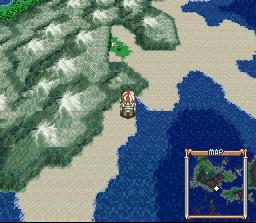
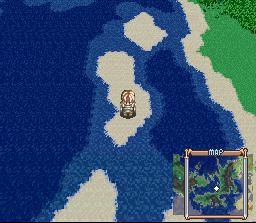
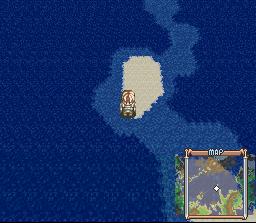
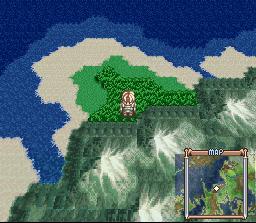
After you enter Dhaos's Castle in the Future, you should walk right out and back to the world map. Get on the Airbirds and fly to Freezekill. There's now a man on the left side of the bar who'll tell you his name is Graham Ayflite. He's looking for treasures of the Ayflite family, which are scattered throughout the world. When you say you'll help him, he'll give you his Ayflite's Notes, which is really a map which tells you the locations of all the treasure sites. There are a total of 22, with some truly amazing items inside! Many of them are trading items, which means you're in for a wad of cash, but others are much more useful.
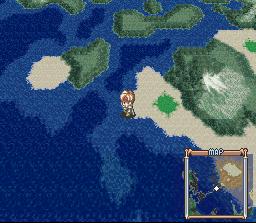
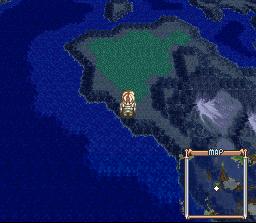
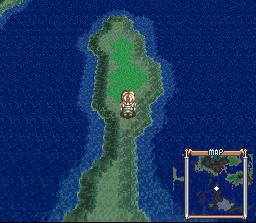
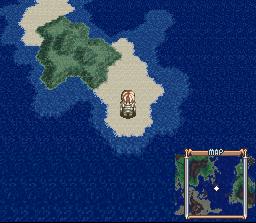
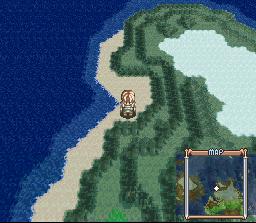
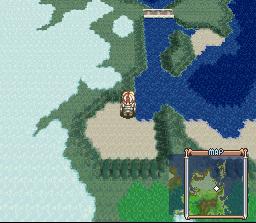
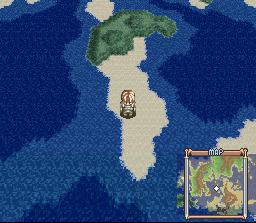
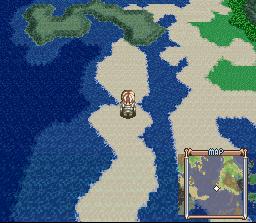
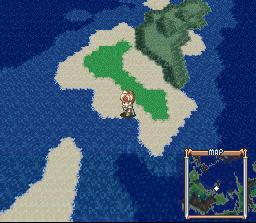
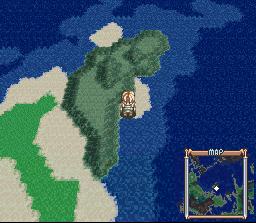
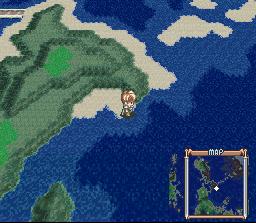
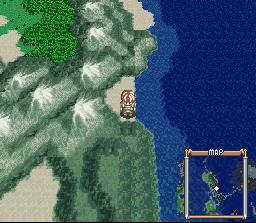
The treasure sites are unmarked, which means a lot of searching. Here's a rundown of where they are (a snapshot is provided of the world map at that point) and what's in them:
- On a beach SW of Freezekill (Snapshot): Hyper Gauntlet, Mental Ring, Whale Meat
- On a field W of Ary (Snapshot): Whale Meat, Resist Ring
- On a field N of Ary (Snapshot): Sefira, Blue Candle
- On an island far NE of the Olive Village continent (Snapshot): Sake x9
- On a beach NW of the Unicorn Forest (Snapshot): Gold Helm, S-Flag, Elixir
- In the snow N of the Unicorn Forest (Snapshot): Jade Ring, Elven Boots, Namco Gamer, ?Weapon (Lucky Blade)
- On an island NW of where Dhaos's Castle used to be (Snapshot): Whale Meat x3
- On a beach near where Dhaos's Castle used to be (Snapshot): Red Line Shield, ?Weapon (Duelist's Sword), Elven Boots, Cat's Eye, Red Lantern
- On an island off the far NE end of the Olive Village continent (Snapshot): Whale Meat, Drum Set, Elixir x2
- On an island off the NW end of the Olive Village continent (Snapshot): Whale Meat, Jade Ring, Soup Pot
- On a beach SW of Morrison's House (Snapshot): Whale Meat, Blue Line Shield, Black Onyx, Green Torch, Elixir, Armlet
- On a large island NE of Cave of Spirits (Snapshot): Mental Ring, Elixir, Dark Seal
- On the eastern inlet of the same island (Snapshot): Whale Meat, Protect Ring
- On an island NW of Bato's House/Long Valley (Snapshot): Whale Meat, Moon Crystal
- On a beach NE of Bato's House/Long Valley (Snapshot): Silver Cape
- On an inlet N of where Harmel used to be (Snapshot): Whale Meat, Reverse Doll
- On an inlet SE of Miguel (Snapshot): Reverse Doll
- On an inlet SE of Ymir Forest (Snapshot): Protect Ring
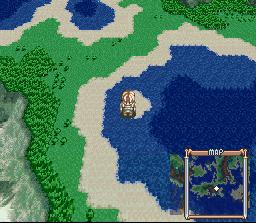
- On an island SE of Alvanista (Snapshot): Silver Mattock
- On an island quite a bit N of Alvanista (Snapshot): Silver Cape, Whale Meat, Resist Ring
- In a forest NE of Alvanista (Snapshot): ?Weapon (Tidal Axe)
- On a small island directly E of Ymir Forest (Snapshot): Rosa's Dress (Rare Item)
Morlia Gallery
This super-tough dungeon can only be entered if Cless is at least at Level 60. The best place to raise levels is the Ymir Forest, but Arche isn't allowed in there. However, the Treant Forest is second-best, and if you just head to the Ninja Village, Arche can come with you! Before attempting any of it, I highly suggest you do the Treasure Hunt (see above)and get several excellent items, including the Namco Gamer Book, Blue Line Shield Shield, Hyper Gauntlet, and most importantly, the Sefira and Dark Seal items. Use Rune Bottle on both of them to change them to a Sefira+1 and Demon Seal. The Sefira+1 will give you 120% the experience you have before, and if you give Demon Seal to Cless (it'll disable his techniques, though) you'll get twice that! It should make experience building a snap! Make sure to build up Chester's levels as well (put him on Defend if he's still weak) as he'll be invaluable in the dungeon.
I also highly recommend entering Dhaos's Castle and getting the Meteor Storm spell; it'll be invaluable down there. The Shadow and Aska summon spells are also useful. Make sure you have the rings found in the Future Cave of Spirits, Glaciated Cave, and Sylph's Mountain.
Find the Gallery on the World Map (SE of Alvanista), then enter. You've been here before, so go down the staircase all the way to the last floor. Go right and up to enter a new room, with guards and people camped out. The woman in green right in front of the doorway down will sell you some necessary items, and the woman next to the tent in the top right will let you rest for free. (The room at the top right with the ! switch on it was used in the past; don't worry about it.) I recommend building up your levels to at least L.70 before attempting to go the distance.
You should have an entire set of Gummys; that is, 15 of every single kind. (Use Rune Bottles to get all the ones you need; you should have enough money from all that level building to afford them all.) Also be sure that you have 15 Rune Bottle. You should also give Fairy Rings (modify the Jade Rings you have with Rune Bottles) to Klarth and Arche. Now that you're ready, head down.
Make sure you have a few Holy Bottles before entering the Gallery. When you try to go into the Gallery proper, there'll be a flash and all your Holy Bottles will disappear (No cheating here!). The reason you do need some is that if you don't, your Remedy Bottles will disappear instead, and you need those! If you really want Holy Bottles (and you probably will) you may go back to a shop and buy them again, and the next time you go in the dungeon they will not break. The bottles breaking is a one-time only event.
There are no super-tough bosses, but the enemies themselves will give you an enormous headache. Here's a bunch of tips:
BigFoot: Don't get too close; he'll stick out needles and give you a poke you'll remember! The time to get him is when he starts throwing snowballs. Have your magic users attack him if his needles are up (the Mystical Rune accessory is useful here). If you're lucky, he'll drop an Ivory Tusk, which can be used back up top to exchange for Mah Jong Tiles.
Sokuram: He resembles Maxwell, in appearance and tactics. Avoid him when he's a ball, then go for him; he's not that hard. If he drops a ?Bow, modify it for the Berserker Bow bow, which makes Chester an awesome addition to the party!
IceChild: They're not too hard; go close and hit them! If you don't keep pounding them, they'll cast Tidal Wave. Mecha Blade works great here.
Manticor and BeastMan: If you wait even a bit, they'll each let go with massive spells which no armor can absorb. Have Mint handy! Don't get too close to the Manticor or he'll stone you. Mecha Blade can work wonders on this pair.
Mimm and Ahlakola: Don't go close to Mimm with Cless; hit her with Meteor Storm or Origin from afar. Have Cless concentrate on the Ahlakolas.
WildWolf: A super-hard enemy with 50,000 HP! Usually you can run away real fast. However, I suggest trying to kill him until he drops a ?Weapon which can be modified into the Demon Hand, which in my opinion is even better than the Bahamut's Tail axe found at the 20th floor! Once you have the Demon Hand, run away whenever you see him; it's not worth the hassle. He doesn't give decent EXP or gold.
Urchin: This small green guy cannot be hurt and he instantly kills anyone he touches. Run away; there's nothing else you can do.
BeastMan and TuskBoar: The TuskBoars will rush at you incessantly while the BeastMan casts Summon Lich. Put Arche or Klarth at the back (or middle, if you're surrounded) and blast BeastMan, and have Cless and Chester deal with the TuskBoars. Arche's Indignation spell actually works better than Meteor Storm here. This set can also drop the Berserker Bow.
HellLord and Yuinaru: The Yuinarus aren't too bad, but get rid of them quickly; they can cast Hammer Head, which can dizzy your entire party. Have Klarth or Arche hit the HellLord with Origin or Meteor Storm before he can cast Summon Lich.
Banshee and D.Flower: The D.Flowers can cause instant death to the entire party, as well as paralyzing you, but they don't have a lot of HP; make sure you keep hitting them. Stay away from Banshee if you can; she also can cast the Restrict spell which causes instant death for one person. Explode works well here.
Ishisu: Use Aska if you have Klarth. If you can, just have Cless walk up to her while she's invisible, and keep pressing the A button; she won't be able to move! She may drop a ?Weapon which can be modified into a Saint's Rapier, which could come in useful somewhere else. *^_^*
OK. On we go!
The first few floors are not tough puzzle-wise. They just go around and around. You'll notice the first inconsistency on the 12th floor, where a staircase leads down instead of to the right. Follow it for a small treasure room.
On the 13th floor, the three chests in the room hold Spy Lens, Flare Bottle, and Life Bottle. Go down and right.
Keep following the pattern. On the 16th floor, there's another staircase down which leads to a room full of gas. If you have the Emerald Ring from the Cave of Spirits, Klarth will learn the Chameleon spell here. There are also three chests here: a Dark Bottle, Sage, and Creamy Cheese.
There's a small puzzle on the 17th floor. The object is to get all four circles to be dark. It's very simple. If you number the four circles from left to right 1, 2, 3, 4; step on them in the following order: 1, 2, 3, 4, 2. Continue to the south. (There's a teleporter at the top of the room if you want to return to floor 10, the beginning of the Hard Part.)
The 18th floor is the first maze:
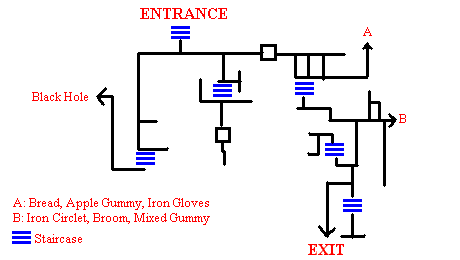
Not only that, but you can only see a small circle around you! There's really nothing of any value to the right of the entrance. Head to the left. Go down all the way, then left and up and out the left door to get the Black Hole spell for Arche. Now go back to the entrance. Head right past the stone, then go down to reach a staircase. Follow it, then go right, then down again as soon as you can. Go down until you see a staircase, but instead of following it, go left. Head down to reach the 19th floor.
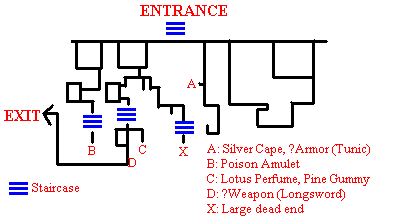
It's still dark here! There are eight passages downward; four to the left of the entrance, and four to the right. The one directly right leads to a Silver Cape and a ?Armor which turns out to be a useless Tunic. The second from the left, if you follow it all the way down past the twists and turns, leads to a Poison Amulet. The one you want is third from the left. Go down, right, down, left, and down the staircase. Here you can go left, right, or straight. Right leads to a Lotus Perfume and Pine Gummy. Left is the way out. You'll reach a straight room with several bridges, and a ?Weapon which turns out to be the powerful Bahamut's Tail axe! Leave to the left.
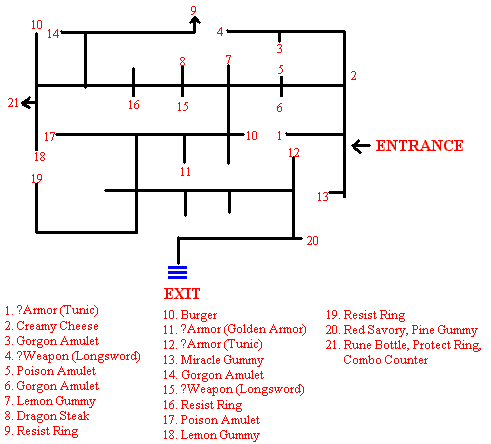
You're now in a room set out like a grid. You can see where the stone blocks are by looking at the torches, but other than that you can't see until the room flashes from time to time. Get used to this! There are two really good items in this room: The Golden Armor, and the Combo Counter item. To get to the room with the Combo Counter, start by going up one square. Now head left all the way, then down a bit to see a hole to the left; that's where the Combo Counter is. Now go back all the way to the right to get your bearings. Go left two squares, down one, left one, and down to pick up the Golden Armor. Now go back up, left one, down, right three, down and left to reach the 20th floor.
Here there's another small puzzle. You're in a room with several stone statues. When you cross their line of vision, they'll knock you backwards. To get past this, look at the following two snapshots:
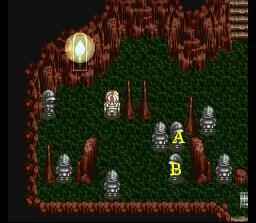
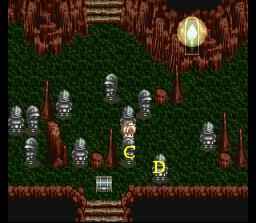
First put yourself in the same position Cless is in the first screenshot. Walk down one step and right one step (to avoid the gaze of the soldier Cless is currently facing). Now head down and right and in between Soldiers A and B. Take one step to the right, then step up so Soldier A knocks you to the right, past the next soldier's gaze. Now step down in front of Soldier C so he'll knock you past the gaze of Soldier D. Now head down and left behind Soldier D to pick up your Jade Ring and reach the last level of the Gallery.
You'll notice that the music becomes garbled here. This small room holds a Rune Bottle, Reverse Doll, and Protect Ring. The last batch is ahead!
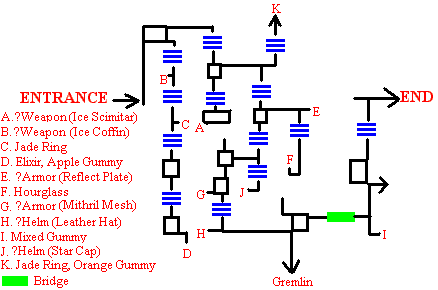
Again you can't see besides for small flashes. First you'll want to just get to the end; you'll see why in a minute. To get there, head up and right past one staircase; take the second one down. Now go right and take the staircase down. Go down past the stone and take the next staircase down. Go left and down again, past another stone, take another staircase down. To your left is a ?Helm which is a useless Leather Hat again. Instead, go right and take a detour down to enter a gas room which holds Klarth's best spell, Gremlin (but he'll only learn it if you have the Sapphire Ring from the Glaciated Cave). Once you have the spell, go back out of the room and right all the way past the bridge. Go up past the room to the right (which is a dead end) and you'll reach another room to the right, where you'll finally get to a save point. Go up and fight the Wyvern (who's a joke after all this!) Claim your prizes at the top: the awesome Excalibur sword, the Thor's Wrath combo, the Extinction spell, and the Scout Orb item. You can now set your rate of monster attacks to Low by using this item, and the going out is much easier than the coming in. Refill your HP and MP with the rest of the treasure on the side here: two Life Bottles, Hourglass, four Miracle Gummys, four Mixed Gummys, and an Elixir. Congratulations!
Two last notes: On the way back, you'll come across the same circle puzzle as before. It's the same thing, just do it backwards (4, 3, 2, 1, 3). And you can use the teleporter here to return to floor 10.