
 |
|
|
Walkthrough Part 9
SEASIDE TUNNEL
Go right, pick up the mushroom, and talk to Kara. Just wait out the scenes... Well, this area's pretty pointless. At the end, you reach the Angel Village.
ANGEL VILLAGE
There are two parts to this. There's the guest area, which you get to by going down the right ladder at the start, and the main village which you get to by going left and down the other one. You should go to the guest area and talk to everyone first, it's just good for the storyline... Then go to the main village.
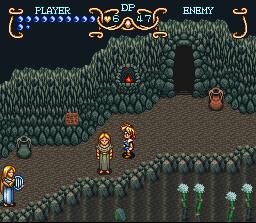
MAIN VILLAGE: Go all the way to the right, and through the doorway. Then, go right, and in through the next doorway. Talk to the two angels, they'll tell you how to get to Ishtar's studio...
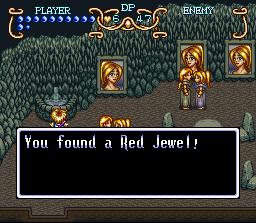
Anyhow, go back down, and head left. Go in through the doorway on that tight-fitting area to enter the Dance Hall. Search the fountain for a RED JEWEL.
Leave, and continue left. You'll see an angel staring at the river. That's the Jeweler Gem.
Behind the Jeweler is a doorway heading down. Go in it. The doorway to your left has a Dark Space in it. You should save. Continue all the way to the right until you see a large door. Talk to the angel, and answer YES. To open the door, face it and press the TALK/ATTACK button. Then, go in.
GETTING TO ISHTAR'S STUDIO
ENEMIES/HP:
Dive Bat/5 Steelbones/20 Draco/10
Ramskull/10
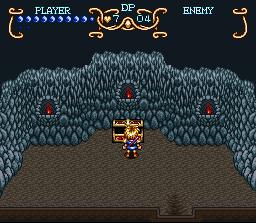
Okay, this is pretty easy. The flames on the wall blow away from the correct way. So if one is slanted like this: \ Go right. If it's slanted like this: / Go left. Simple? Good! Just take doorways between two opposing flames.
Steelbones inflict quite a bit of damage, so if one approaches you, just keep swinging and eventually its stupidity will lead to its demise. Dive Bats are simple to take out: Just intercept them with your flute when they dive!
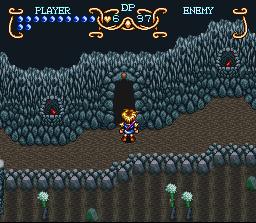
There's only one way to go for a while. You'll then reach a room with four doors (besides the one you came in). The first two lead to the same place. Besides for the two upward staircases, that room has one downward staircase, which is a dead end. The far right door in the four-door room leads to another dead end. (The dead ends do have enemies, which you should kill.) The way to continue forward is the third door from the left. The hall will get dark after a while, but the enemies are the same.
When you reach the screen with a river at the bottom, search the wall between the area where the two wall flames would imply that there's a doorway, and one will appear.
When you encounter two Dracos, take them both out, and slide under the small gap in the wall behind the one on the left for a RED JEWEL.
In the Wind Tunnel, life is a lot easier if you run, and when close to a Ramskull, shift up or down and Psycho Slider it to death.
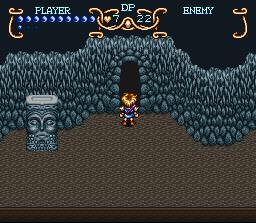
After the wind tunnel, you will encounter columns of Ramskulls. Psycho Slide the center one to destroy them all with one hit. In the last room, the entrance to Ishtar's Studio is hidden:
Method 1: Between the last two statues is a V-like point in the wall of the cave. Between that V-point and the statue just left of the last one is the entrance.
Method 2: Your hair blows around in one part of the room. Go straight up. The entrance is there. Go to the right of the waterfalls, and you'll see three doorways.
Door 1: Kara is trapped in the painting. Obviously, you're the one that has to get her out...
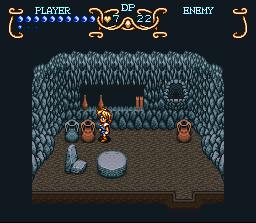
Door 2: Search the red pot on the left for a RED JEWEL.
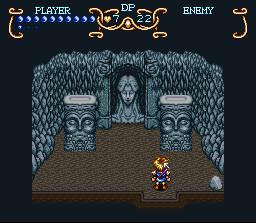
Door 3: Talk to Ishtar. Solve the riddles, you get Kara back? Okay, fine. Go on to the riddle section.
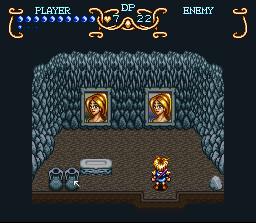
PART I: The jar all the way on the right changed color from brown to blue-ish gray.

PART II: The two jars in the bottom-left changed color.
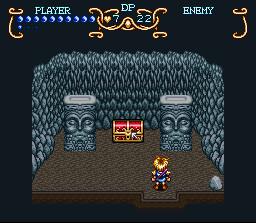
PART III: Open the chest in the first room, obviously. The contents have changed, so select the chest. Inside the new chest is a RED JEWEL, so get it before you continue.
PART IV: Your hair blows around, so select your head.
Anyhow, after solving all the riddles, go back to Ishtar's studio, and talk to the portrait (yup!), then open the chest for Magic Dust. Go back outside, into the first door, and use the Magic Dust on the portrait of Kara. Then, talk to the portrait. Will gets pissed, for reasons beyond my comprehension. Please don't e-mail me explanations. Talk to Neil to leave for the Floating City, also known as Watermia. (From now until the very end of the game, you can freely go back to places you've been before, including dungeons.)
WATERMIA
First, talk to everyone, then leave the house. To read Kara's diary, go to the left side of the raft that keeps the house you were just in afloat, and stand on the second plank from the top. Go right. When you're basically right above the ladder, press your TALK/ATTACK button to read it.
Go left until you reach a house with two pots in front of it. Go in. Talk to Lance, then his father, then Lance again. Then leave. Lance will cut in front of you. Go back to Luke's house (the place you started...) Lilly's birthday party progresses, and afterwards, Lilly and Lance go outside. Lance reveals his true feelings for Lilly, and Lilly runs away.
Okay, now exit Luke's house, go down to the next raft, and left to the next. Go down to the little mini-raft with 4 exits, and go left to the edge of the next raft. There's a woman surrounded by a bunch of pots. Search the upper-left one for a RED JEWEL. (Hint submitted by Drowsy Head)

Go back to the miniraft, and head right to the gambling house. There are three people facing downwards. The one on the left is the Jeweler Gem.

Anyhow, leave the gambling house, go to your inventory, equip Lance's Letter, and use it anywhere. Go back to the mini-raft, and go left. In the house is a Dark Space. SAVE! Now, go back to the mini-raft, and go down. Off to the Great Wall!