
 |
|
|
 |
 |
Fountain Head Walkthrough
Corak's Notes on Fountain Head:
In the days when Fountain Head was created Morphose was summoned to be its protector, but the Rat Overlord captured him and locked him in a magical cell, allowing the Moose Rats to run free in the town along with their allies that take shape from the green ooze. Morphose must be freed to lift the Curse of Ooze.
And there you have it... your very first quest, right at the beginning of the game: Free Fountain Head's guardian spirit Morphose from his magical prison.
Monsters in this area: Moose Rats, Bubble Men.
Map of Fountain Head:

![]() The Inn. The arrow in
front of the Inn indicates the party's starting position and facing.
The Inn. The arrow in
front of the Inn indicates the party's starting position and facing.
![]() The Blacksmith's Shop.
This shop sells mostly basic items, but the ninth item in each category is a random one.
Whenever the shop gets resupplied, this last item changes. These could be valuable magical
items, so be sure to check back often.
The Blacksmith's Shop.
This shop sells mostly basic items, but the ninth item in each category is a random one.
Whenever the shop gets resupplied, this last item changes. These could be valuable magical
items, so be sure to check back often.
![]() The Training Center.
You can train here until your characters reach level 10. After that, you'll have to
continue your training at another town.
The Training Center.
You can train here until your characters reach level 10. After that, you'll have to
continue your training at another town.
![]() The Tavern. When you
refill your rations here, you'll have enough food for 5 days.
The Tavern. When you
refill your rations here, you'll have enough food for 5 days.
![]() Raven's Guild. You can
buy only the most basic spells here, but you'll need membership first.
Raven's Guild. You can
buy only the most basic spells here, but you'll need membership first.
![]() The Temple.
The Temple.
![]() The Bank.
The Bank.
![]() The Magic Mirror. It's
behind a gate, so you'll have to bash it down before you can use the Magic Mirror.
The Magic Mirror. It's
behind a gate, so you'll have to bash it down before you can use the Magic Mirror.
If you don't know what things you can do at these places or how to do them, click here.
Next follows a list of the important things you should do in this area. Look closely at the map while reading this, so you can orientate yourself a little.
| The first thing you should do is pay a visit to the blacksmith, to upgrade your equipment. On the way there, you'll notice a small alcove to your left(two squares west and one square north of the Blacksmith's shop). There, you'll see a desk like the one in this screenshot. Approach it, and a man will ask you for 50 gold in exchange for Raven's Guild membership. Make all party members who can use magic Raven's Guild members in this way. | 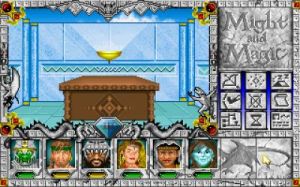 |
There's another desk two squares east from the Temple(this should be obvious, but you'll have to walk past the Bank to get there). On your way there, you'll notice a message on the wall stating that King Righteous is looking for Ultimate Power Orbs. When you reach the desk, a man there will offer you the Cartography skill for 25 Gold. You'll only need one party member with this skill(Sorcerers already have it), but if that person is put out of commission your automap will not be expanded. Therefore, you may want to consider giving the Carthographer skill to more than one person.
After visiting the cartographer, turn around and you'll see a door. Behind that door is another desk, where a taskmaster will offer you a job. If you accept, you'll waste a full week of game time for a lousy pay of 50 gold. I wouldn't bother with this unless you're really desperate for gold. The main reason that you shouldn't waste time is that, in this world, a week has 10 days, and a year has but 100 days. And since your Age increases by one every year(duh;), wasting so much time is not a very good idea.
When you come back from this area, you should notice a cryptic message on the wall: "The call of adventure is a call to roam; return again by saying HOME." What this message is trying to tell you is that if you say HOME at a Magic Mirror, you will be instantly transported back to Fountain Head.
Now, several options are open to you. You could try to bash through the gates in Fountain Head and explore further, but you're probably not yet strong enough to beat the enemies there. A better idea would be to exit Fountain Head for now, and build your experience in the Fountain Head Area.
Another thing you could do is visit the Arena. To do so, go to the Magic Mirror, and say ARENA when asked for your destination. In the arena, you can fight random opponents to gain experience, but beware that these enemies may very well be more than you can handle. Therefore you should always save before entering the Arena. For more information, check my Arena section.
When you've gained some levels, take another look at the map of Fountain Head. You'll notice an area in between the numbers 1 and 3 on the map, but if you try to go there, you'll find it's inaccessible; a wall's in the way. However, if you stand in front of the wall and you have a Gnome in your party(or if you skipped ahead and got the Spot Secret Doors skill for another party member), you'll notice the gargoyle at the right of the screen will start frantically waving its arm. This is to indicate the wall in front of you is a thin wall, one that can be bashed in. Bash the wall down, and...
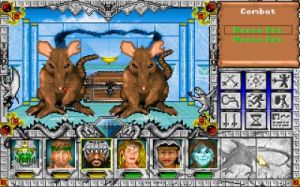 |
Two Moose Rats stand between you and a treasure chest. You're about to find out if you're strong enough! If you are, and beat the Moose Rats, have your Thief (I'll use that term from now on; with it I mean "Ninja or Robber") pick the lock on the chest and you'll find it contains 900 gold and a random item. |
A random item? Yes, in M&M III, there are many places where you can find random items. This is great for the game's replay value: You'll never get the same items, it's different in every game. The same goes for the shops: There are slots which are filled by random items, which change every time the shop is restocked, and are different every game. Usually, the more difficult the area, the better the quality of the random items. Of course, you can cheat: If you save the game before taking the item(s), you can load the game if you get unwanted items; you'll get something entirely different the next time you take the random item(s).
After getting the chest, save the game, then bash in any of the two remaining gates. You'll end up in a large room with 3 Moose Rats and a Bubble Man. If you can't beat them, load the game and come back when your characters have gained some more levels. After beating them, note the alcove in the room... there's a hole there. It leads to the Fountain Head Caverns. To go down a hole, you need to either have the "Rope and Hooks" item or the "Create Rope" spell.
There's only two rooms left to explore now; the two on the right side of the map. When you walk in that direction, you notice another message on the wall, stating that there's a reward for anyone returning Artifacts of Good to Castle Whiteshield. Remember that. Now, first take the smaller of the two rooms; the one that isn't blocked by a gate. It leads to another desk, where you'll meet Kranion the Skull Miser. He'll give you a quest: Find five Sacred Silver Skulls, which are scattered all over the isle, and bring them back to him. For every skull you give him, you'll receive 1000 gold, and all party members will gain 1000 experience points. When you complete the quest, he'll give you the password you need to pass a certain area in the Fountain Head Cavern. You'll still be able to give him skulls after that, for the same gold and experience reward. And if you bring him ALL skulls in the game, he'll tell you the password you need to raise the Fountain of Youth. But that's getting ahead of things.
The other door leads to the Storehouse, and it's barred with a gate for a reason: It's infested with Moose Rats and Bubble Men. There's at least 10 enemies here, so you'll need plenty of power before attempting this. If you're able to beat them all, you'll notice two chests in the back. Unlock them with your Thief. The left chest contains 2500 gold and a random item, while inside the right chest you'll find 500 gold, 25 gems and a random item.
This completes Fountain Head's walkthrough. After every walkthrough, I'll list all areas which you can directly access from the area which was discussed in the walkthrough. This doesn't include areas you can access by using the Town Portal or Nature's Gate spells, a Magic Mirror, or any other magical means. This way, you can browse through the different walkthroughs in order.
Adjacent areas:
| Area | How to get there |
| Fountain Head Cavern | Climb down the only hole in Fountain Head |
| Hidden Valley(A1) | Exit Fountain Head through the town gates |
|
|