
 |
|
|
Bosses
Detailed information on all enemies (including bosses) can be found in the Enemy Section. This section is only for boss strategies.
 |
|||
| As you might expect from a first boss, Creaking Skull is exceedingly easy. He has two attacks: A fireball, and swinging downward with his bone-club. When you see him gathering energy, you know he's about to shoot a fireball. Just duck to avoid it. When he brings his arm back, he's about to swing his club at you. Just back off (or use L to back-dash) to avoid it. In between attacks, keep wailing away and you should win easily. | |||
 |
|||
| The key to beating the Manticore is keeping your distance. If you do, all he can do is shoot fireballs at you, which can easily be jumped over. If you get too close to him, he can swing his tail at you, which can poison you. So, keep a safe distance and attack with a long-distance Bullet Soul. If you have the Giant Ghost Soul, you can activate that, which will reflect his fireballs back at him, making an easy boss even easier. | |||
 |
|||
| If you keep your distance from Great Armor, he won't be able to harm you at all. So the trick is to use your long distance Bullet Souls. If you don't like using Bullet Souls, or if you run out of MP, you should attack with the Whip Sword (or a longer-range sword if you're doing a New Game +...). If you're attacking with a sword, though, you'll be in range of Great Armor, so when he's about to attack, just press L to dodge backward. | |||
 |
|||
| To beat Big Golem easily, you need to fight defensively. Also watch his stride. He will either have his arm forward, or his leg forward. When his leg is forward, take the opportunity to attack it. When his arm is forward, back off, since it can't be damaged, but it can hurt you. When he moves his hand up to his face, he's about to vomit some rocks on you. Just back off to avoid them. When he crouches down, he will jab with his arm, again, easily avoided if you maintain your distance. | |||
 |
|||
| Headhunter's first form is ridiculously easy. All she can do to attack is swipe at you with a knife. Still, to be extra careful, try to keep your distance, but try to conserve MP. Hack away with your weapon and she should go down without any trouble. | |||
 |
|||
| Headhunter's second form is a bit tougher. She flies back and forth across the room in a wave pattern and she attacks with either fire or lightning. Neither attack is very hard to avoid. The trick is to stay beneath her, not directly beneath her, but a tiny bit to the side. When she attacks with lightning, just stay where you are, and it should miss you. When she attacks with fire, duck until the flames pass over you, then jump over them when they return toward you. Try to have a swinging weapon equipped so you can attack Headhunter from above without having to jump. | |||
 |
|||
| Headhunter's third form is the most difficult of all. Try to keep about a half a screen from her at all times. You want to be just out of range from her tongue attack and poison mist attack. When she does her tongue attack (and misses, since you've been keeping your distance), you can attack her tongue, which will cause her damage. Additional attacks can be made with long-ranged Bullet Souls when you have the chance. Fight defensively, and this fight will be yours. | |||
 |
|||
| Death's most dangerous attack is his small flying scythes. If you use the Giant Ghost Soul, you will not only be immune to these scythes, but you'll reflect the scythes back to him. The Buer Soul will is an OK substitute if you don't have the Giant Ghost Soul. Now just keep your distance and attack his large scythe when he throws it at you. When he begins flashing, start running away from him, and don't stop moving until he stops with his beams of energy. | |||
 |
|||
| You won't need the Giant Ghost/Buer Soul here, so turn it off to save MP. The trick here is to know how to avoid Death's attacks. When he throws his scythe quickly near the ceiling, wait for it to come back toward you, then double-jump over it. When he throws it at a medium speed at the center of the room (he will spin the scythe first to tip off this attack), you can simply duck under it. When he lunges at you with his scythe, you can slide at him, which will damage him and prevent you from being damaged. Keep avoiding his attacks and attacking him between his attacks and you shouldn't have much of a problem. | |||
 |
|||
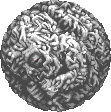
| Legion will begin the battle by chasing you around the room, so keep moving clockwise or counter-clockwise to avoid it. As you're running, be attacking with your weapon or Bullet Souls (Ghost works well since Legion is weak against Holy attacks, and is cost-efficient). If you stand on the second-highest platform on either side of the room, Legion will just hover above you, leaving you free to attack it without moving. As you attack Legion, bodies fall from him, be sure to defeat them too. His shell is comprised of four pieces, and as you defeat them, the core will be revealed. The core has three tentacles that shoot beams at you. Try to avoid these at all costs. When the core retracts its tentacles, that means it will start bouncing around the room. You can usually dodge this by ducking in a lower corner. You won't get Legion's soul unless you defeat all its core sections as well as the core, so keep that in mind too. | |||
 |
|||
| Hoo-boy, Balore is tough. He hits like a mack truck, and he's difficult to dodge too. Having the Claimh Solais really helps here, since it's powerful, quick, and attacks upward, making it easy to reach his eye. When Balore reaches back to punch with his hands, duck directly under his nose. Both fists should miss you. When he pounds you with his fists, he will always raise one fist before the other (his left). This one will attack first. Go to the left until his fist pounds down, then immediately move to the right to avoid his other fist. This takes some practice. Once you get his HP down to half, his hands will disappear, and he'll begin shooting beams from his eye, causing walls of fire to rise up. The beams can't hurt you but the fire can. Luckily for you, it's easy to avoid by double-jumping. | |||
 |
|||
| Castlevania vets should be familiar with this form of Graham. Since you'll probably want to have the "correct" souls equipped for this battle (check the Secrets Section if you dont know what I'm talking about), you won't have much flexability in your arsenal. But if you have the Claimh Solais, you won't need it. When he teleports, stand near him (close enough to reach him with the Claimh Solais, but far enough that you can react to his attacks) and duck. You should be able to hit him once before he attacks. If he launches fireballs at you, swipe with your sword to destroy him, then continue attacking. If he shoots two energy balls at you, duck the first one and jump the second (or vice versa), then attack him before he teleports away. If he launches many quick energy balls, just duck them all while attacking. Eventually, he'll teleport to the center of the room while spinning out energy balls constantly. These are easy to avoid. Back off when he launches three energy balls, then move in close to attack, then back off when he launches three more, and repeat. | |||
 |
|||
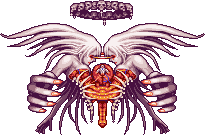
| Graham's second form is much tougher if you don't know what you're doing. The thing that makes this battle tough is the evil halo that shoots lightning downward. If you have a lot of patience, it's easiest to take it out first. Stay on one side of the room, and the halo will follow you. When he's about to get to you, jump up and hit it with your Claimh Solais. Now, slide under Graham and keep sliding until you get to the other side of the room (DON'T STAND UP WHILE DOING THIS), the halo will follow you, so repeat until it's gone. It may take a while, since the halo has 4000 HP. But with the Halo out of the way, you'll have nothing to worry about. After taking care of the Halo, slide under Graham's claws, and walk directly beneath the center of him (wait until the claws are out of the way), then duck. Keep ducking and attacking. The Claimh Solais should have just enough reach to hit Graham. Easy, huh? If you're really impatient, you can take out Graham without taking care of the Halo first, too. To do it the hard (but faster) way, stay between his two claws and use a long, swinging weapon (like the Claimh Solais). This way you can attack Graham without jumping. You'll need to be moving back and forth constantly to avoid the lightning bolts, and duck whenever you see a claw flash. | |||
 |
|||
| The first thing you should know about Belmont is that he's resistant to Holy attacks, so the Claimh Solais won't be much help in this battle. I like to use the Balmung as a substitute for this battle. If you keep your distance, Julius will have trouble attacking you. You can move in for a quick hit after he whips at you or when he's airborne. When he starts levitating, start walking away from him immediately, since he's about to do his cross attack. If you keep walking away, you should avoid it. After this attack, he will start using his subweapons. These can be trouble, but you should be able to avoid them if keep keeping your distance. If you have lots of Mind Ups, you may want to consider using the Death Soul for some extra offense. The Black Panther Soul is also handing for making quick escapes. | |||
 |
|||
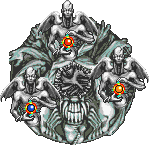
| Chaos is comprised of three pieces, and each piece seals one type of soul, so you'll have to rely on the good ol' Claimh Solais for this battle. You should take out the sections one at a time to get rid of them quicker. I suggest getting rid of the Blue or Red part first, since they are the ones that do damage. The Red one fires three crystals at you, and the Blue one transforms into some sort of beast that rushes at you. The Yellow one sucks away your MP, but since you're not using any Souls anyway, this doesn't really matter for now. The crystals can be batted away, but you'll need to double-jump or slide out of the way of the beast. Keep in mind that contact with Chaos doesn't damage you, only its attacks do. This battle's not too bad, just try to conserve your HP. | |||
 |
|||
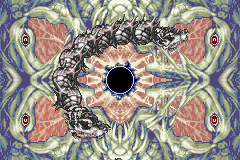
| This is it, the final battle! You'll have plenty to avoid, but nothing too difficult. To defeat Chaos, you need to take out its central core, but its defense is ridiculously high, so you'll need to take out the four eyes in the corners of the room first. For each eye you take out, Chaos' defense is lowered. The small orbs can be knocked out of the way by hitting them with your sword. When thorns appear around the core, they will shoot out in the same order as they appeared (if they appear in a clockwise fashion, they will shoot out in a clockwise fashion). If you're on the same side of the room as the first thorn to appear, quickly slide to the opposite side. If not, wait for the thorns to start shooting, then slide to the opposite side. The bone snake wandering around isn't too hard to avoid, neither is the big orb it shoots. Hopefully, you'll have plenty of Potions stored up for the battle. Take out the four eyes, then the core, and you'll be victorious. | |||
|
|