|
|
Bosses
 |
Lord Crump(1) | | 5 HP | Attack: 1 | Defense: 0 |
| Pathetically easy. If you have any trouble with this, you might as well quit playing the game right now... |
 |
Blooper | | 12 HP | Attack: 1 | Defense: 0 |
| The first "real" boss of the game. The thing you need to keep in mind is that all of its attacks have a Attack Power of 1, so if you defend, you won't take any damage from anything. Keep this in mind in the unlikely event of an emergency. Simply pound both the tentacles to get them out of the way, and the Blooper will drop to the ground, allowing you to attack it. You should be doing 4 HP of damage per round, so you should have little trouble taking care of this squid. |
 |
Gold Fuzzy | | 10 HP | Attack: 1 | Defense: 0 |
| The Gold Fuzzy is certainly not intimidating... it only has an Attack Power of 1, and doesn't even absorb HP. Plus it only has a measly 10 HP. It will soon summon a Fuzzy Horde, though, but that's no big problem, since it is also easy to block its attacks. Just keep attacking the Gold Fuzzy and the Fuzzy Horde will go away too. If you want, you can have Mario and Goombella guard each round, and attack by Super Guarding, which effectively makes you unbeatable (but may take a long time). |
 |
Red Bones | | 5 HP | Attack: 3 | Defense: 1 |
| The first thing you should know about the Red Bones (and its posse of four Dull Bones) is that it has a Defense value of 0, so Goombella won't be able to do any damage, so don't use her (unless you want to Tattle it). Also, have Mario use his hammer, not jump. The first thing you should do is take out the Dull Bones, so if you have a POW Block or Fire Flower handy, go ahead and use it. The Red Bones can build new Dull Bones, but only one at a time, so don't worry about it, since they can easily be defeated. If you defeat the Red Bones, but leave some Dull Bones alive, the Red Bones will revive after a round, so keep that in mind. You can even use that to your advantage... keep a Dull Bones alive behind the Red Bones and keep defeating the Red Bones for tons of Star Points over and over! |
 |
Hooktail | | 20 HP | Attack: 5 | Defense: 1 |
| The most crucial thing in this battle is to equip the Attack FX R Badge, which will cut Hooktail's Defense to 0, and will reduce her Attack Power by 1 for every time a sound effect is produced. To get her Attack Power to 1 as fast as possible, have Mario use Jump Attacks, which will make the sound twice. At this point, it's academic. When Hooktail's HP is reduced to 0, she will make a series of offers. If you accept any of them, she will bite Mario and cause 5 HP damage... so don't. After this, she will eat the audience and restore 10 HP. But her tactics won't be changed or anything. If you want to defeat her without the Attack FX R badge, use Koops as your partner, and use Power Smash a lot. |
 |
Gus | | 20 HP | Attack: 3 | Defense: 0 |
| How easy or difficult Gus is depends directly on when you decide to fight him. You can fight him as soon as you enter Rogueport, as he is guarding the eastern part of town, but it's recommended that you wait until after Chapter 1, so it'll be easier. It's not like you need to access that part of town before then anyway. In any case, jump attacks won't work, so Goombella won't be much help, all the more reason to wait until you can get Koops. If you challenge him earlier, be sure to have lots of Mushrooms on hand. |
   |
The Shadow Sirens (Beldam, Marilyn and Vivian) | 9 HP (Beldam)
10 HP (Vivian
12 HP (Marilyn) | Attack: 1 (Beldam and Vivian)
Attack: 2 (Marilyn) | Defense: 0 |
| The Shadow Sitens aren't terribly difficult, particularly if you upgraded Goombella. A normal attack from Goombella can take away 4 HP, and that doesn't even get into Multibonk. The Shadow Sirens will mostly just attack you, which does very little damage (although Marilyn does 2 HP damage). Vivian is the weakest, so she should be ignored first. It's better to go after Marilyn (who can charge herself up) or Beldam (who can use shrink and grow magic) first. Whichever one you choose, concentrate on that one until it's defeated, then move onto another one. When their HP gets below half, Beldam will start instructing them to use their magic, and when Beldam's HP gets below half, all surviving sisters will blast you. But if you keep your HP up, it's not a big deal. |
| [Picture Pending] |
Magnus von Grapple | | 30 HP | Attack: 2 | Defense: 1 |
| Magnus has a defense of 1, so Goombella won't be able to damage it unless she's powered up. If she is powered up, however, she is very effective. Mario should use jump attacks. Magnus normally just stomps on a party member, which isn't that big of a deal. Once you get him down to 20 HP, however, he will be able to release his arms to attack, and they do 4 HP damage to the character in the front. They only have 2 HP each, so get rid of them as soon as they appear. While the X-Fists are doing their thing, Magnus attacks with an earthquake, which damages both party members. The one party member who isn't very effective is Koops, since he cannot attack the X-Fists, and the earthquake will flip him over. Flurrie, on the other hand can float above the quake, escaping damage, and can blow away both fists at once, making her the party member of choice. |
 |
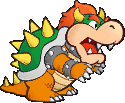
Bowser | | 30 HP | Attack: 3 | Defense: 1 |
| Bowser's battle begins immediately after the battle with the Dark Craw, so you may not be at 100%. But other than that, Bowser isn't that tough. All his attacks do only 3 HP damage, and only one of them (the fire) attacks both characters. He has a defense of 1, so you will be able to do more damage with your hammer than with your boots. Also, this makes Koops and Flurrie desirable if they're powered up. Koops can be flipped by Bowser's jump attack though, so be aware of that. Speaking of the jump attack, Bowser will take away a command from a character when he uses it, so adjust your strategy accordingly. Also, Bowser's bite sometimes causes poison status. If this happens, use Sweet Treat right away to cure it. |
 |
Rawk Hawk | | 40 HP | Attack: 3 | Defense: 1 |
| After watching Rawk Hawk destroy the Koopinator in a single blow, you'd think he'd be a bit more difficult than this. Rawk Hawk isn't that much of a threat at the beginning of the battle, but when you reduce his HP by 1/3, he adds a powerful swoop attack to his repertoire... When his HP is reduced by 1/3 of its max again, he'll gain the ability to hang from the ceiling, where he can shake various stuff on you, causing heavy damage, or even shake down Mushrooms to restore his HP! When he gets on the ceiling, get him off by attacking him as soon as possible! Flurrie is probably the partner of choice here, since she can easily attack him while he's on the ceiling. |
 |
Macho Grubba | | 60 HP | Attack: 4 | Defense: 0 |
| Macho Grubba is the ultimate master of powering up. He always uses an attack that allows him to attack twice in a round, and when he does attack twice, he uses a power up move, then an attack. His power up repitoire includes making himself Dodgy, raising his Attack and Defense and charging himself. His jump attack, however, only attacks one character for 4 HP, so it's manageable. Also, it's pretty easy to block. But you need to be aware of what power-ups Macho Grubba has at any given time, since they can greatly increase the power of his attacks. He has a defense of 0, so it's pretty easy to do damage to him. Multibonk and Power Jump are really helpful, especially when charged. When Grubba's HP is reduced by half, he'll add a punch that allows him to attack both of you at once, so be aware of that. Also, Koops has a tendency to get flipped in this fight, so be careful if you want to use him. I'd suggest just sticking with Goombella. |
 |
Atomic Boo | | 40 HP | Attack: 4 | Defense: 0 |
| Atomic Boo is an optional boss in Creepy Steeple. Fight it by spin-hammering the Boos in the lobby. By beating it, you get the Lucky Start Badge. Due to Atomic Boo's low defense, the partner of choice here is Yoshi or Goombella (with her Multibounce). Koops is the worst partner, since he can't attack and can be flipped over. The most difficult thing about Atomic Boo is that all his attacks hit both characters. When the Boo hides his face, you'll either know his next round is going to be a Boo-spitting attack that hits three times (3 HP, then 2, then 1) or a scare attack that can Confuse you. When smaller Boos start to circle you, the attack may immobolize Mario and his partner. If you're inflicted with immobolization or confusion, Sweet Treat can cure what ails ya. |
 |
????? | | 40 HP | Attack: 4 | Defense: 0 |
| This is the Creepy Steeple guy that's been turning everybody into pigs. He begins by only diving at a character, which isn't that bad of an attack. On his fifth round, however, he will transform into a shadow version of Mario. When he does this, though, he's even weaker, since he can hammer the front character for 4 HP damage or jump on a character for a piddly 2 HP damage. Defense isn't an issue, so wail away on him with your most powerful attacks and you should have no problem. (20) |
 |
????? | | 40 HP | Attack: 0 | Defense: ? |
| When you try to return to Twilight Town after your body gets stolen, you'll be ambushed. You can't do any damage to him, and he can't do any damage to you, so all you can do is run away. ...So run away! |
 |
Doopliss | | 40 HP | Attack: 4 | Defense: 0 |
| The third fight with Doopliss takes place at the same place as the first fight. Doopliss retains the attacks from his Mario form in the first attack, although sometimes he is able to hit twice with his jump. You begin this battle alone, but Vivian joins on the third turn. Doopliss is accompanied by Goombella, and if you defeat her, Koops, then Flurrie, then Yoshi, but don't attack them! You just need to defeat Doopliss to win (and besides, if you damage Goombella until she's down to her last 25% of HP, she'll start Multibonking... OUCH!) Concentrate on Doopliss and he'll go down quickly. (20) |
| [Picture Pending] |
Cortez(1) | | 20 HP | Attack: 4 | Defense: 1 |
| The first form of Cortez isn't particularly outstanding. He will attack the front character for 4 HP damage, then the rear character, then one of the characters 4 times for 2 HP damage each. But that's about it. Due to his defense of 1, Vivian (if super-powered) is probably the best partner, since she can do 3 HP damage, and cause burning status all in one round. Unless, of course, you'd rather multi-bonk with Goombella. Mario will be able to do more damage with his hammer than jump, due to Cortez' defense. |
| [Picture Pending] |
Cortez(2) | | 20 HP | Attack: 4 | Defense: 1 |
| Cortez' second form adds a few new attacks to the mix. He can still attack either character for 4 HP damage (this time as a headbutt), but he can also charge himself, raising his attack power by 4 for an attack. After charging, he will always throw bones at both Mario and his partner, which takes away 4 HP each (actually, 8 HP, since he's charged). Although a little more dangerous, your tactics should be the same as last time. If you plan on using Vivian again, the Veil attack is a good defense to when he charges himself up. |
| [Picture Pending] |
Cortez(3) | | 20 HP | Attack: 4 | Defense: 1 |
| Now Cortez is nothing more than a floating head, but he still has his four weapons. And they will each attack you, which basically puts you at 5 on 2. If you have Vivian upgraded, this won't be very tough, as Vivian's Fiery Jinx is able to destroy all weapons at once (as well as damage Cortez). The weapons will regenerate after a couple of rounds, so when they do, just hit them with another Fiery Jinx. Cortez himself will only be able to bite Mario or his partner for 4 HP damage, so he's a pushover with his weapons out of comission. After knocking off half his HP, he'll eat half of the audience, ala Hooktail, but that'll just be prolonging his inevitable defeat. (30) |
 |
Lord Crump(2) | | 30 HP | Attack: 3 | Defense: 0 |
| Lord Crump again! Crump himself hasn't gotten much more powerful since his last outing, as he can only attack the front character for 3 HP damage. But in this battle, he always has some X-Nauts on hand to lend a hand. The X-Nauts are in special formations, which gives them special attacks. At the beginning of the battle, there's a pyramid of X-Nauts that can attack the front character for 5 HP damage. After Crump's HP is reduced by half, X-Nauts will hang on the ceiling, where they can attack a character 5 times for 1 HP damage, or both characters for 4 HP damage. Destroying the X-Nauts just causes Crump to summon more, so just attack Lord Crump. When Crump's HP reaches 0, he will regain all his HP, and come back with another group of X-Nauts that will damage both characters for 5 HP damage each round! Again, you should just concentrate on Crump, so use a character that can attack from a distance, like Goombella or Vivian. (20) |
| [Picture Pending] |
Smorg | | 50 HP | Attack: 5 | Defense: 1 |
| He is one. He is many. Smorg doesn't attack directly, but he is constantly composed of tentacles, "miasmas", that attack for him. He begins with three miasmas, each with 4 HP, that attack one character for 5 HP damage each. Smorg is invincible while they're present, so take care of them. If you're got FP to spare, Fiery Jinx can take care of them in one fell swoop, but if not, Mario's jump attack can take them out one at a time, as can most ultra-ranked partners. When the miasmas are gone, Smorg's defense is 0, so pound away before he revives them. After you knock off the first half of his HP, he'll trade in his three miasmas for one big one with 6 HP. This one attacks both characters for 10 HP damage, so it means business. You can attack Smorg directly at this point, although his defense drops to 0 if you defeat the miasma. Or you could use a special attack like Earth Tremor or Art Attack to take out the Miasma and damage Smorg at the same time. (30) |
| [Picture Pending] |
Magnus von Grapple 2.0 | | 70 HP | Attack: 6 | Defense: 2 |
| The second version of Lord Crump's mech. As may be expected, this one's much tougher. Keep in mind that the character in front will probably bear the brunt of the damage in this fight, so organize your characters accordingly. Magnus 2.0 has high defense, so characters like Flurrie, Vivian, Bobbery and Ms. Mowz can do the most damage. However, Magnus 2.0, like its predecessor, launches its fists, which do a whopping 9 damage to the front character, and Bobbery and Ms. Mowz won't be able to reach them, and it's critical to take them out immediately. Furthermore, they're spiked in the front, so Vivian's Shade Fist is ineffective as well. This leaves Flurrie as the best choice for your partner, as she can do good damage to Magnus 2.0, but can also take care of the X-Fists. When its HP dips below half, Lord Crump will demonstrate the dirtiest trick in the book-he will have Magnus 2.0 suck up 20 audience members and spit them out at the front character. This attack does 3 HP ten times, so if you don't guard well, this can be up to 30 HP damage! Ouch! Keep pounding away, and taking care of the X-Fists, and you should succeed. (30) |
 |
Dark Bones | | 20 HP | Attack: 5 | Defense: 2 |
| The Dark Bones isn't much of a boss... it's basically a souped up Dry Bones, with 20 extra HP. It's also accompanied by 4 Dry Bones, which should be eliminated quickly. An Earth Tremor followed by Vivian's Fiery Jinx will take care of them nicely. Then just treat the Dark Bones as any other Dry Bones, and he'll go down quickly. |
 |
Gloomtail | | 80 HP | Attack: 8 | Defense: 2 |
| The older brother of Hooktail is certainly an intimidating presence, and he's not a pushover either. Most of the damage will be given to the front character (with chomp and stomp attacks that do 8 HP damage to the front character), so keep that in mind throughout the battle. Flurrie, Bobbery and Ms. Mowz all make great partners for this battle, as they can each do 4 HP damage with their basic attacks. Vivian does a good job too. I recommend Flurrie or Vivian, though, since one of Gloomtail's attacks doesn't hurt them at all (Vivian's Veil will come in handy as well). If Gloomtail poisons you with his breath attack, Sweet Treat or Sweet Feast can be used to restore your status. When his HP gets knocked down to 48, he will add a stomp attack which will damage both characters for 10 HP, but it's not much more dangerous than the Poison Breath attack (And it doesn't even harm Flurrie or Vivian). When his HP gets to 32, he'll add the ability to charge by 8 for his Megabreath attack. This adds up to a total of 16 damage for both characters, so you definitely want Vivian's Veil to help you avoid it. (25) |
   |
The Shadow Sirens (Beldam, Marilyn and Doopliss) | 30 HP (Beldam)
40 HP (Marilyn and Doopliss) | Attack: 5 (Beldam)
Attack: 6 (Doopliss)
Attack: 7 (Marilyn) | Defense: 0 |
| It looks like the Shadow Sirens have recruited Doopliss to take Vivian's place. Despite the fact that there are three opponents, this battle isn't too difficult, mostly due to their low HPs and lack of Defense. Doopliss will attack once as himself, then spend the rest of the time copying Mario or his partner's attacks. Marilyn can strike both characters with lightning or charge herself up, doubling her attack power. And Beldam can hit both characters with ice or attack with status ailments, such as poison, shrink/grow spells, or give her comrades extra attacks, or take them away from her opponents. Marilyn's by far the most dangerous, but Beldam's the most annoying and has the lowest HP. Take one of these two out first, then the other one, and finally go after Doopliss. If Marilyn charges herself, obviously, you'll want to have Vivian use her veil attack. As for Doopliss, what characters he attacks as depends on Mario's partner. Yoshi is the least dangerous clone (he only Ground Pounds, which hit 2-6 times, but do only 1 damage each, and can be easily blocked for 0 damage), and he can do good damage to the Shadow Sirens with his Ground Pound and Stampede attacks, so he's definitely the partner of choice for this battle. (48) |
| [Picture Pending] |
Grodus | | 50 HP | Attack: 7 | Defense: 1 |
| In many ways, Grodus is just like a beefed up Yux. He summons "Grodus Xs" to protect him just like Yuxes do. When he has 0 Grodus Xs, his defense is 1, but for every one he has, his defense goes up by 1. If he has all 4, he is invincible. Trouble is, he starts with all 4, and he summons two a round. Worse yet, the Grodus Xs attack too! So it should come to no surprise that using a partner that can take them all out at once is recommended. Vivian and Bobbery both work, but Vivian is more cost-effective. Other than that, Grodus isn't particularly dangerous, his most powerful attack is a lightning attack for 7 HP on each character. He can give himself the ability to counter direct attacks, so when he does this, remember to have Mario attack with is Hammer, rather than his jump, and have your partner adjust their attacks as well. Make sure he doesn't keep building up Grodus Xs, and this fight is nothing to sweat over. (30) |
  |
Bowser & Kammy | Bowser: 70 HP
Kammy: 50 HP | Attack: 7 (Bowser)
Attack: 5 (Kammy) | Defense: 2 (Bowser)
Defense: 0 (Kammy) |
| Like the first battle with Bowser, the toughest part about this is that you're directly coming out of a previous battle. Plus, this time, he's much meaner and brought Kammy along as well. Bowser attacks the same as before, but more powerfully, and Kammy attacks just as you'd expect a magikoopa to attack, with status-altering spells and blasts from her wand. It's advisable to take her out first, since she also has the ability to heal herself or Bowser for 8 HP, and with her low defense and HP, she will go down quickly anyway. With her out of the way, you will be free to wail away on Bowser himself. As before, Bowser can breathe fire, bite and jump, and his jump attack can still take away one of your commands. Also, if a character gets poisoned from Bowser's bite, Sweet Feast or Sweet Treat can take care of it. (30) |
 |
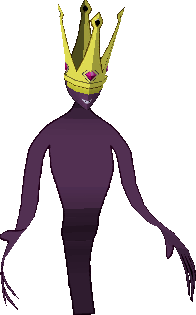
Shadow Queen(1) | | 150 HP | Attack: 7 | Defense: 0 |
| The first battle with the Shadow Queen isn't particularly difficult, just be careful. The most annoying part of the battle is when she raises her attack and defense by 3... when this happens, Ms. Mowz' Love Slap is useful in doing the most damage. Keep your HP up, but try not to use any items if at all possible. When you knock her HP below 90, her shadowy true form will emerge, and she'll become invincible. Just attack her for three rounds at this point, and the battle will end (Even though she's invincible, you must still attack her for three rounds). |
 |
Shadow Queen(2) | | 150 HP | Attack: 7 | Defense: 1 |
| Mario and his current partner's HP, Mario's FP, and his Star Power will all be refilled at the onset of this battle. This form of Shadow Queen is basically the same as the second form from the first battle, but with higher defense, and the ability to charge herself up. When she charges, switch your partner to Vivian and have her use Veil. Otherwise Mario and his partner will both suffer 14 HP damage. Ouch! If Mario or his partner are inflicted with a status effect via the Shadow Queen's Breath Attack, Sweet Treat or Sweet Feast can cure them (The Feeling Fine Badge can also be useful here). When the Shadow Queen has her hands out, Koops' Power Shell, Vivian's Fiery Jinx or Bobbery's Bob-ombast can take the hands out, preventing them from attacking for a round (which is especially helpful since they have the nasty habit of draining 7 HP and using it to heal the Shadow Queen). The Dead Hands should be ignored when they appear. Keep your HP up and you shouldn't have too much trouble with the Shadow Queen. |
 |
Bonetail | | 200 HP | Attack: 8 | Defense: 2 |
| Bonetail is the boss at the bottom of the Pit of 100 Trials, and as you would expect, he's rather tough. His stats don't lie... he's a more powerful foe than even the Shadow Queen herself... But he's still not too bad. As you might expect, Bonetail is like a beefed up Gloomtail, so expect lots of stomps, chomps and breath attacks, the difference being this time, instead of Poison Breath, Bonetail has breath that can freeze, confuse, shrink, or put you to sleep. Since most of his attacks only affect the front character, Mario can stay in the back and use another character as a meat shield. Flurrie works well for this, since she can keep recovering HP with Lip Lock. Of course, you can and should switch your partner often to utilize all their HPs, especially if you have the Quick Change Badge equipped. When Bonetail's HP gets to 50, he'll heal 20 HP, and he may do this again throughout the course of the battle, but at this point you should be able to beat Bonetail down. Seriously, the last 10 levels of the Pit were more difficult than Bonetail himself. |
|
|
(c)2006 RPGClassics.com. All materials are copyrighted by their respective authors. All games mentioned in this site are copyrighted by their respective producers and publishers. No infringement on any existing copyright is intended. All rights reserved.
|
|


