
 |
|
|
Serenade
Before you attempt to complete this
quest, make sure you have at least 100 chips in your Library, ecause
you can't do it otherwise.
Step 1:
Defeat teh Flamz0r
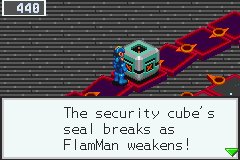
First thing's first, to get what you
need, you have to break FlamMan's security cube. All you have to do is
find his ghosts and kill them again.
 |
First you have to find the defeat the
ghost of FlamMan. He's at the right of Undernet 5. Take the warp-pads and then go up before the single arrow to reach him. he's invisible, so just step onto the last square at the edead end and you'll automatically battle. |
| After FlamManAlpha has been successfully
pwned, head to Yoka 1, and the large yellow water heater. Equip the Oil
chip in the customiser, and then run around. FlamManBeta appears
randomly, so you'll just have to bide your time and wait. |
 |
Before you approach Serenade's hideout however, you need to collect the Hammer. You'll find out why shortly.
 |
Now that FlamMan is totally
and completely deleted (for now anyway) head to Undernet 6. Remember
how to get there? The easiest and least confusing way is to go through
the hole DrillMan made in SciLab 1 and from there go down then right.
When you get here, take the large walkway on your left... |
| Then go back down the smaller
one on your left... |
 |
 |
Walk down, then go up the
first smaller one you come... |
| And finally go up past the
two that are side by side. |
 |
 |
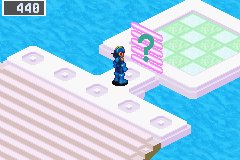
You'll grow to love this
message. |
| Continue along the path and
collect the WeapLV+1 program below you, then go back up towards the two
arrows pointing towards one another. Head across the first one, then go
down, then right, and finally right and up to get to Undernet 7. |
 |
 |
Go right at the square and
give the monster the fifty BugFrags it asks for (make sure you have 50
first). Go around the collect the Hammer. |
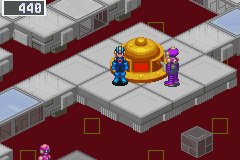
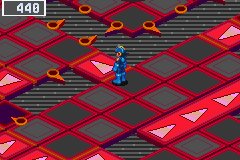
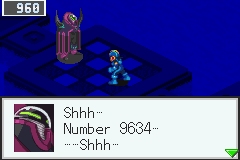
Prepare for pain. That's the only way to describe this place. It holds the baddest bosses and most annoying enemies in the game. It also holds (literally) infinite cool chips though.
The black statues are security systems, which you examine to 'hack' (fight). To beat them you have to destroy them with one hit, on the order of the numbers on them, so you need at leats three chips that do more than 250 damage before you even think of coming here. Try to make sure at leats one of them attacks diagonnaly (think V-Gun), and another attacks everywhere, or a close to everywhere as you can get.
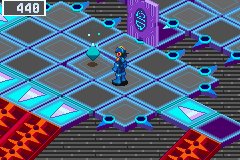
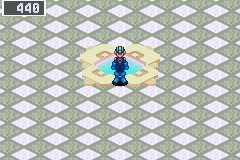
| Go to the Undernet server
beneath the baths in Yoka Inn and jack in. Examine the white hole in
the floor and after some spooooky effects you'll land in the Secret
Area. |
 |
 |
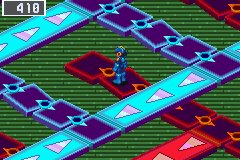
Head down-right and head along
the path. Keep going. The gate will only pass you if you have more than
140 chips Just before you make it to the next area
you'll be challenged to the first of the Secret Area's bosses; DarkMan. |
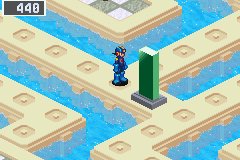
| When you've killed him, continue into the next area. If you keep pushing against the right wall here you'll find a path hidden under the second bridge which leads to some Zenny. Carry on down. The warp pad leads to a Cannonball * and a Chip Dealer. However, what we want is the green monolith blocking the other path. Remember the Hammer? You should. Examine the monolith and say yes, then prepare for pain. Stock your most powerful chips and healing before taking this endurance battle on. | 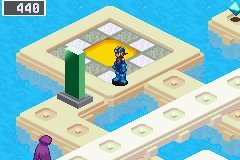 |
Pack only MegaChips that attack more than one enemy. PlantMan and ProtoMan are musts. Take plenty of Bombs and Cannonballs, and the best healing you have. Swords will be next to useless. TimeBomb seems to work well, as does Mine for the fast-moving enemies. Equip a lot of Attack, Speed and Charge programs in the Customiser as well. For the rest, go for firepower.
| Battle 1: Spikey3 Metrodo |
This battle won't be a
problem. Take out the Spikey3 first to stop it moving around so damned
much and shooting at you, then hit the Metrodo as it's on the floor. |
| Battle 2: Yart Deetle |
Still nothing too taxing.
Kill the Yart first to get rid of the damned annoying spiky yo-yo, and
then take care of the Deetle at your leisure. Watch out for the purple
panels, as standing on them will drain your health. |
| Battle 3: LowBlow |
The entire arena except for where you
start is death here. When he starts to use tornados, move. Being slowly
sapped is less deadly than being hit by three of these things. Use
whatever Long-Range you have to end this fight quickly. |
| Battle 4: StormBox Fishy3 |
Kill the Fishy3 first then go
for the StormBox using your Buster. Nothing complicated here. |
| Battle 5: Poofball Poofball |
ARRRGH, not these! Attacks
from the front won't hurt them at all,so I hope you remembered to pack
a lot of Balls (no laughing at the back). When they're on poison
squares they'll take damage, but they're recover when they're not.
Luckily for you their one attack only reaches one square in front, so
you'll be safe for a while.Plantman works well, as it'll hit them
whether they're shielded or not. Just hope for the arching chips to
come up before they use AreaGrab, and begin to kill you quickly. |
| Battle 6: Toto Metrodo BrushMan3 |
Kill the Toto first so his
fire attack won't stop you from moving across the rows. destory the
block if you have the agility and the patience to dodge the Meteor
attack and the BrushMan
turning the panels to fire aroudn you (if you have a Heat style this
won't be a problem of course, you lucky bastard), otherwise just plug
away and hope the right chips come around. |
| Battle 7: Yart BrushMan3 HardHead |
Ignore the HardHead and go
for the Yart first (the yo-yo again). if you have PlantMan then that's
deal with the HardHead instantly anyways. Avoid being caught by the
Yart and just shoot them. |
| Battle 8: Mashy Moshy |
Irritatinglittle mushrooms.
not only do these guys regenerate on grass, which much of the arena is,
they're fast. If you appears
nextto you, move. The attack only reaches one space in all directions,
so dodging isn't a problem. |
| Battle 9: Fishy3 Smasher |
The Smasher doesn't move, but
just pummels you. Avoid being caught by the crosshairs and shoot away
at the Fishy first, and this battle won't be much of a problem. |
| Battle 10: DemonEye Dominerd2 BrushManOmega |
The Dominerd has the annoying
trait of appearing in front of you when you use a chip, and so won't be
much of a problem. As soon as you shoot one of the other enemies, move
backwards quickly and fire again while it's attacking where you just
were. The Demoneye only fires down two lines identified by the balls
that fly from it, so it won't be much of a problem. This battle
shouldn't be too tough, so long as you remember not to get in the way
of the DemonEye. |
 |
|
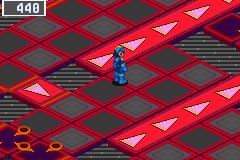
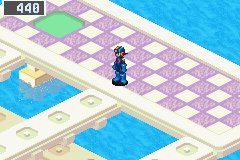
| Go up and keep hugging the
left
wall to pass across a hidden wakway. The gate will only pass you if you
have at least one GigaChip. Now, face the next boss on your way
to Serenade; JapanMan. |
 |
 |
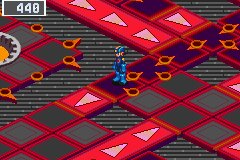
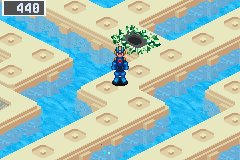
You're so close! Follow the
path
and hack/fight the security system to pass (You need a chip that
attacks one space up and another one right). Go down and say 'yes' to
the Monolith-breaking question, and prepare for another endurance test.
*sigh* |
| Battle 1: Mettaur3 Mettaur3 ErthJelly |
Jelly. Jelly jelly jelly.
Kill the damned jelly first before fires it all-columns attack, then
dispose of the Mettaurs as usual. |
| Battle 2: Pengon Shadow |
The Pengon will turn the
whole stage to ice if you wait too long, and if that happens it's
invincible. Kill it before this happens. The Shadow can only be harmed
by Sword attacks, and appears all around you, so try to dodge and hit
it when it's momentarily stationary. |
| Battle 3: Ratty3 Ratty3 Canodumb3 |
Kill the Ratty's first, as
they're far more dangerous. The projectiles they fire are just that
little bit faster than lower versions, and they have a habit of firing
at once. Luckily theres a hole in the midlde of your side, so if you
kill you, you can sit out the other's sttacks and wait for a homing
chip to come around. Otherwise do you best to dodge and hit them with
whatever you have. |
| Battle 4: N. 0-2 Trasher |
The little fella will just
stand on the front row and shoot illusions of himself at you, which is
easy to avoid. What you need to worry about is not getting caught in
the crosshairs of the Trasher, or your arena will disappear like that. The fact that most of the
arena is ice doesn't help either. Kill the N 0-2 before the Trasher. |
| Battle 5: Eleglobe Eleglobe |
An easy one. They stop moving
as soon as they end up in a square next to you. Make sure this happens,
then move one square backwards and pummel away in safety. A good tactic
if you start with some powerful chips is to move forward one space,
wait until the first Globe freezes to start attacked, then one one back
again. The first one's attack will miss, and the other will just ignore
you completely, letting you shoot at your leisure. |
| Battle 6: Slimest Slimest Trumpy |
If you think you can kill the
Trumpy before the Slimests block you off entirely, try it. Some
electric chips you be handy here. The Slimests will steal every square
they touch, so shoot them with everything you have if they get close. A
powered-up, speeded-up Buster can do amazing damage. The Trumpy makes
them invincible, so if you have some good ranged chips, kill it.
Probably you won't get the chance though before the Slimests steal your
first column. |
| Battle 7: Doomer Doomer |
Wait this one out. If you try
it hit them as soon as the first one fire's, you'll get hit by thr
second. Use the second or so you have when both projectiles have
disappeared to hit them. Nothing complicated. |
| Battle 8: Geelte Geetle |
When they fire, wait until just before the first bomb hits you
before moving, or the second or third lot will get you. They both fire
at the same time luckily, so there's no risk of behind trapped in a
wall of fire. |
| Battle 9: Momogre Heaviest Momogre |
Stay on the second row and
don't fire any chips. As soon as the Heaviest appears above you, move
backwards one and hit it with whatever you've got. This way the
Momogres can't hit you. After they're dead, go for the Momogres. If
you're lucky enough to get PlantMan, use that and it'll hit them
whether they're hidden or not. A good way to do it is to stand on the
upper-right square, then when one appears behind you dodge down then
back and hit him with a WideSword (you can just make it). This is more
awkward then hard. |
| Battle 10: Yart BlueDemon |
The BlueDemon will almost
never stand still. If you get ProtoMan, use it at once. The Yart can't
touch the backrow, so use that to hide in (beware though, the
BlueDemon's dagger form goes vertically). Kill the Yart first, then
just hold out for a Sword chip to dispose of the BlueDemon. |
| Done, thank Him. Go down past
the monolith and keep going down. |
 |
 |
Oh. Oh oh oh. The door here requires you to
have collected all 200 regular chips. Have you done this yet? No? Then
go back and do it! If you have plenty of BugFrags, check the BassGS section for an easy way to help this process along. Once you've got them all, you may pass. Go forth and challenge The Man. |
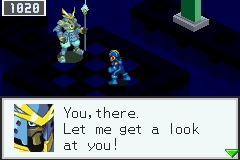
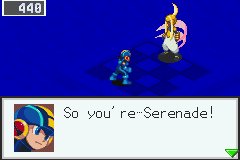
| This is not
the droid you're looking- oh, wait, he is. Huh. Fight Serenade |
 |
Congradulations, you're the new king of the Undernet. One more task awaits you. Finally, head to Undernet 7 (where you got the Hammer). You can now pass the cream-coloured curtain (collect the HPMemory here) and the solid blue door. Search around for some chips, then head up the final set of stairs for a GigFldr1 program.
|
|