
 |
|
|
Virus Breeding
Just before you go to fight DrillMan,
you'll see that the SciLab Virus
Lab has a brand-new electronic wizardry machine thingy in it's corner.
This is the virus breeder, and when you first see it it doesn't do much.
HOWEVER!
Dotted around the cyberworld are several groups of enemies that
only shw up on one exact square, and when defeated are downloaded into
the Virus Breeder. There you can feed them BugFrags. Feed them enough
and they'll get more powerful, giving you chips to call them
in battle, like MegaChips only these are normal ones, and therefore
with no limit to how many you can have in your folder. The chips you
receive are shown at the bottom of the page.
Basic
Virus Locations:
| Family |
Picture |
Location |
Tips |
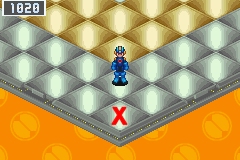
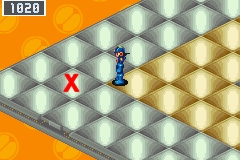
| Mettaur |
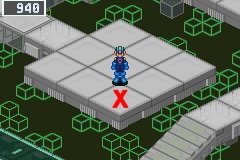 |
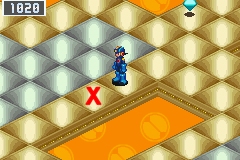
ACDC 1, on the other side of
the purple door. You need the WWW-ID from job 17 to do this. |
They're only Mettaurs. ^^ |
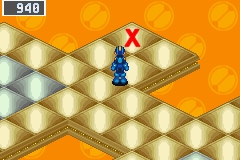
| Bunny |
- |
Complete Job 20 |
- |
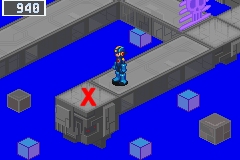
| Spikey |
 |
Go to Hades Island and jack
into the right Gargoyle. Go up. |
Not hard. Their only attack
shoots forwards so they're easy to dodge. |
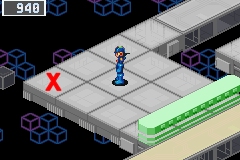
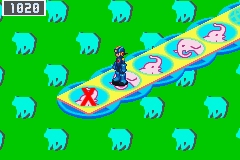
| Swordy |
 |
Go to Undernet 1 and follow
the blue path. Turn left at the end and stay on the blue path. Swordys
are at the very end. |
Again, not hard, since they
only use sword attacks. Kill them before they can use AreaGrab and
you'll have no troubles. |
| Jelly |
 |
When heading to the Undernet
entrance, turn left and go past the purple barrier instead of going to
the warp. They're at the end. |
Now it gets tricky. Since
they're only vulnerable when they're lower down and there are no
obstacles in your way, their attacks will hit you every time. Bring a
RockCube though and you'll have to trouble. Just pop out from behind it
and shoot them when they go low. Otherwise, use powerful Megachips and
long-range attacks. |
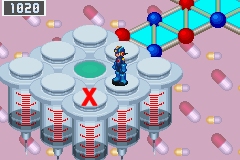
| Mushy |
 |
From the Cyberline in SciLab
2, go up the stairs and go left twice, they're at the farthes point. |
Bah to 'em. Take a good
number of fire chips and hammer away. Their attacks only confuse you
and do little real damage, and this doesn't affect your attacks, only
your movement. FlamMan is great here. |
| KillerEye |
 |
Go into the Principle's
computer, past the green Navi, and then walk along the big screen until
you find them. |
Too easy. The middle-middle
and middle-left squares are completely safe. All you have to do is
shoot them when they aren't looking in the direction you want to move. |
| Momogra |
 |
Go to where you fought
BeastMan in the Zoo comps. They're at the back. |
This one is considerably
harder than the others. It's basically a game of cat and mouse. Sit on
the first row of your area, and when one appears behind you quickly
dodge around him and smack him. It's real trial and error
unfortunately. The Meteor attacks work very well though. |
| Scuttlst |
 |
Head left from the entrance
to the Secret Area. |
Hard hard hard! All three of them have Auras
that need to take 100 damage before they break, and their attacks are a
bitch to avoid. The blue one throws blocks of ice along the row it's
on, the red one is like a FlamMan chip, expcet the flames follow you
across the rows, and the yellow one shoots you with bolts of lightening! Make sure you have a LOT of high-power MegaChips. ProtoMan, PlantMan and Kingman work well. the Meteor attacks will again come in handy. It's hard to make an effectie strategy against these guys. If you're lucky you may be able to chain PlantMan chips and Meteors. |
| Scuttlst 2 |
 |
(You must have all the other
viruses to do this) In secret 3, go down the small path to your right, and keep heading right. They're at the dead end there. |
The purple one fires a huge beam across the whole row every second or so, and the green one has the 'creeping vine' attack that PlantMan has. Both also have an Aura that can sustain 100 damage before collapsing. Just hit them with everything you have. If you got this far you should have learned to dodge attacks like this pretty well |
The
looting and
pillaging capturing phase is complete!
Feed your Viruses!
You can feed any one virus family up to
one hundred BugFrags. Talk to the green Navi and it'll let you
redistribute the food. You can take away or add 5 BugFrags at a time to
a Viruses' bowl using the left and right direction buttons, but the
number in all three Viruses' bowls can never exceed one hundred. The
more food, the more power that Virus has. A good combination is:
| Virus |
BugFrags
in bowl |
| Rank 1
(i.e. Mettaur) |
50 |
| Rank 2
(i.e. Mettaur2) |
30 |
| Rank 3
(i.e. Mettaur3) |
20 |
The sustenance phase is complete!
Once you've fed a virus family one hundred BugFrags, talk to the green floating Navi beside them and it'll tell you where their boss is. Now you gotta go find him.
Viruses Bosses
| Boss |
Picture |
Location |
Tips |
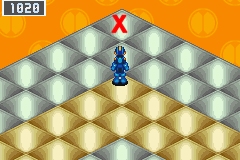
| MettaurΩ |
 |
ACDC school blackboard (your
class). |
Basically the same as
every
other Mettaur you've faced, with the exception that their wave attack
now cracks panels, so be careful where you dodge to. |
| BunnyΩ |
 |
Jack into the hospital bed
where Yai was staying (last door, 2nd floor) |
Just your standard Bunny,
only a little faster and more powerful. No surprises here. |
| SpikyΩ |
 |
Hear the exit to Zoo 3, at a
figure-of-eight walkway, go to the upper-right and they're at the last
square of the dead-end. |
Fast and powerful. If you
brought some CrosShlds, this is the place to use them. Activate them
when the fireballs comes flying towards you and chances are it'll get
bounced
right back at them. Otherwise use wide-effect chips like TrplBomb or
homing ones. You're bound to hit one
of them. |
| SwordyΩ |
 |
The Zoo warning bell. It's
behind and all the way to the left of the Panda cage, and not visible.
Just go right as far as you can and jack in. |
These guys will AreaGrab you
to hell if you don't hurry up. They have Sword, LongSwrd and WideSwrd
attacks, so kill at least two before all but the last row is taken from
you. High-power chips is the way to go here. |
| JellyΩ |
 |
Jack into the panel to the
left of the Yoka outdoor bath. |
Not as hard as it first
seems, because if the first one hits you, you'll still be staggering
(and thus invincible) when the next two pass over. Use powerful chips
when they're hovering low to the ground. That's it really. |
| MushyΩ |
 |
On the Hospital 3rd floor,
jack into the panel of the emergency stairs. |
Beware, this is hard. Unlike
before, the fumes do real damage. Use plenty of Ratton, Roll, PlantMan
type chips to home in on them when you're confused (and believe me,
you'll become confused). Just hope you kill them before they kill you. |
| KillrEyeΩ |
 |
Walk into but
not past the archway going into the SciLab Virus Lab and jack in to the
right-hand side. If you're in the right place you'll jack in. |
Now begins an interesting
game of dodge-the-rays. Move down to the bottom row a soon as you start
the battle to
avoid the top two beams, and hammer the bottom Eye with attacks. When
the Eyes
change direction (they'll blink when they do), move u to the middle of
top row to avoid the bottom one. Keep alternating
between this to avoid any damage. |
| MomograΩ |
 |
Where you fought BubbleMan. |
Yup. Same as the last time.
Just wait, then dodge. Remember that the back row is a totally safe
area if you need to think about what to do next. |
| ScuttlstΩ |
 |
After getting of the boat at
the WWW base, go all the way up
into a small pathway and jack in when you can't move anymore (you can't
see yourself) |
Surprisingly this is slightly
easier than the previous one. Since both of them only shoot beams
across a row, there's always one row that is safe. Each of them has a
200-damage strong Aura though, so make sure you packed plenty of chips. |
When used in battle, the enemy appears in front of you and cycles through all the viruses caught so far. The effect will change depending on which virus is selected. As you capture the boss or (in the case of the Scuttlers) more of them, more optiosns will appear.
| Name |
Picture |
Letter |
Inflicts |
Element |
Description |
| Mettaur |
 |
T |
? |
- |
Mettaur
wave runs along one row at varying speed |
| Bunny |
 |
R |
? |
Electric |
ZapRing
of varying power travels across row. |
| Spikey |
 |
E |
? |
Fire |
Fireball
flies forwards across row |
| Swordy |
 |
W |
? |
- |
Swordy
slashes in front of it. Effect varies |
| Jelly |
 |
Y |
? |
- |
Wave
travels across screen. |
| Mushy |
 |
H |
? |
Wood |
Spice of
varying power travels around all squares surrounding it. |
| Momogra |
 |
G |
? |
- |
Mole
appears and hits enemy one space in front of it |
| KillrEye |
 |
K |
? |
Electric |
Beam
flies in direction laser was pointing when button pressed |
| Scuttlst |
 |
A |
? |
All |
Varies.
Fire, Electric, Water, Wood and normal attacks all possible |
Congratulations.
|
|