
 |
|
|
Bosses
Although each boss requires
different chips or plans to dispose of it
quicker or while taking less damage, always keep moving.
Dodging damage of theirs is more important than the damage you can do,
so customise for
speed rather than power before you do battle. Often they'll be quicker
than you, so make sure you're ready, as they'll attack usually just
after they've moved.
| Boss |
Information |
|---|---|
 |
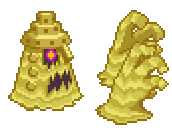
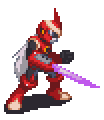
FlashMan HP: 300 Attacks: Neon Light (10 dmg), Spark Arm (15 dmg), Flashlights Weak against: Wood The only really difficult thing about this boss is that he's quick. Try to avoid using attacks that take time to reach the squares targeted (ie Minibombs, Shockwaves). Canons and Guns are the way to go here. Always destory the Flashlights as soon as he places them, or you'll be paralysed when they activate. Staying away from the first row will negate his Spark Arm completely, and Neon Light isn't hard to dodge if you're watching. If you want to risk it, when he leaps forward for Spark Arm, quickly rush in and slice him with your sword, which is still your most powerful attack right now. If you have the BambSwrd at this point, it will make your job a lot easier. This boss shouldn't pose any particular threat at this point, although you'll see him again later Prizes: Zenny |
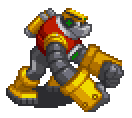 |
GutsMan HP: 300 Attacks: Shockwave (20 dmg), GutsPunch (30 dmg), GutsHammer (20 dmg) An easy battle. The Shockwave can be avoided merely be moving up or down a row, and the GutsPunch can be avoided by staying away from the front line. GutsHammer is a double-edged sword for the big guy. It weakens every panel, which means moving off them will make them collapse, but since the Shockwave can't travel over air, merely moving one space back will invalidate his only decent attack! Watch where you're stepping though, and avoid being trapped on the front row, where you'll be easy meat. Guns and Cannons are the biz here. Swords are a maybe if you want to risk his wrath and test your timing. You shouldn't have any real problems though. Prizes: GutsMan G |
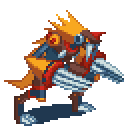 |
BeastMan HP: 500 Attacks: Beast Ray (20 dmg), Jumping Claw (20 dmg), Wild Rush (20 dmg) Weak against: Swords None of his attacks are particulary powerful, which is a Good Thing because this mother is fast. Again, no delayed attacks, stick to your Canons and Guns when he's zipping around. He'll use Beast Ray a lot as well, but this can be dodged by merely moving one square in any non-diagonal direction. After you deplete a good amount of health he's start doing the Wild Rush on yo ass. The only advice here is to move up and down madly, and you should dodge all three attacks. You can use the same tactic as for FlashMan if you're daring or lucky. When he jumps in front of you for the Jumping Claw, slash him with one of your Swords for massive damage. The GutsMan chips are great here, as they will break all his panels and leave him trapped for a while, to be attaced at leisure. if you're lucky enough to trap him on the front row, slash away with swords and watch how fast he dies. Prizes: Zenny |
 |
BubbleMan HP: 500 Attacks: Bubble Parade (30 dmg), Aqua Shot (50 dmg), Fish Missile (30 dmg), Weak against: Fire The biggest annoyance in this battle is the bubbles that rise all the time from the hole in the centre. They'll chase you around the arena if you don't destory them (one buster shot will do), so get 'em all. Ocassionally it will be a Fish Missile, so get ready to dodge as soon as you pop it. Fiddler Crab works exactly the same as Ratton, so wait until it's between square before dodging it. Mine floats towards you and blows up in a cross shape, so stay in one of it's diagonals and you'll be fine. When his HP gets low he's start using his Aqua Shot, surrounding himself with a bubble to stop you getting any attacks on him. A good trick here is to shoot all the bubbles floating around, shoot the one surrounding BubbleMan, and then use Cannons or Guns to hit him. It's not that difficult once you have his pattern down. He doesn't move into your own area like the previous two bosses, but he is hard to hit in the final stages of the battle. Prepare to be annoyed before he finally falls. Prizes: Zenny |
 |
KingMan HP: 800 Attacks: Knight (50 dmg), Pawn (30 dmg), Checkmate (50 dmg), Plan-B Tedious is the way to describe this boss. KingMan himself has no attacks. However, the knight and pawns will dog you like nothing else. The Knight jumps around the arena trying t land on you, and on top of that sends out a shockwave directly in front of it when it lands. The pawns slash the two spaces directly in front of them when you move onto their row also, making your life even more miserable. An easy tactic for this battle is to at first just stand on th back row and dodge the Knight, allowing you to take potshots at KingMan before the Pawns block you. Eventually he will use Plan B, and steal one row. The Pawns will move up, and then your life becomes difficult. At this point the Knight is jumping around and the pawns are slashing at you. So, what you do is this: Never ever stay in the middle row for any length of time. As the Knight tries to stomp you, move all the way down or up. This means the Pawns will have to adjust themselves, so they won't slash you. When the Knight prepares to stomp you, move back up/down to avoid them. Again, the pawns will move and not slice. Good weapons for this battle are, if you have it, the Lance (130 damage to the back row makes this a guarenteed hit) and anything you can fire fast. Guard will be mostly useless, so pack a few heals. Any kind of sword will be useless. You have been warned. Now all you have to do is keep up the regime of move-shoot-move-shoot. If you time it right the Knight will miss and the Pawns won't have a chance to slash you. Balls it up and be ready for a world of pain. Perserverance is this boss' watchword. Prizes: Zenny |
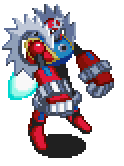 |
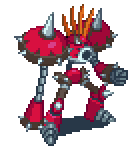
MetalMan HP: 500 Attacks: Metal Wheel (20 dmg), Metal Missile (20 dmg), Metal Fist (80 dmg) Annoying rather than hard. The buzzwheel spinning through the centre row will cause hell with dodging. Metal Missles are easy to avoid, as the ground will flash yellow before they hit. Metal Wheel spins around the outside squares of the arena, which means sticking to the centre of the anrea will make is miss entirely (just watch out for that buzzwheel). metal Fist only ever comes into play if you go to the front row. Easier than KingMan. Dodge the Missiles and Wheel to your best ability. Cannons and Shots are a must. Bombs are only a slightly better bet than last time, so if you're gonna use them, do so just after he moves. The Gears in the centre of the arena can be destroyed if you have the BrakChrg program, and they won't return once gone, so get rid of them if you can. Swords are back in action for this battle as (still) some of the most powerful weapons you have. Moving to the front row and trying to anticipate whether he'll try to punch you is risky but pays off massively. Prizes: MetalMan M (if you're lucky) |
 |
DesertMan HP: 800 Attacks: Lion Head (40 dmg), Arijigoku (40 dmg), Heavy Sand (60 dmg) Weak against: Water (doesn't do any extra damage, but does slow him down) Annoying annoying ANNOYING! DesertMan will hide behind two small sand pillars, stopping you from hitting him with anything other than Bombs or Waves. The two hands will follow you and constantly rush at you in Lion Head form if you're on the same row as them, forcing you to move every few seconds. He'll also create small Arijigoku sand whirlpools on the ground randomly which limit your movements even further, and after you've knocked off a decent amount of HP the hands will begin to fall from the sky onto you (Heavy Sand). Add to this the second that DesertMan is hit he moves away, and you have the worst boss so far. Luckily, everything can be blown up. If you have the patience, you can blast away the hands and pillars with a lot of MegaBuster shots. Or, if you have the spare chips, with anything that comes to hand. The hands will regenerate after a few seconds, but the pillars won't re-appear until both are destroyed. If he goes onto the back row and you're blessed enough to have Lance, use it. Likewise with Swords and the front row. If you have a TimeBomb, use that as well. None of his attacks are paticulary hard to dodge, but he will cause damage over time if you're not paying attention. Get out any Water chips you have before you fight to stand the greatest chance. Prizes: Zenny |
 |
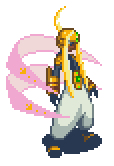
PlantMan HP: 1000 Attacks: Rose Needle (50 dmg), Plant Weed (40 dmg) Weak against: Fire Pack lots of projectiles for this one, cause swords aren't gonna help ye. The Rose Needle is a cinch to avoid. There's enough of a delay before he fires for you to get out of the way. It's when the Plant Weed appears that things begin to get harder. This thing snakes through your panels chasing you. If it touches you it locks on hard and won't let us for a while, letting PlantMan get in some free shots. The best way to avoid it is to move at the exact moment the point touched re-enters the ground after coming up. That way it'll go to the square you were just at rather than the one you're going to. IT also won't move diagonally. After most of his HP is gone he'll sprout two flowers on your side, which will periodically fire pollen on you. The red one confuses you and the yellow one slows you down. Add to this the fact that those damned viones are chasing you, this is a pretty chellenging boss. Fire chips are a must, as this guy will take double damage from them, and you should have a ton by now. Pump him full of HeatShots and he'll fall a lot faster. Best advice is to pay attention to the ground a lot, as since you're always moving the Rose Needle wil rarely connect. Destroy the flowers as soon as they appear, and use your most powerful Mega chips and guns, and he won't stay standing long. Prizes: Zenny |
 |
FlamMan HP: 1000 Attacks: Fire Blaze (60 dmg), Chaos Flame (60 dmg) Weak against: Water The first thing you should notice when you start is the two candles behind FlamMan. As long as at least one of these is lit green he can't be hurt with normal weapons. If the candles glow red he will slowly recover HP, and if they glow yellow he will create the Chaos Flame, two balls that circle the outside 8 squares. Shooting the candles a few times will put them out. always deal with the yellow one first. Fire Blaze is pretty easy to dodge at the start, as it merely covers one row in flame. Near the end though it spreads out like a fan, covering first one square, then the next three, then all the rest, so you need to be next to the first square on fire in roder to dodge the rest. Apart from that it's pretty straightforward. Water chips are his weakspot, so pack plenty of them, and Electric types also work well for stunning him in place, allowing you to plug him with something more powerful while he's paralysed. A nice tip is to use the Boomer chips. These will take out both candles at once, and if FlamMan is between them it will damage him also. Prizes: Zenny |
 |
BowlMan HP: 1000 Attacks: Gatling Pin (40 dmg), Bowling Bomber (40 dmg), Tower Bowl (40 dmg) Luckily, this guy's attacks are fairly predictable. when he holds out an arm to use Gatling Pin, get ready to move side to side a lot as bowling pins fire across all rows. They move pretty fast, but you can still dodge them if you're good. The three-stage Bowling Bomber is annoying as hell. First three pins raise from the floor, then he throws a ball at them, and then if any were knocked over they'll fly through the air, and any that hit will cause damage. Use Invis, Mole and Shadow chips to dodge a lot of the damage he would inflict, and use CrsShld when he uses Gatling pin. Thi will not only protect you, but hurt him also. PanlOut will stop him using his Bowling Bomber, and the pins he lays will in fact be knocked away by his own Gatling Pins. Prizes: Zenny, Rank |
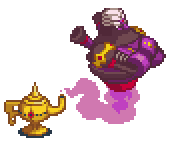 |
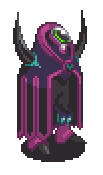
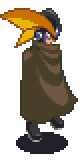
MistMan HP: 1000 Attacks: Demon Tackle (40 dmg), Misty Poison Smoke (12 dmg per second), Misty Poison Punch (40 dmg, Soul Gengar (20 dmg) Weak against: ? You have to attack the lamp, not MistMan himself, to cause any damage. Demon tackle throws out a lamp that travels towards you. When the lamp reaches you, said demon pops out and punches you. The Misty Poison smoke isn't very damaging so long as you avoid moving into it for long, so onl go in it if you have a clearer shot or you need to dodge the Tackle. The Punch causes smoke to appear to the left and right, and then demons shoot throgh the row. Since the smoke is less damaging than the punch, move through it to avoid the punch. Gengar is similar to PlantMan's Weed, as two ghosts will start to chase you through your area. They paralyse you when they touch you, leaving you wide open for an attack, so watch it. Good chips to take are, basically, anything big and powerful, to get it over with as soon as possible. AreaGrab will stop him from limiting your movement, and chips like Bomb and BlkBomb will fly over the demon and damage the lamp. Ratton chips are also useful in the opening stages, before he claims areas from you. As with most bosses in this gane, the faster you move the better off you'll be. Prize: Zenny |
 |
DrillMan HP: 600 Attacks: Drill Drive (80 dmg), Panel Crusher (80 dmg), Triple Hole (80 dmg per hit) The first thing he'll do is fly into the air then start doing his Drill Drive. Basically three drillbits will fire across an entire row, and only one of them will be DrillMan. He's invulnerable from the front for the entire time (thought it was gonna be easy eh?), so for this battle pack a lot of wide-effect swords and anything else that fires backwards or effects more than one square. When three holes appear at once the'll start to fire unbreakable drills at you. Just dodge these. When flashing yellow panels appear, move, as a few seconds later three drills (again, one of them DrillMan) will break through. A few seconds later some stones will fall on three more, so watch for the falling shadows. Bring a lot of wide-effect chips, like WideSwrd. If you have the BrakChrg program for the customiser, use it, and when he's stunned use chips like Plantman and Roll to hit him. AirShoes is also useful for stepping over the chips he breaks. Prizes: Zenny |
 |
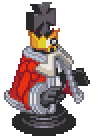
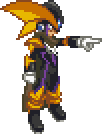
ProtoMan HP: 1000 Attacks: Sonic Boom (100 dmg), WideSwrd (100 dmg), Fighter Sword (100 dmg), Surprise Sword (100 dmg), Shield. Weak against: - His most-often used attack is to throw two Sonic Booms across the arena, one after another, then follow this by leaping into your field with a WideSwrd attack or staying on his side and using the Fighter Sword (basically a LongSwrd). If they only fried on the top or bottom rows, move very quickly to the opposite side. ProtoMan will also use his shield a lot to block incoming attacks.. If you hit his shield; he will counter it and end up by appearing behind you and hitting you with the Surprise Sword. Watch out!! Though the Pawn Chip will stop the Sonic Boom attack, it won't stop him from coming behind you and use his Surprise Sword. You can really use some Pawn chips in this battle. Put them in the center row of the field, so they're on his side. This will block his Sonic Booms, since they need two rows to travel through to reach you. Bring PlantMan, Roll, Ratton3, and anything else that homes in on him. Prize: ProtoMan B |
 |
Punk HP: 800 Attacks: Mad Roller (30 dmg), Shield and Chain (30 dmg), Double-Go-Round (30 dmg) Weakness: - At this stage of the game this guy should cause no trouble for you. Mad Roller either acts like a Ratton, running along the bottom of the stage, then up through you, then back to his side of the arena, or he waves up and down across all the rows like Serenade's Saint Light. He's invincible while he does this as well, so don't attack him. Double Go Around sends too spinning-tops after you like the Mad Roller, and then Punk jumps to in front of you and slashes. The best way to avoid this is to move up as he does them then dodge down or up away from his slash. If you throws his arms back while he's shielding, an arm will appear on your side of the field to attack you. Bring LavaStge. Since he moves around a lot he'll lose almost half his HP to one of these. A Pawn placed on his side of the field will also stop his Mad Roller attacks dead. AreaGrab will give you a lot more room to move in. Then just hammer away with powerful homing chips. PlantMan, Roll and Ratton3 will make sure he dies fast. Prizes: Zenny |
 |
DarkMan HP: 1400 Attacks: Flame Tower (100 dmg), Killer's Beam (100 dmg), Ice Wave (100 dmg), Dark Shadow (100 dmg), Black Wing (50 dmg) Weakness: - First annoying trick; every time he moves, his color will change. The color he is determines which element attack he will use. Unfortunately, he does not change Elements himself, so he doesn't have a weakness. All the moves he uses are the same as one used in the game by another enemy, so you'll know them all by now. The Flame Tower is the same thing as FlamMan's Fire Blaze attack, The Killer's Beam is the same attack that the KillerEye viruses have, and the Ice Wave is the same attack that the Pengi viruses have. His own moves are much harder to dodge however. The most annoying attack he has is the Black Wing, which opens up three portals on your side of the field, disgorging bats which fly at you and knock you silly. The portals will close after a set period of time, and it's fairly easy to dodge the bats, but while you're trying to dodge them chances are he's going to use his other attacks on you. DarkMan makes use of the Dark Shadow attack, which appears in front of behind you and slashes one space horizontally, so dodge up or down or hit it with a sword attack. Put some AreaGrab chips in your folder before going into battle, and make use of them. This not only give you a safe zone for the Black Wing attack, it will also allow you to move closer to DarkMan so you can hit with some powerful chips. DarkMan himself isn't as fast as most bosses, so chips like M-Cannon and Bombs shouldn't have that much difficulty hitting him. Prizes: Zenny |
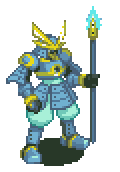 |
JapanMan HP: 1600 Attacks: Thousand Spear (100 dmg), Spinning Reflect (150 dmg) Straight Spear (150 dmg), Backup (100 dmg) Weakness: - First thing's first; the Thousand Spear attack covers the right two columns on your side of the field, so step back into the leftmost column to dodge it. The Straight Spear can hit you all the way in the back, but it shouldn't be to hard to see it coming and sidestep before it impacts. Spinning Reflect comes into play if you dare fire your MegaBuster at him. It'lll reflect the shot right back at one. Sometimes he doesn't use it, but don't risk it. Only use your buster if you run out of chips The most annoying move is Backup, which summons what look like litle ninjas to run at you. It's slow and it's easy to dodge, but your panels will be stolen, so kill them as quickly as you can, or be left a sitting duck. Stick to the back row in the beginning, and step in with wide attacks when YamatoMan tries to use his Straight Spear on you. Try to save your good chips for later on so you can finish him quicker. When the Backup appears, use some panel-destroying chips in the leftmost column so you can keep those little guys away. Bring your most powerful chips for this one, and kill him quickly. Prizes: Zenny |
 |
Serenade HP: 2000 Attacks: Sonic Boom (100 dmg), Saint Light (100 dmg), Holy Shock (100 dmg) Weakness: - Don't expect an easy ride. Any attack you fire at him, he'll merely bounce back at you as a Sonic Boom. The Saint Light acts like an Ice Wave, except it wander across all three rows as it wobbles towards you. The Holy Shock shakes the entire screen and cracks panels on your side, and hits the panels randomly for 100. Make sure you have the FolderBack chips, because you're so going to go through the entire thing. When he's using Holy Shcok is the only time you can hit him. Use your strongest chips you you can knock him out of it, because this attack can destroy you quicker thn you can imagine. This battle is going to last a long, long time. PlantMan is, as he turns out to be for most battles, a great chip. It'll hold him there for a few seconds, so you can get him with a few good chips. Bring more than one version of him, and you will love him before the battle is over. Bombs and anything else that flys over attacks will work, as will Ice Wave, if you stand on the highest or lowest panel at the front, as they wobble down and hit him. Most of this battle will be spent dodging Saint Light, so bring some healing chips for after Holy Shock. Never shoot him, ever, with anything, when he isn't using Shock, and keep as much parience as you can, because this battle ain't short. Prizes: Rank 1 |
 |
Bass HP: 1000 Aura: 100 Attacks: Air Burst (100 dmg), Explosion (100 dmg), Breaker (100 dmg) The first thing you need to know is that the aura can only be destroyed by an attack that deals over 100 damage, so you can't even start touching him before you do this. Load up your folder with all the high-power chips you have and some strong healing ones. Swords, especially StepSword, is a good idea, as he moves around the rows a lot, so you can get in some good hits here. Air Burst fires across a whole row, so is easily dodged, but it can travel across empty ground, so beware. Explosion is like Shockwave, except he fires masses of them across all rows, leaving little room to dodge. Do your best, but sometimes all you can do is take the hit. Sometimes he'll use Breaker, where he flies into the air and comes crashing down on you, destroying the panel you were on the and the ones above and below it. There's not really much advice. If you have a lot of HP you can try and take him out with slower-moving weapons when he pauses to use Shockwave, or you can use faster chips like Ratton to take down the aura and then use Megachips to deal some damage. Generally though try and pack more than one powerful chip in one turn, then wait until your Custom guage is almost full before attacking, so you can quickly re-tool up and attack him before his aura reappears. Prizes: Nothing |
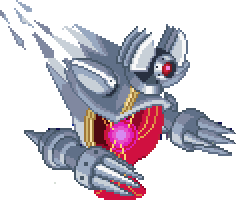 |
Alpha HP: 2000 Attacks: Devil Hand (50 dmg), Red Eyes Delete (80 dmg), Reverse Vulcan (20 dmg), Alpha Arm Sigma (60 dmg), Alpha Arm Omega (100 dmg) Big and hard. The only way to hurt this guy is to destory the armour guarding the core, and the only way to destory that is to do over 80 damage to it with whatever you have. It also regenerates, so if you hit it some, and then stop, it'll return to normal. A pain. The most common attack he'll use is the Devil Hand. One arm will appear at the tp and sweep down an entire column, and after that the other will sweep across an entire row, so you have to dodge one and then move to dodge the other, and he'll do this a few times in a row before he stops. Red Eyes delete is more predictable; it fires at the centre-left square, will crack that one and the three that are adjacent to you, and send a shockwave down the middle row, so all you need to do to avoid it is move to the back and either side. Reverse Vulcan doesn't do much damage, but damn it's fast and persistant. When this thing is working don't stop moving or your HP will start to drop like a shot. The Alpha Arm Sigma lightning attack alternates between lighting up the top and bottom rows then the middle. Keep moving, or use some Invis chips to just let it go through you if you have them. The Alpha Arm Omega attack projects a pillar of lightning that alternates between the middle row, then the two outer rows. To dodge it just move up and down across the middle and top-bottom row. A good strategy (if there is one for this boss) is to load up on multiple-hit chips. This way you can expose the core and do some damage, and the you can open up with your better ones and some Megachips. Bring the better Recover chips, because you will need them.Homing ch Prizes: You won the game! What more do you want? |
 |
BassGS HP: 2000 Attacks: Explosion (300 dmg), Airburst (100 dmg), Earth Breaker (300 dmg), Gospel Cannon (300 dmg), Shootng Claw (300 dmg), Banishing World (500 dmg) Basically, he's the man. All his attacks do mega-damage. Airburst and Earthbreaker are familiar from Bass. Shooting Claw summons two claws to fall onto panels - luckily the targeted panels flash yellow - and then rushes forward and shoots fire at you with Gospel Cannon moving outwards (first covering just one square, then three). Banishing World will only be used when he's really low on HP, but will hurt a lot if it hits. All you can really do it hope you have an aura to deal with it (remember, an Aura will still absorb the whole attack even if it disippates). Bring a lot of your most powerful chips, and FoldrBak. CrosShld is great against Airburst, it'll reflect back and hit him for his entire aura, allowing you to lay into him with Megachips. Make sure you have a lot of HP (over a 1000 would be good) and pack as much power into your folder as you can. If you have it, make sure you equip as many MegaFldr programs as you can in the customiser to shove in more Megachips. Breaking past the Aura is the hardest part of killing BassGS. Bring as many NrthWinds as you can to dispose of it. PlantMan, Roll, FlamMan are good for when you're disposed of the aurs and need to hurt him. Use any powerful Program Advances you have the chips for. Rewards: Bass+ X/Bass X, and you earned it. |
|
|