
 |
|
|
Walkthrough: Final Chapter
Intro / General Outline
First pick your lead character. The basic difference that makes is that you're stuck with him through the entire chapter, so pick someone you like! I recommend Sunset, since he's so hard to get and so useful. I recommend against the Shinsanken inheritor, merely because a bug in the translation patch prevents you from seeing the names of items you pick up. ^^;
You'll be sent to either your chapter's ending sequence or a sequence just after it. You'll be teleported to a completely dark place. Keep walking down for half a minute or so and you'll bump into a staircase. Go down to the lower part of it and walk up and you'll be transported to a slightly changed version of the Medieval Chapter map.
OK. You can get up to four of the seven main characters into your party at any time, but you can swap them out if you wish. In fact, to get the best ending you have to take every character into your party at least once. Each character has a spot where they "hang out". That spot is where he'll be if he's not the lead, and the same spot is where you'll start if he is the lead.
You'll be attacked randomly by enemies as you walk through the world map (like the medieval chapter). The enemies you meet at the start of the chapter seems to be slightly dependent on who is in your party (you can meet any enemy, but the randomness seems to be weighted somehow). The enemies will get stronger as you get more characters in your party and as you level up.
Each character has his own dungeon to get through; at the end is his best weapon. Usually there aren't any bosses in the dungeons. If you're only planning on beating the final chapter once, I recommend taking in all the characters at one point or another and doing all the dungeons! Especially because seeveral of the "best weapons" can also be equipped on the left arm of other characters and they usually have awesome stats. 8-)
Here's my recommendations for your party: Definitely have Cube (hope you gave Akira some of those accessories!) and Sunset in your party. As for the other two, it depends on how much you leveled them up in their previous chapter. Pogo, Oboro, and the Shinsanken inheritor can all be good. Masaru and Akira tend to be a bit more useless than most characters, though.
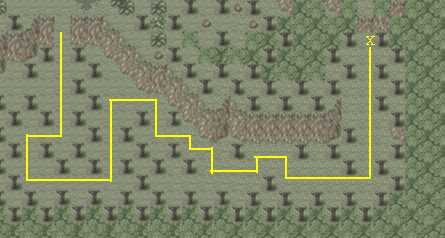
GENERAL OVERWORLD MAP (click a link to reach a pictorial map of the area):
                 Lucretia Castle
                     |
      Mountain   Lucretia Town
           |         |
           -----------            Forbidden Land
             |                       |
 Famillia -----------------------------
                  |
                Glen
LUCRETIA CASTLE MAP:
      Left Bedroom -- Throne Room -- Right Bedroom
                           |
                       Stairs Down
                           |
                         Balcony

         -------------------------------------

                       Stairs Up
                           |
                       Courtyard
                           |
                Prison -- Hall -- Treasure Room
                           |
                          Exit
Depending on what items you took in the Medieval Chapter, you can find treasure inside the castle and Forbidden Land. (In other words, if you took it then, it won't be here now.) Here's what you can get in the castle (see Forbidden Land for the treasure there):
PRISON: Defender
TREASURE ROOM: Amegist Shield x3, IzanagiScroll x2, UnicornHorn x2, GatsunGlove, Kasuteira, HugeMeatbone, GenjiGlove, GenjiSocks, ArcShineSword, MarvelSword, GenjiHelm, NightmareHlm, SilverDress x2, GenjiArmor, PotionNo9, Peach
LEFT BEDROOM: UnicornHorn, HolyArmor, MarvelSword, AmegistShield
RIGHT BEDROOM: ParasiteSwrd, SilverDress, UnicornHorn, IzanagiScroll.
And here's where the locations are of the characters. I'll assume that you *don't* have the character as your lead, because there's some extra conditions to meet if he's not.
- Akira: In Famillia Village. You can choose to fight him (choose the first choice) or not (second choice).
- Cube: There's an object just south and to the right of the gravestone on the mountain. (If you're Pogo, it's a ????; Oboro/Sunset/Shinsanken instructor: IronBox; Akira: Battery; and Masaru: Parts.) Take it to the balcony on the castle and use it on Cube.
- Masaru: He's in the prison in the castle. If your lead is Cube or Sundown he'll join automatically; otherwise he'll fight you first.
- Oboro: Examine the sign south of the Forbidden Land. You have to beat him for him to join.
- Pogo: He's in the southern glen between Famillia and the Forbidden Land. He'll hide in the trees three times; snoop around to find him (if you're using ZSNES, press the "2" key to reveal him!). After you find him for the third time, chase him around. He'll fight you, then offer to join. If your lead is Lei, he'll join without a fight.
- Shinsanken Inheritor: In front of the gravestone at the far north of the mountain. If the inheritor is Yun, he'll join without a fight. Lei fights you first, and Samo requires five food items before he'll join (stuff like herbs won't work).
- Sunset: The hardest to get. You have to talk to him no less than nine times for him to join. He starts near Hash's house on the second screen of the mountain. Number 2 is at the far right of the first mountain screen (right near Pogo's Instinct dungeon). Number 3 is at the signpost south of the castle. 4 is at the top left of Lucretia Village. 5 is in the castle treasure room. 6 is in the throne room. 7 is in the right bed in the Left Bedroom. 8 is sitting on a chair in the Right Bedroom. For 9, just walk through the castle gate. If you let him leave your party, he'll end up randomly in one of the nine spots. O_o
Some notes: The Bryon sword can't be equipped, but you can find it in the gravestone at the far north of the mountain. You need it to enter the Forbidden Land. Finally, the glen where Pogo appears holds 10 NaoriGrasses; exit the screen and reenter and they'll regenerate. You can easily get 99 of them this way. 8-)
Enemies (and 100-Run Boss)
The enemies appear fairly randomly based on the average level of your party (I think). Some of them can be a bit difficult, so here's a few of the ones that'll give you some trouble.
MasterDragon: This guy "controls" anyone he appears with, but if you want to get UpgradeParts for Cube (highly recommended), you'll want to defeat his cronies before him. The BigFaces aren't bad, but the Pistachios are ANNOYING. Either get someone with a medium to strong IQ or a very high PW to hit the Pistachios. Every time you hit them, they'll counter with almost every status problem there is on all characters. Cube won't be affected by it, though, so if you have some good techs for him, use them!
Ishtar: This is kind of a mini-boss. If your levels are too low or you don't have decent techs, you'll never be able to beat him! (...Yes, him.) If you have a technique that induces Stun, use it as often as you can. If you don't have at least one character with his/her level 16 technique, it'll be VERY tough to beat him. However, doing so is useful - at even medium levels, he'll cause your characters to level up immediately. 8-)
Jigen: Don't allow these guys to stand at a diagonal to anyone or they'll kill 'em instantly. Use strong techs (by the time you see them you should have strong techs) and pick them off one by one. Masaru's techs actually work well against them (G.Suplex, for example).
TitanBlood and Pistachios: This time you'll have to deal with 12 Pistachios! You can go the easy way and use any long-reaching technique to take out the TitanBlood, or you can go the slow way: have Cube keep using NoiseStream. After 3-4 uses, all the Pistachios will be dead. Cube isn't affected by their status attacks, and those do almost no damage. Cube can then finish off the TitanBlood with ChickShot or something similar (or if any character isn't statused out, use them instead).
LimberScylla: They appear in the Forbidden Land when your average level is above 20; they appear four at a time. Again, pick them off one by one. Fire-resistant clothes would be nice.
DeathProphet: If you run/teleport away from battle 95 times, a mysterious voice will call you a coward and begin counting down another 5 times. When it reaches 0, you'll be attacked by the DeathProphet! His worst attack is to turn people to stone, so if you have any Ariel equipment, it'd be a good time to equip it. ^^; He actually has fairly low defense, so if you have enough people at level 16 (Sunset's HurricaneShot works wonders) he should go down quickly. He'll drop the very nice ArielMail when you beat him.
Mind Dungeon (Akira)
LOCATION: Just have Akira teleport several times from battle. Note that this counts towards your "100 run" counter. Once you enter, the only way to leave is to reach the end. Once you do reach the end, you can't come back to the dungeon.
The little blue circles here contain the ghosts of people from the Medieval Chapter. Examine them to get them to appear, then hit Y to read their minds, and they'll disappear. Nothing strategically important about that, but it's neat. ^^; I won't mention them in the walkthrough.
Start by heading to the top right and pick up a BloodyDress. Continue to the bottom left and down the stairs. Now head to the bottom right and enter the door. Go down again and pick up a SangoRing. Go back up two screens and head for the staircase at the top left. Now go to the top right to reach a small screen; exit to the bottom right to pick up a NightmareHlm. Go back out two screens and head to the lower right staircase.
Head to the top right here to pick up an Akimi. Go to the bottom center and down two screens. Enter the first staircase to your right and go to the center of the screen to pick up a GutsGlove, Akira's best weapon. One more person will appear; read her mind to exit the dungeon.
Intelligence Dungeon (Cube)
LOCATION: In either house in Famillia Village (right where you find Akira).
You won't fight any enemies or find any chests in here (at least the first time round). Enter either house, go down the staircase, and go into the red curtain in the center between the two staircases. Talk to Cube's alterego, then enter the door behind him and go downstairs. Talk to the chair to get a hint, then continue up.
The first puzzle isn't very tough... Cube's movement will be altered when he steps on the checkerboard squares. The floor wraps around horizontally (keep going right and you'll end up where you started). The first level will have his left and right movements swapped. Just go around the peg and up to the next level, where his up and down movements will be switched. Again, go around the peg and up. The final level is a bit more confusing: Up becomes right, down becomes left, left becomes up, and right becomes down. Hold left till you get to the top, then hold down till you get to the door, then hit left again to go up and exit this part of the dungeon. Note that one of the doors at the far north and far south of this room leads to a dead end with a checkerboard floor (which has the same properties as the third level); the other door leads onwards.
Talk to the chair again. Now, you're supposed to "mirror" what the Cube in the mirror is doing. In other words, up becomes down and vice versa. To get to the door, use the following directions from the chair: Right, right, up, up, up, left, left, up. Examine the sphere to continue, and talk to the chair again. This time, only look at the left mirror. Do this: Right, up, up, left, up, up, and examine the spheres to continue again. Finally, there are three mirrors. Remember that there are four directions? 8p Go in the direction NOT shown in any of the mirrors, as follows: Right, right, up, left, up, up, right, right, right, up, up. If you get it wrong, entering the door will propel you back to the beginning of this segment, so watch out!
Here, keep going up... but when you enter certain doors, the arrow will change to a down arrow. When this happens, go back down a screen. Here's how to get to the end: Up, up, down, down, up, up.
The final puzzle has to do with time. In other words, we're going clockwise! 8p Examine the spheres at the top right, bottom right, bottom left, and top left to end up facing a single sphere. Examine it and exit north. Collect the treasure: Cube's 17Diode, his one and only weapon (not counting Akira's BowlingBall, which no one in their right mind would have left on him anyway). You'll end up back at Hash's house on the mountain.
If you make your way back to the Dungeon of Intelligence, you'll find Yuraux wandering around the checkerboard square room! He'll be in the third level. This fight really shouldn't be too tough. None of Cube's techs will be particularly useful (even the ones with Akira's accessories) so keep him using HighSpeedOp (have everyone else next to him in a 1-square radius) and have everyone else use their best attacks. You'll win the ArielHelm from him. He has about 650 HP, so even with an attack that takes off 80 HP or so you can beat him in a few minutes.
Strength Dungeon (Masaru)
LOCATION: Just before you enter the Mountain, head right (you'll see a funky-colored monster) through the trees. Confront the monster and beat it to enter.
The monster fight should be a joke; it has less than 500 HP and lousy defense. When you go in, you'll notice a bunch of chests; all of them will be unopenable until you get the BestBandage. To get it, just run all the way north. As you go south from the top, you'll notice that the amount of enemies attacking you has increased drastically. However, your new bandage makes Masaru not suck so much! 8p Keep using GaleFist against the nasties (except for the MasterDragons; just try to have Cube for this dungeon so he can use NoiseStream). Other than the MasterDragons and the Granglasses' GammaBeam counter, you shouldn't have too many problems with the enemies here.
The chests on the way south hold the following items:
Screen 1: MermaidBottm, IceHelm
Screen 2: BloodyDress, GoldTopknot, AmegistShld, nothing, MiniGoddess, CharioBoots
Screen 3 (screen where you entered the dungeon): Nothing, Akimi, MagicPendant.
Key Dungeon (Oboro)
LOCATION: In the houses in Lucretia Town. There are four entrances to the dungeon.
A new enemy, Kage, will lurk randomly in here. He'll drop RustyKeys, which you can then use to open the doors in here. Basically, there are four "important" keys to find. Once you find them all, you can open the way to the end and Oboro's best sword. There's only one other treasure in the dungeon. Go ahead and check out the full map if you like, but here's how to get all the treasure quickly:
Enter the lower left house. Use a RustyKey on the left door (right is a dead end) and enter. Open the next door to your right and continue up and into the room to pick up the SuzakuKey. Backtrack two rooms and now go down the stairs straight ahead. Continue up to the next room. Exit to the lower right. Continue down and right and into the room for the GenbuKey. Backtrack to the room with three exits (you're below a waterfall) and exit north. Continue on, open the door, and go out to return to the village.
Now enter the door just to your right to reenter the dungeon. Open the door above you and enter. First go straight down and follow the path to a room with the SeiryuuKey. Backtrack and take the left staircase this time. Continue right and up the next staircase. Here, go left and first take the north staircase. Ignore the exit to the lower left and continue right and in the north door (south is a dead end). Go to the upper left, lower left, and in the middle door for the ParasiteSwrd. Now backtrack all the way until you find yourself coming out of a north staircase with a southbound one in front of you. Take it. Head right and up to get the ByakkoKey, then back down and into the staircase. Use the GenbuKey on the door and continue on. Just follow the path; the next doors require the ByakkoKey, SeiryuuKey, and SuzakuKey: there's the Murasame!
To exit from here, head back through all the doors. Head left as soon as you can and into the door. Head north, then go around, open the door, and exit south. Finito!
One last note: The four keys are named after the four spirits of Japanese lore: Suzaku the Red Bird, Seiryuu the Blue Dragon, Byakko the White Lion, and Genbu the Black Turtle. People who've played Star Ocean 1 (untranslated version) or Final Fantasy Legend 1 may recognize their names.
Instinct Dungeon (Pogo)
LOCATION: On the first screen of the mountain, head to the right and up a narrow path. Hit Y for Pogo to use his nose. Follow it to a blank wall. Examine it and Pogo will open the path to his dungeon.
First head left twice, down, and left again. You'll reach a spot with three doors. The left one has an AlisBiscuit and the right one has a UnicornHorn. Enter the center one to continue onwards. Here there's two frozen statues of people you should recognize: Watanabe and son, who've appeared in some form in every chapter. If Akira's in your party, read their mind for a hint about the "100 run" boss. Continue right.
Continue up. Follow the path and first take the left door for a PhoenixTail, then go back and take the right door. Continue down (it doesn't matter which door). Now: the left door leads to a huge fish named Amulucretia. If you have a GoldTopknot (you can find one in Masaru's Strength Dungeon and one in the Forbidden Land), give it to it and it'll challenge you to a fight. It's quite difficult; it has 2000 HP! You can always come back later. If you win, it'll give you an ArielRing. Even if you lose, your game won't end and you can always come back to challenge it again. You can ask it some questions and it'll give you some funny answers. 8-)
When you're finished with the fish, head down, in the next door, and up to finish the dungeon and pick up the BuriburiAxe, Pogo's best weapon. Exit out.
Technique Dungeon (Shinsanken)
LOCATION: On the left of the first mountain screen, about halfway up. Check the mountain map for the location of a large rock. Examine it and the Shinsanken inheritor will break it to enter.
You will not be attacked randomly in here, but you will be subject to a very annoying battle over and over again. 8-) Here's how it works. There are three "big" screens. Each screen has a bunch of passageways. Each passageway has a chest inside and connects to another "big" screen. To open passageways forward, you must use one of your inheritance techniques on the rock blocking the way. (Passages back are rock-free.) Note that you really only need one technique (OldFoxDance) to continue, since you can get all the rest of the treasure from the back of the passages! Note that you can enter the back of any blocked passage (i.e. from screen 2 leading back to 1) and pick up the treasure, but you can't get through the other side. Or, of course, you can just break all the rocks when you're *on* screen 1 so you can walk freely through all the passages as you wish. 8-)
Now... inside every passage is a crazy guy named VoiceHeart who attacks you. He has 800 HP, but he's not particularly difficult, being blessed with really bad defense and attack power. 8p If you have all four characters, anyone with a decent tech can make mincemeat out of him.
A good way to start is to break all the rocks you can, go to the next screen, repeat the process, go to the third screen, and break the sole rock here using OldFoxDance to reach the final room. In here, VoiceHeart will ask you if you're angry. Say YES! and this will be your last fight with him! Although the music's changed, the fight's no different. Once you beat him, pick up the MasterNunchk for the Shinsanken inheritor, and you can freely explore the dungeon with absolutely no battles. 8D
It'd take too long to mention all the treasure and passages in here, so just check the full map for everything you need - which passages require which techniques and what's inside them. For reference sake, though, here's everything you'll find: Dynamite, MiniGoddess x2, TsukeDown, GoldenGodPin, CharioBoots, IceHelm, Akimi x2, KachinkoCase, MermaidBottm, AmonBlood, BaalBlood, and MariaVeil.
Time Dungeon (Sunset)
LOCATION: At the very lower right of the world map, Sunset will hear (and see) a horse. Follow it through a small maze of trees. If you're using ZSNES, hit the "2" key to disable a layer allowing you just to see the stumps. (Click here for a map of the path.) Follow it through to enter Sunset's dungeon.
You won't be randomly attacked by enemies in here. As you progress through the dungeon, you'll hear eight bells. Each bell will darken the dungeon more. At the eighth one, you'll be attacked by four JagiEggs. They're not all that tough (unless this is the very first dungeon you're attempting) if you keep away from them, and they only have about 400 HP each. If you have at least one character at level 16 you shouldn't have much trouble. They'll drop the ElialGlove. Note that this is a mistranslation; it should be "ArielGlove" like the other Ariel equipment. However, a good tactic would be to first rush through the dungeon and pick up Sunset's best weapon, after which you'll have a much easier time with them. 8-) To do that, just keep taking the left door.
Here's how to navigate the dungeon from the start: You can get a BoinVenus at the top right and an EyeofArgos at the top left of the first room. Take the right door and follow to the next staircase. Pick up an Akimi at the lower left, then go around and exit. Take the lower door, go down, go left and up, pick up the MagicalWood, then up again to reach the room with Sunset's 44Magnum, his best gun.
To exit and get the last chest, take the lower left door, up and exit, go up and pick up the CharioBoots, exit north, exit south, then head right and out. You're done.
Forbidden Land
To enter the Forbidden Land, you'll need the Bryon sword, which is on the gravestone at the far north of the mountain. Just examine the entrance to go in. It's identical to the Medieval Chapter version, with two exceptions. 1) If you didn't take the treasure in that chapter, different treasure will be here now; and 2) the enemies are far harder, especially if your average level is above 20. The Enemies section deals with that, though. The treasure you'll find is as follows: AlisBiscuit, DemonCloud x2, WindGodScroll, UnicornHorn, TokenOfAcala, GoldTopknot, IzanagiScroll, DeathDress, EyeOfArgos, PotionNo9, BoinVenus. See the Forbidden Land Map for the locations of everything. By the way, I strongly recommend having at least four pieces of Ariel equipment (doesn't matter which) and equipping each character with one of them before entering the Forbidden Land.
When you reach the room with the seven statues, examining the relevant ones will elicit a reaction from your party members. Go north to reach Odio's room, examine the statue, then go down towards the staircase and he will appear. Now, if you like, you can fight a secret boss, but that'll mean having to go through the Forbidden Land again. No big deal, IMO. 8-) To do so, just go down the staircase again! Run away! Run away! 8p You'll end up back in the weird place at the very start of the final chapter, with a difference: if you wander around for long enough, you'll be attacked by the HeadPlucker!
This guy only has about 550 HP, but his stats are sky-high. He has a single attack which he can only use against people adjacent to him, which will usually instantly kill them unless you have a CON of over 99. However, every time he uses it, his stats will randomly decrease. If you have Cube and Sunset like I recommended, have Cube heal every round, have Sunset use HurricaneShot, and keep waiting until you see his CON and LV go down at least twice. Now you can just let loose at him with your best techs and he'll go down fairly quickly. He might drop a GenjiGlove, but he WILL drop the ArielBoots, the last piece of Ariel equipment.
Back at Odio, if you choose to go up and confront him instead of running away, you'll fight the "final" boss. He's split up, in true RPG tradition, into parts. The eyes have 800 HP each and the worst attacks. Go for them first (HurricaneShot!). Next go for the mouth. Oboro's final technique, by the way, can do very nice damage to all three parts at once. Don't hit the mole, or it'll heal HP and raise all the stats of the other parts!
When you beat those three parts, the mole will turn into PureOdio, with over 2000 HP. If you have a piece of Ariel equipment on each character like I recommended, this battle will be much easier, since he can't turn you to stone. If not, just have Cube use HighSpeedOp on the stoned character. In fact, have him heal every turn. Use your best attacks for the others... you'll find that fast attacks (Sengazanken, Dodege) work better than slow and strong ones, because he'll use Canceller to stop you from using the slow ones. Don't hold back on your healing items; you probably won't need them much after this battle. By the way, losing this battle gets you the "Sad End", the same one you'll get if you use Apocalypse if you play as Orsted in the final chapter.
By the way, it IS possible to beat the mole in the first part of the fight. Doing so will completely skip the second part of the fight (and I've heard that it'll make less sounds appear in the final sound room) To do so, beat the eyes first, then hit the mole with any attack that's fast and does more than 1 damage point (and preferably one that lowers its CON or IQ as well). He has 992 HP, so doing this will take a hell of a long time to do. ^^;
Once you beat Odio, he'll ask you to finish him. Saying "Yes" starts one more rather joke of a battle; beating him will get you the "Never End", which is lame. Instead, say "No". Ignore him and return back to the room with the seven statues. Go south and the other character(s) you've met (that aren't currently in your party) will show up. Another scene will play out, and each person in the room will be pitted against the final boss from his chapter - alone! Don't worry, by this time you're so tricked out they're fairly pitiful now. 8p Beating all of them will get you the REAL ending, and unlock the rest of the tunes in the sound room. If you haven't met all seven characters, you'll get a truncated ending without the "good" credits sequence (it's very nice, trust me). Instead, at the end will just be a repeat of the credits sequence from the hero's chapter. That's it! Congratulations!