 |
|
|
 |
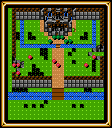
Gardiana and Cypress have joined their forces in the fight against Iom. You can see a room with a few monsters sacrificing the King to Iom. The head beast is named Warderer. He asks Barbara if she has any info on Cypress. She says that Cypress is marching to Iom, unaware of the traps. Warderer then talks to Solo, who says that the fort is almost complete. Warderer has one more problem. The Sword of Hajya. He calls Gordon for this. Gordon says that even with the hand of stone (from the last book) Nick will still come. Gordon is then given orders to attack the Cypress army after they leave. Gordon, Solo, and Barbara then leave, leaving Warderer and a knight named Hindel in the area. Hindel's little brother was killed by a lowly swordsman. Hindel says that anybody who cannot defend themselves deserve to die. You then arrive outside Cypress Castle where Nick is leading an army to attack. And get this, Nick talks! Nick leaves Mayfair (who gained her eyesight back somehow) in charge. Just as they leave, Natasha and a Centaur brings in a wounded boy. Nick tells them to take him inside and look after him and the army leaves. After a while, the boy (Deanna) recovers and him with 5 others guard the castle. Mayfair comes out to make sure that they are doing their duties (she keeps a close eye on Eric). She leaves and Eric goes off and horses around (appropriately named for a Centaur). Just then, explosions are head and monsters appear. Time to fight. Battle #1
This battle is extremely easy. Since it is so easy, I leveled everybody up to Level 5. By this time, Natasha will have Freeze 1, and Luke will have Heal 2. Dawn will gain more power than Eric, making her a better choice. Keep having Luke use Heal 1 every round to gain Exp. Very easy, so kill them all to continue. After the fight, Mayfair will yell that there is a theif. A ranger comes out of the castle with the Sword of Hajya. He runs and make a hole in the castle wall, making his escape. The force chase after him (Jaha has a funny scene here). They all jump down the cliff and Graham calls for a Dwarf to protect him. Battle #2
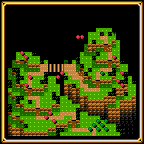
I didn't even waste my time with this battle. It is so easy that you should have no trouble with it. Kill them all to continue. It seems that they lost the theif. Mayfair hops down the cliff and leads the Force to Thames Village. Mayfair and Deanna ask around town. First at a Weapon Shop, with no help. They search around some more and find a priest. He will not talk much until Mayfair asks if Iom has captured the village. The priest then says that Iom will let them go for the Sword of Hajya, but Mayfair says that they probably will not keep their promise. Mayfair asks him to join and help defeat them. So Slade the Priest joins. Slade... what a name. It fit that ratman in Shining Force II better. Oh well. Slade says that Graham is headed for the Albert Cliff. You then camp up. Buy new weapons for everybody, save and exit. Slade will say that beyond the mountain lies the Albert Cliff, but monsters stand in your way. Battle #3
Again, this is nothing but another easy battle. Get everybody up to Level 7 on this battle. Have Slade use Heal 1 often to get Exp (do the same with Luke). You could also have somebody weaken a monster and have Slade kill it to get his levels up. Kill the monsters to continue. Mayfair tells Deanna to lead the Force to the cliffs. You then are at camp. Do what you have to and exit. You finally catch up with Graham. He makes it to the top where an Archer comes and asks for the Sword of Hajya. Graham tells him that Cypress is right behind them, thus starts another battle. Battle #4
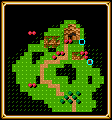
Graham is in the battle, but he will run into the hut at the begining. This is yet again, another easy fight. If you want some good Exp, though, fight the Incubus and the Death Archer. But remember that killing the Death Archer ends the fight. There is no sense in gaining levels here. Just keep everybody at level 7 and kill the Death Archer to continue. After killing the Death Archer, he will say that it is too late, and that the Dark Mage already has the Sword of Hajya and has dealt with the villagers. At the cabin from the last battle, the Iom monsters have Graham hostage. They force him to hand over. Just then, the Cypress Army arrives and Graham runs into the cabin and locks it. They say that they must now fight. Battle #5
This is where you want to level up. Take time and Level up to Level 9 or 10. Do not kill the Dark Mage. Doing so will end the battle. The best thing to do is have Luke get rid of the Iom Knights really quickly and have everybody else take and wipe out the rest. When you get back to camp after Egressing, use the Powerful Wine (from the last battle) on Deanna, the Protect Milk (also from the last), on Slade, the Cheerful Bread on Jaha, and the Quick Chicken on Deanna (I always make the leader the fastest and strongest). After you reach Level 9, go ahead and kill the Dark Mage. After you kill the Dark Mage, he disappears to another part of the field and summons a Gargoyle to take the Sword of Hajya away. It flies away, until Graham comes out and shoots it down. The Gargoyle dies and the Sword is out there somewhere. Graham asks to join and he says that the Sword of Hajya is near King Emild's castle, so that is where you are going next. Thus Ends
|
|
|


