
 |
|
|
Game
Basics
Controls
The following are the button functions
for Dark Cloud:
| X | Open atla; attack enemies and use Charge Attack |
| ○ | Lock on to enemy |
| ∆ | Open inventory - general |
| □ | Open inventory - special item selection; sort items |
| Select | Automap on/off and size selection; georama mode |
| Start | Pause game |
| R1 | Move POV clockwise |
| L1 | Move POV counter-clockwise |
| R2 | Switch to first person view |
| Left analog stick | Move character |
Dungeon Maps
| The dungeon layouts are random, and so cannot be mapped. However, there is an automap feature which will make dungeon navigation much easier. Using the Select key in a dungeon will display the map. It can be viewed as a small map in the top right corner of the screen, or a large map in the center. This feature can also be turned off, but it is very useful to keep it on. As you make your way through a floor, the map will fill in to show the areas you have explored. The following symbols are used on the map: | 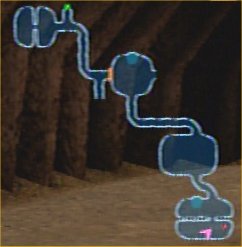 |
|
■ |
Entrance |
|
■ |
Exit
|
|
● |
Enemy |
|
● |
Chest |
| ● | Atla |
|
▲ |
Current
location and direction |
|
? |
Back floor entrance |
| ● | Pool |
| O |
Mystery seal |
| | or | |
Locked
door |
Chests, Drops, and Stealing
 |
On each regular floor, there will be one chest containing a map, which will show the entire floor outline, and one chest containing a magical crystal, which will show all chests and enemies. The locations of these chests are random. If you find the chest containing the map near the beginning of the floor, you may find it difficult to tell where you have been, since the whole floor is shown. If you look carefully, you can see that the outlines of areas you have explored will be a little thicker white than the outlines of unexplored areas. |
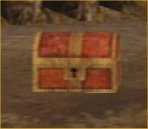
| Sometimes, enemies will drop items or gold. You can pick these up by walking over them. You will find many chests as you explore the dungeons. Most of them are small, and contain various items. On some floors, small chests can actually be Mimics, which are enemies that appear to be treasure chests until you open them. Occasionally, you will find a large chest. These usually contain weapons, but now and then they will contain the Happy Clown, who will allow you to choose one of two presents - a large box or a small box. The large chests can also contain King Mimics, bigger and fiercer versions of Mimics. | 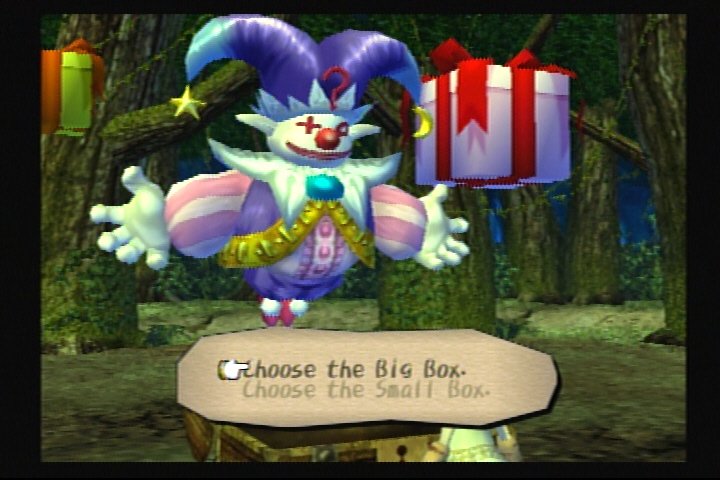 |
| Sometimes
you will find that a chest is trapped, and if you wish to
open it, you will have to either use a treasure key, which you will
come upon only rarely, or guess what trap is on the chest. The
possible traps are Poison, Explosion, and Curse. If you guess the
trap
correctly, you will be allowed to open the chest. If you guess
incorrectly, you will receive the effect of the trap, and will have to
guess again, choosing the correct trap the second time. |
|
| If you
can equip a weapon with the Steal ability, use it. It will
make the game easier to play, and will do wonderful things for your
finances. You will be able to steal basic items, such as bread,
water, and repair powder, reducing the number of items you will need to
buy on your visits to the local shops. You can also acquire other
items which you might prefer to sell, which will further help your
financial situation. Since Dark Cloud is a game in which money
does not come easily, this is an important consideration. |
|
Quick Slot Items
| The three gray boxes at the top
of the screen are
quick
slots, and you can keep items equipped in them for ease of use.
Certain items, such as Auto Repair Powder, are of no use if not
equipped here. Attack items (bombs, gems, etc.) can be equipped
here singly or in groups of up to nine. When a Dran's Feather is
placed in a quick slot, it can be used to increase your movement
speed. Use quick slot items by selecting the desired box and
pressing the □ |
| One note of caution: if you are accustomed to using a Dran's Feather, and flying through dungeon floors with the □ button pressed down, be very careful if you change the quick slot selected to use an attack item. It is easy to forget after the battle, and start off again with your thumb on the □ button as usual. If you have not changed the selected slot back to Dran's Feather, you could easily waste the rest of your bombs, or whatever you happen to have equipped in the current slot. Remember that the □ button will activate whatever item is in the current quick slot, unless it is an automatic item only. |
Weapons
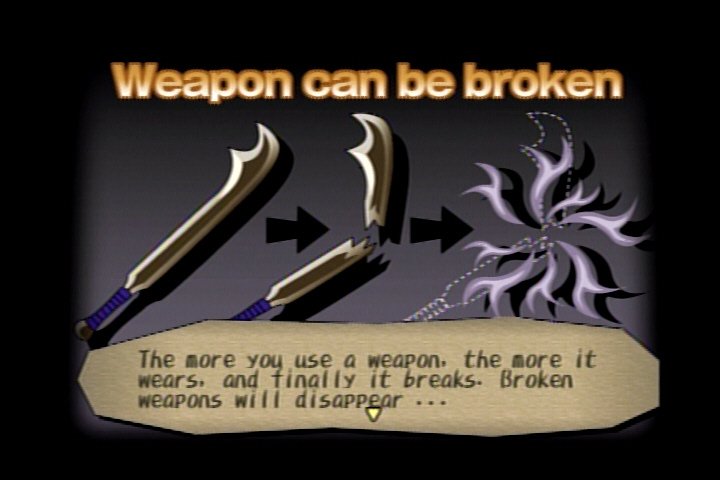 |
Keep a close watch on the WHp (weapon hit points), because when they are gone, so is your weapon (unless it is a starting weapon). Certain enemies, such as ones made of stone or metal, will eat up WHp, and your weapon can break before you would have believed possible. Keep a healthy supply of repair powder, and don't wait till the last minute to use it. You can equip Auto Repair Powder in a quick item slot, and it will automatically be used when a weapon's hit points reach zero, preventing the loss of the weapon. However, since the cost of Auto Repair Powder is ten times that of regular Repair Powder, you should keep it as an emergency item, and not plan to make use of it if you can avoid it. | |
| Weapons will absorb power, known as Abs, from the enemies they defeat. After a weapon's Abs gauge is full, it can be upgraded. If attachments are present, they will be absorbed into the weapon upon upgrade, and their effects will forever be a part of the weapon's stats. A weapon that is at least a +5 can be turned into a synth sphere, which is an attachment with 60% of the weapon's abilities contained within it. A synth sphere can be placed on any weapon . . . not just those belonging to the character who created it. However, a synth sphere can only be placed in the first attachment slot with the blue outline. The number of attachment slots available will vary. From time to time, if you are very lucky, your weapon will have randomly have a "x 2" slot, which will double the effects of the attachment placed there. It is best to use a gem in those slots, because the amount being doubled is so much larger in that case. When a weapon has reached the necessary levels in various attributes, it can be built up into another weapon. | ||
| If you find a Powerup Powder, it will automatically fill up your weapon's Abs gauge so it can be upgraded. If you use it from the Weapons menu, it will fill up whatever Abs are lacking to reach the next level. However, if you use it from the regular inventory screen, you can keep the Abs you currently have, and will still be one level higher. Drag the Powerup Powder to the weapon icon and drop it. The screen will show the attachments currently on the weapon, and ask if you want to upgrade it with those attachments. When you say yes, the weapon will be upgraded to the next level, but the Abs level will remain unchanged. | ||
Staying Healthy
| Watch the character's health and thirst meters. Health can be restored by eating food, and the water drops in the thirst meter can be refilled by drinking water. Both will be refilled completely by stepping into one of the small pools which are often present on dungeon floors. These will be indicated on the map by a large blue spot. There are status conditions that can be inflicted by enemies or trapped chests: Poison can be cured by an Antidote Potion, Goo can be cured by Soap, and Curse can be cured by Holy Water. Poison will continuously deplete health, Goo will reduce movement speed considerably, and Curse will prevent the changing of weapons, so it is a good idea to have status-removing items in inventory whenever possible. | 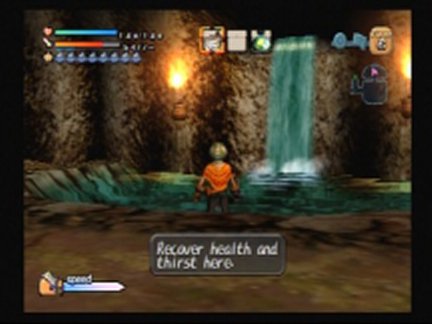 |
|
| When
a character's hit points are gone, he will be incapacitated. You
must either use Stand-in Powder, which will allow you to replace the
current character with another character, or you can leave the dungeon,
losing
half your money. The second choice is unacceptable later in the
game, when half your money would likely be a large amount, so keep
Stand-in Powders in inventory. You will also need Revival Powder
to remove the defeated character's exhausted condition. Losing
Toan when all atla have not yet been opened, or Xiao when there are
still gaps that must be jumped, would result in your being unable to
finish the floor. For each character in the game, there will be
certain times when he or she will be indispensable in completing a
floor, so you will not want to have anyone incapacitated for
long. Revival Powder can be equipped as a quick slot item, and
will be used automatically to revive the active character and restore
half its HP. I would highly recommend keeping some of these in
inventory, but always have one set as a quick slot item - it won't
activate if it is not equipped. This is especially important in a
character-restricting Limited Zone, because Stand-in Powder is of no
use there. |
||
Limited
Zones
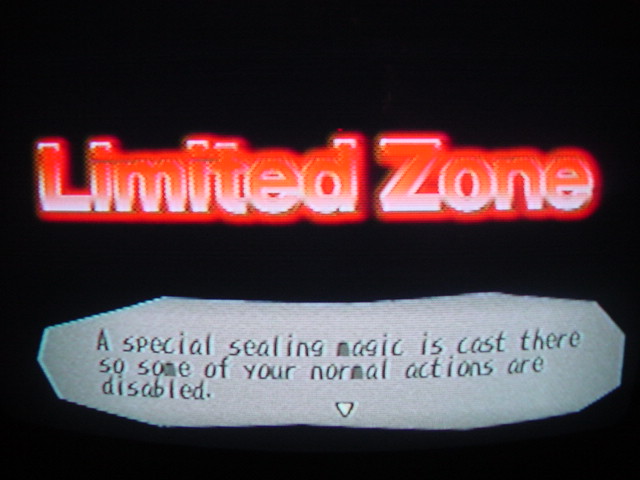 |
Some floors, which are known as Limited Zones, will place certain restrictions on the player. Some will allow only one particular character to fight, some will deplete Abs and prevent the changing of weapons, and some will greatly increase the character's thirst. These restrictions make the floors more challenging, and you need to be prepared for them. It is a good idea to let all the characters do some fighting, because if the secondary ones are using weak weapons, you will have great difficulty getting through Limited Zones which restrict character use. Saving between levels is a great safeguard against the negative effects of Limited Zones, as well. If you enter a floor and find it is a Limited Zone, you can restore your saved game and make preparations for tackling the floor, such as buying extra water or unequipping a weapon with a nearly full Abs gauge. |
Mystery Seals
| These blue circles appear randomly on dungeon floors, and their effects differ greatly. When you step on a seal, it will do one of the following: | |
|
|
| Since there is a such a variety of possible effects, I would recommend not stepping on the seals if you are low on health, your weapon is about to break, or you have no repair powder. If you have a weapon with a nearly full Abs gauge, you should probably switch to another weapon (or character). Have a weapon with an empty or low gauge equipped, in case the seal is an Abs-filling one. It would be a waste to fill up the gauge of a weapon that is already nearly full when you could gain an entire level on another weapon. | |
Leaving Floors
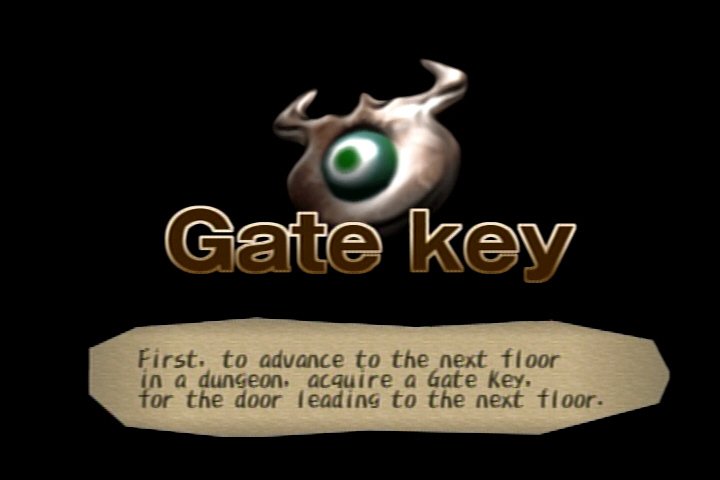 |
One random enemy on each floor will drop a gate key, which must be used at the exit to proceed to the next floor. If you need to leave the floor before defeating all the enemies, you must use an Escape Powder. If you don't have any Escape Powder in inventory, you will lose half your gold by leaving. Any floor that you leave other than by way of the gate key will have to be repeated, because the entrance to the next floor will not be available unless you have used the gate key to leave the floor by the exit. Between floors, you are free to continue to next floor or temporarily exit the dungeon. The latter is nearly always a good idea, as it will allow you to replenish supplies, work in Georama Mode, and save the game. You could be very sorry you didn't save the game if you find that the next floor is a limited zone. |
Storage
| There is one person in each area who will store items for you, generally after you complete his or her home. These storage facilities are like different branches of the same bank. It doesn't matter where you made the deposit - you can withdraw it from any branch. Any items, weapons, or attachments put in storage will be available from any storage location. |