
Walkthrough for 750+ HP
These are the recommended quests that you should attempt between these HP ranges. (Note: this is not the order you have to do these quests in, and it is possible to do quests in the next range before these.) If there are any requirements before you can perform these quests, they will be listed.
Quest Starts: Rashkuta
Rewards: Plenty of Treasure
Requirements: Rashkuta must be opened on the map. (Completed the Eastern Quests)
Walkthrough:
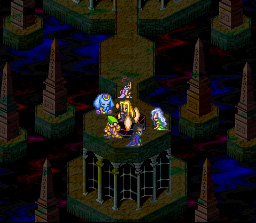
| Talking to the various Elephants in Raskuta will eventually open the Rotten Sea Ruins. It seems that these ruins used to actually be the home of the Elephants long ago... Travel there to see what's left and to gather up some nice treasure. Once there, walk all the way north to enter. Turn right and walk all the way up. Ignore the first staircase you come upon and walk up the second which should be on the left. Now work your way around the railing and go north through the door, ignoring the staircase for now. Open the 3 chests for a Life Element, 1000 G, and a Wing Charm. Take the first door on the left. Now walk south and go down the stairs. Open the 2 chests for a Screamer and Crocodile [armor]. Walk back up the stairs and go back through the rooms until you reach the room with 2 staircases. Take the staircase closest to the door and go north through the door. Walk north a bit and west, then walk through the door. Open the chest inside for a Barrier Stone and return to the previous room. Walk up the stairs and turn west, then walk through the door. | 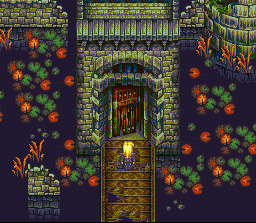 |
 |
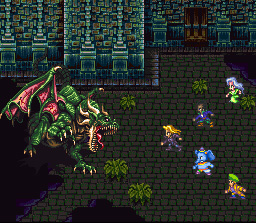
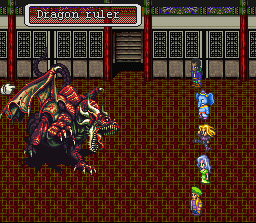
Now go up the stairs and take the exit to the right. Run counter-clockwise around the railing and exit to the right. You now stand in a room with 3 staircases. First, take the bottom staircase. Walk right through 2 rooms to reach 3 chests that contain (from bottom to top) 2000 G, Hawkwind [axe], and a Troll Stone. Go back up the stairs and take the top staircase this time. Follow the hallway around until you reach the stairs leading up. There is something strange though- there is a block of stones which you may walk over. If anyone knows if there is something special about them, email me. Now, go north through the hallway then turn right. Take the exit to the right, then you'll see a chest. Opening the chest summons a Dragon Ruler! Prepare for battle first. When you are ready, open the chest to get a Will [buckler]. The Dragon Ruler will fly down and the battle will start. |
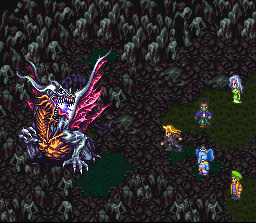
| Green Dragon Ruler
Unlike the previous Dragon Ruler, the Green Dragon doesn't regenerate. This Dragon Ruler, in my opinion, is the easiest one. It doesn't have power attacks or counter attacks. If you managed to nab a Dragon Spear from our previous Dragon Ruler encounter and have learned Round Slicer, use it. Round Slicer is the most powerful spear waza, even though its built-in to the Dragon Spear. Also using Dragon Inferno, Final Letter, Shell Split, Split Body, and Dynamic Hit will quickly exterminate the Dragon Ruler. Now all you have to do is exit the Ruins, and you're finished. |
 |
Boss Strategy:
Quest Starts: Ancient Cave
Rewards: Death Frag, Treasures, and Ashuras to fight!
Requirements: Various- Some characters must clear the Thieves's Cave, some must talk to the old lady in Farce, others must go through the Thieves's Cave once monsters are inside.
Walkthrough:
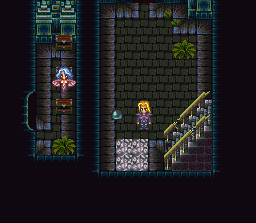
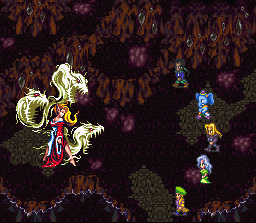
| First of all, you need to have opened the chest in the Earth Abyss that tells you about Death. Enter the Ancient Cave and walk to the northwestern corner of the first floor and go down the stairs. Walk southeast through the exit and then east. Go down the stairs and open the chest for a Salve 3. Walk back up the stairs and north through the exit. Walk north up the stairs and then turn to the left. Walk to the west and go through the small exit to enter a room with two chests that contain 300 G and a Barrier Stone. Return to the previous room and take the northern exit. Continue walking north to encounter a stationary demon. If you are strong enough, the demon will be an Ashura, the strongest regular monster in the game. This creature is the best monster to fight to learn various waza. Once you clear the cave, you will be unable to fight any more Ashuras unless your main character is Harid. If you want to continue to fight them, do not clear this cave! | |
| After beating the demon, | |
Get the Holy Grail from Leonid's Castle
Quest Starts: Podol
Rewards: Holy Grail, may recruit Leonid
Requirements: Won the Zweig Tournament
Walkthrough:
| After having beaten the Zweig Tournament, the Duke will reveal the location of Podol and tell you to get the Holy Grail from the Vampire there. Even if Podol is already on your map, you must complete this event before you can seek the Grail. Head into Leonid's Castle and talk to him. He'll tell you that the Holy Grail is underground and ask you to get it. Leonid will then teleport away. Head down the stairs to the left and go through the door. Kill the stationary demon (5 War Bats) and walk across the room and up the stairs to the left for a chest with 400 G inside. Head back down the stairs and walk south and exit. Walk down the stairs until you get to a door and go inside. Continue walking down the stairs and turn left. Walk west until you see an opening to the south and go through it. The stationary zombies in this room are the Psn Gions. They can be rather difficult to kill if you aren't strong enough yet. Walk into the T-junction, walk south and kill the Psn Gion | 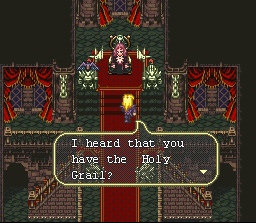 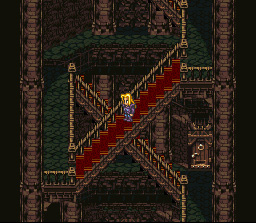 |
|
Open the 2 chests to get 200 G and a Barrier Stone. Walk all the way north, kill the Psn Gion, and open the chest for a Guard Ring. Walk south some and turn left. Walk down the hallway and kill the stationary zombie which are 3 Dragon Zombies. Walk down the stairs and exit to the south. In the next three rooms, walk down the stairs in the southeastern corner. On the next floor, walk down the carpeted stairs then head towards the east. Walk up the carpeted stairs, kill the stationary skeleton, and head through the exit. Immediately walk north through the door and walk down the stairs. Head to the southern side of the room for a chest with a Bloody Sword in it. Go back to the first room and head north and up the stairs. Take the north exit for chests with 600 G and a Moon Bone inside. Walk down the stairs and under the walkway. |
| Enter the door and walk down the stairs to get 2 chests with a TPotion 2 and MPotion 2 inside. Walk down the stairs and exit to the south. You now stand on the roof of Leonid's Castle. Walk west and go through the door. The stationary skeleton will provide a rather difficult challenge, though... | 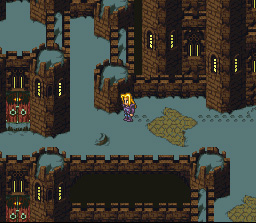 |
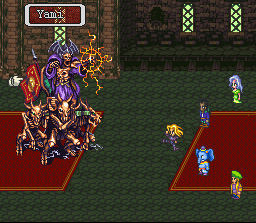 |
Yami
Yami can be very difficult if your HP isn't high enough. It gets 2
attacks per round and regenerates 999 HP. Its attacks can be very
devestating causing 400+ HP if you have a low defense. Use waza such
as Final Letter, Golden Dragon, or Triple Thrust. Using Waterball can
cut out some of its stronger physical attacks. This battle will work
alot better if you have a designated healer. |
Quest Starts: Loanne
Requirements: Have sealed at least one Abyss Gate
Rewards: Opens up the next sidequest (if done through method A), Seal an Abyss Gate
Walkthrough:
There are two methods for completing this gate.
Method A:
Go to the Small Village and open up Mt. Loob if you haven't already. Travel inside and talk to Gwain. Ask him to help you seal the Wind Abyss Gate, and he'll agree. Your main character gets to ride on Gwain, and the two of you fight the Byunei, the Wind Abyss Gate Guardian.
Method B:
In Loanne, talk to the experienced climber in the southwestern house. This shall open up Mt. Taftan. Climb Mt. Taftan to reach Byunei's Lair. Go through the lair and seal the Abyss Gate as you would a normal one.
I recommend if you do Method A, afterwards, go to Byunei's Lair later to get all the treasure from it.
| First, you'll need to have opened up the Small Village while you were in Vanguard before it took off. Next, head to the village and talk to the pub owner. He'll reveal that their is the Dragon Gwayne on Mt. Loob to the west. Head to Mt. Loob and walk north and up the slope. Now just circle around the mountain and exit to the north. Now walk counter-clockwise up this section of the mountain and exit to the west. Walk down the stairs and then exit to the south. Throughout the cave, try to avoid being in the mist as much as possible. It cuts your movement rate in half making it easier to get ambushed. Walk all the way south then turn and walk to the right. Now that you're on the other side of the large pit, walk all the way to the north. Walk north and then turn to the left then go down the large staircase. On the next floor, enter the small cave for a chest with a Barrier Stone inside. Exit the cave and head to the south then turn left and walk into the cavern. Walk west a bit then go north and down the stairs. Now head south and through the cave. Go into the western cavern for a chest with a Guard Ring. Return to the previous room and take the eastern exit instead. Go down the stairs then head all the way south and go down the next set of stairs. Now walk north through the large opening to confront Gwayne... |  |
 |
Gwayne will glance over, rather angered upon your entrance. Choose to talk to Gwayne, and he'll tell you that the Abyss Gates are far too small for the Devil Lords to fit through. Instead, they send their clones through. If the Destined Child is captured, then it will be impossible for you to seal the Gates. Gwayne then tells you that the Mother Dragon once defeated Byunei with the help of the Holy King. The Holy King later killed the Mother Dragon, causing Gwayne to hate all humans. Gwayne will, however, join up with your main character to defeat Byunei. |
| Byunei
This is my absolute favorite ball in the entire game- your main character and Gwayne must square off against Byunei. Have your main character use their strongest waza against Byunei, and have Gwayne use Twin Spike. After the end of each of the first three rounds, Byunei will grow another head, adding to her attacks. Her Triple Blaster can be very costly later if it paralyzes your character. If your main character does become paralyzed, Twin Spike becomes unusable since it is a Multi-Tech. If your main character happens to have a Dragon Spear equipped, use Round Slicer. At one point during this battle, I was able to do 9999 damage using the waza. Every other time, it did around 4000+ damage- very helpful. |
 |
Method B Walkthrough:
| Climbing up the mountain is very easy, and there are multiple ways of doing it. Just remember to keep running so that you can jump from ledge to ledge. To get up some parts of the mountains, you'll need to walk up to the ledge so that a rope can be placed up there. Once you get to the mist, continue going north until you reach a cavern similar to the tunnels in the entrance to the Sea Palace. Walk across the very long platform and walk into the cavern to enter Byunei's Lair. Walk and exit to the south through this strange new enviroment. Try to avoid the strange pit-like things. They contain Life Trap mini-bosses which can be very annoying. Walk south a bit, then take the western path. In the next room, you'll have to fight 3 Life Traps to get to the skeletons on the other end which contain Sorcerer [armor] and an MPotion 2. Now return to the previous room and take the eastern path. Start heading south but stop to get a Barrier Stone from another skeleton. This next room is full of the Life Traps. In the northern part are skeletons containing the Multi-Magic Tempest, a Spirit Stone [scroll], a TPotion 2, and a Martial [shirt]. Once you've gotten these treasures, exit to the west. In the far western corner of the room are skeletons that have an MPotion 2 and a TPotion 2. Exit by heading into the next cavern. At the northern end of this hallway is the Abyss Gate. Walk through to encounter Byunei. | 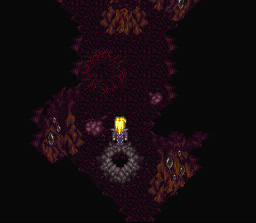 |
|
Byunei
This battle is very similar to the one fought with Gwayne. The only difference is that Byunei has alot more HP than her Gwayne Battle incarnation. The same strategy still applies: use Round Slicer (if you have it) or Triple Thrust if you don't. Split Body does more damage in this battle than Golden Dragon (it seems that Byunei is vulnerable to the Split Type attacks). Use other strong waza (the top of the line stuff such as Dragon Inferno, etc) to knock Byunei to pieces. |
Quest Starts: Pidona/Vanguard
Requirements: Must have beaten Byunei with Gwayne.
Rewards: Avenged the Small Village
Walkthrough:
| After sealing the Wind Abyss Gate with Gwayne, go to the Pub in either
Vanguard or Pidona. Talking to the owner will reveal that Gwayne has
destroyed the Small Village. If you had asked the Poet in Small Village
for an old story, he'll tell you about Dora, the Great (Mother) Dragon, also
the mother of Gwayne:
Long ago, Byunei had made its lair on the top of Mount Taftan. The Holy King traveled to Mount Loob where Dora's Lair was. The Holy King convinced Dora to help the Holy King defeat Byunei. After defeating Byunei together, Dora became the master of the skies. Dora began to attack villages for meat and treasure despite the Holy King's constant warnings to not commit such crimes. The Holy King engaged Dora in a heated battle which ended with Dora's death. Afterwards, the Holy King helped Gwayne a bit but obviously not enough to keep him from follow in his mother's footsteps... It seems that the same fate has met Gwayne... Work your way back through Mount Loob, the walkthrough for that is above. Once you arrive at Gwayne, you can try talking to him, though your warnings to him will not be taken seriously. Challenge Gwayne, and he understands exactly what is going to happen.... |
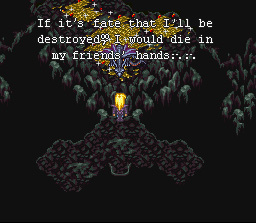 |
| Gwayne
Gwayne doesn't put up much of a fight really. He uses the same attacks that were available during your battle together with Byunei. Use waza such as Triple Thrust, Golden Dragon, Dynamic Hit, and Dragon Inferno to defeat him. After the battle, Gwayne completely accepts his fate. He reveals that he understands his mother's feelings now: he wanted to die by the hands of his true friends... Before you can do anything else, the cave begins to collapse, and a large rock falls upon Gwayne... |
 |
Quest Starts: Ake
Requirements: none
Rewards: Abyss Gate sealed, Treasure
Walkthrough:
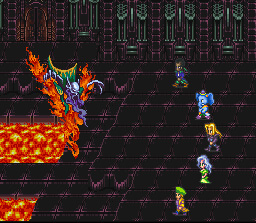
| The Fire Palace can easily be found if you have rescued the Fairy. She'll tell you the color of the butterflies you need to follow. After following them for a while, you should run into a gate. Going through the gate leads you into the Fire Palace. Entering the Fire Palace will open it on the World Map. Now that you are inside, walk north until you reach the raised platform. Now walk to the west and go through the door. Open the chest in the room for a Flame Beast [armor]. Return to the previous room and walk east and up onto the platform. Now walk west and up the stairs. Walk south then turn to the east and go up the stairs. Head north a bit, and you'll see 2 staircases. The one on the right has a chest with 3000 G, and the one on the left contains a chest with the Nitigale. |  |
 |
Now head through the northern door. Walk west across the scaffolding then north. Enter the first door for a chest with a Firebird [armor] inside. Go back to the previous room, walk past the stairway and go into the second door. There is a chest inside containing a Barrier Stone. Now return and go up the stairs and into the door. Chests in this room contain Crimson Flare multi-magic, and 500 G x2. Now take the door on the right and exit to the north. Head north and fight the flame miniboss (Hidona) and take the stairs up to the Abyss Gate. |
| Anuas
Anuas is a rather easy Gate Guardian. His attacks don't do too much damage, but he has a fire counter attack that can do around 300 HP of damage if you physically hit him. Stick to long range attacks or ones such as Split Body or Round Slicer to defeat him rather quickly. If you have the Snowman in your party and everyone else dies, he will sacrifice himself to kill Anuas. Put Snowman in the front of the Desert Lance formation if you have him since he's immune to fire-based attacks. |
 |
Quest Starts: Xuan City
Requirements: Must have sealed all 4 Abyss Gates
Rewards: none
Walkthrough:
| After sealing all the Abyss Gates, Johannes will tell you in Lance that
there is 1 Gate remaining. Its location is somewhere in the East.
Head over to Xuan City and talk to Bai Meiling. It seems that
Tao Gen, the Emperor of Huang City, has been corrupted by the Abyss's Powers.
The only way to get into the City will be to have Yan Fan launch an
attack on it while you slip inside. If you want to recruit Yan Fan,
now is your only chance. If you don't, go ahead and tell him everything
is ready. You will also have to remove one of your characters to get
Shonen. Leave Xuan and head for Huang City... Once there, sneak
inside the palace by taking either of the ladders up.
Once you've entered, there is no turning
back!
Now that you're inside, the battle against Huang can commence... |
 |
 |
Yan Fan (2500) vs Yan Youchun (4000, Def Wave)
This battle doesn't last long. Defend, and they will realize that they are caught in a trap and retreat. It says you have lost this battle, but nothing really well happen. If you want to fight this the fair way, try meeting their infantry with your calvary and vise versa. The Game will now switch over to your encounter with the Red Dragon Ruler. |
| Red Dragon Ruler
The Red Dragon Ruler shouldn't provide a problem at all. Its most severe attack would be its Flame which can hit everyone for around 200 damage. Use Triple Thrust, Final Letter, Golden Dragon, or any other top level waza to take him out quickly. |
 |
 |
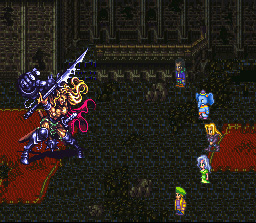
Head north through the door the dragon was guarding. Go north through the next room then go up the stairs. Kill the extra powerful Lilith guarding the western door to get chests with a Life Cane and a Barrier Stone inside. Now exit to the south and go south through the next room. Walk left and then go through the door to fight a Niteflower and some other rather easy monsters. Exit to the north and go up the stairs. Walk south down the hallway then turn right. Kill the Mantis God guarding the door then go through it. Walk north and kill the demon before the Throne. Walk up those stairs and open the chests for a War God [armor] and Power [boots]. Now take either of the doors and kill the Ghost guarding the chests that contain Gold Dragon [armor] and a Duel Master [gauntlet]. Walk west and go through the southern door. Now climb the staircases and kill the zombie then go up the staircase behind it. On the next floor, take either door and go south through the room. In this room exit to the south to appear on the roof. |
| Walk west and go through the door then go north and kill the beast guarding the stairs. Take the stairs and exit to the south. Walk east along the roof then go north through the door. Now go up the stairs. On this floor, you'll see Shonen (if he isn't in your party) be taken away by the Emperor. Follow them out onto the roof. The Emperor will gloat that he now has the Destined Child so the power of the Abyss will be his. He summons an Abyss Naga for you to fight. |  |
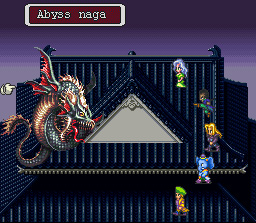 |
Abyss Naga
The Abyss Naga fight is very simple. Use your best waza (Golden Dragon, Triple Thrust, Continuous Shot, etc) to quickly dispatch the dragon. Its Supersonic attack can be a bit annoying, but overall, you shouldn't have a problem with this fight. With the Abyss Naga's demise, it falls off the roof, taking the Emperor with it. Shonen will now join your party. If you have 6 characters entering here, one of them will have to be removed to make room for him. The party now leaves for the final Abyss Gate. |
Walkthrough:
| Shonen walks onto the middle of the Abyss Gate and channels its power.
The party walks in, one by one, and enters the Abyss. It is time...
*Note: You may recover your WP/JP/LP on the Teleporter that you arrived on. Walk north and step on the teleporter. You will emerge in a room with 5 teleports, 4 blue and 1 red. Each of the blue ones will lead you to the true forms of the Devil Lords. I highly recommend killing them before challenging the final boss. If not, you'll be dealing with a truly difficult demon with 120,000 HP and the powers of all the Devil Lords. Its your choice. |
 |
 |
To encounter the Devil Lords, run up to the blue teleports, and you'll
jump into them. You'll enter a small dungeon similiar to their dungeons
back on the earth. The Devil Lords are in this order (left to right):
Byunei - Aunas - Forneus - Arakes To get to each demon, you must go through a small and straight forward dungeon. They are very easy to get through. Here are the strategies for the Devil Lords: |
| Byunei
Byunei has improved pnly a little bit. Your attacks won't do nearly as much damage as they used to. Byunei also returns with her Trinitry Blaster attack, but it doesn't do too much damage. Her only advantage here is her high HP and defense. Keep smashing her with your strongest attacks to defeat her. |
 |
 |
Anuas
Be very careful in this battle! Anuas's fire counter attack has lept up in power to between 500 and 700 damage! It is an absolute must to not make physical contact with the Devil Lord. Use attacks such as Split Body, Round Slicer, and Continuous Shot to avoid the counter attack. Anuas has also learned a new insant death attack that he randomly throws in. The Fire counterattack is the only thing Anuas really has going for him- trash him with Split Body! If you happen to have the Flame Mantle, equip it on your hardest hitter and have him smash Anuas without having to worry about the flame counterattack. |
| Forneus
Forneus jumps into battle with a slew of Spear waza such as Double Stab and Great Wheel. Overall, Forneus is actually pretty difficult with his Maelstrom attack. Maelstrom has the nasty habit of instantly killing half your party. Between that and Mad Thunder which can hit 3 times for about 150 HP, Forneus can be very annoying. Generally though, he only uses Maelstrom when he gets very low on HP. Arakes Arakes is probably the easiest of all the Devil Lords. His attacks mainly consist of alot of the stronger waza: Earthquake Hit, Screwdriver, etc. His attacks though, are lacking in power. Arakes also has the lowest defense of all the Devil Lords, so don't be surprised if you knock off a 7000. After defeating him, its on to the final battle...
|
 |
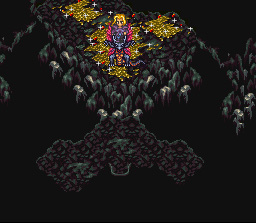
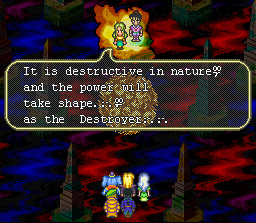
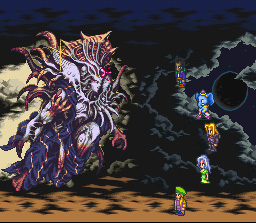
| Preparing for the Final Battle:
First of all, make sure that you have restored your WP/JP/LP on the teleporter that you arrived here on. If you have any Life Canes, equip them and use their Shatter Staff to heal a lot of HP. Make sure that you have Salves equipped on any spare slots to aid in healing. For those of you using Sara as your main character, you get a special version of Commander Mode that allows you to choose multi-techs/magic and choose single techs/magic for the rest of your party. Once you are prepared, walk onto red teleporter and run through into the next room. Sara is being held in a gateway that resembles the ones surrounding the Abyss Gates. Sara is glad that you cared enough to come, but she tells you that having both of the destined children in the same place will create The Destroyer... Once the Destroyer is summoned, Shonen is puleld from the party, and you have one last chance to chance to change your equipment and formation- I recommend Tiger's Cave. Final Battle: The Destroyer (If you want to see this demon's face, click here.) This is the battle you've been waiting for. The Destroyer has 2 forms, unless you didn't defeat the 4 Abyss Gate Guardians, then it will have 6. The 2 main forms are the Light form and the Dark Form. The Light form has a higher defense and does less damage. The Dark Form has lower defense, does more damage, and causes around 200 HP of damage per round! The 4 elemental forms will occur at random and aren't too hard to dispatch. During these forms, the Destroyer will have the attacks of the Devil Lords at its command. During the battle against the Light Form, you will be hit with many hit-all attacks making spells like Shadow Servant very hard to maintain. When it switches between the Light and Dark Forms, it will cancel out all special effects such as Quick Time or Dragon God! The Dark Form uses some pretty devestating attacks such as Death Mirror which will redirect all your attacks back to your party for one round. You'll know when the Destroyer is getting low on HP when it says a couple of things to you. If it switchs back to the Light Form again, it will use a curing spell on everyone that recovers 999 HP. This will greatly turn the battle in your favor. I recommend having any Wind Magic users cast Dragon God and Moon Magic users cast Shadow Servant while the Destroyer is in Dark Form to maximize the damage. Keep up the attacks, and the Destroyer should fall! Sit back and enjoy the ending, you've earned it. |
 |