
Walkthrough for 500-750 HP
These are the recommended quests that you should attempt between these HP ranges. (Note: this is not the order you have to do these quests in, and it is possible to do quests in the next range before these.) If there are any requirements before you can perform these quests, they will be listed.
Quest Starts: Lance
Requirements: Must have sealed at least 1 Abyss Gate
Rewards: Holy King's Relics
Walkthrough:
| You probably remember the Holy Temple in Lance. Well head there
now to begin the Holy King Trials.
Hunter's Trial: First enter the left door and go down the stairs. Take the left stairs and head through the north entrance. You are now at the Test of Hunters so make sure at least one of your characters has a Bow equipped. Walk north through the door into the next room. Walk into the woman blocking the northern door, and the test will begin. You'll have to hit the ninja in the back with an arrow to complete the test. Then head north into the next room to repeat the process 2 more times. You'll receive the Fairy Bow for completing this trial. Trial of Warriors: Return to the main foyer and take the right door this time. Walk through the door on the right then go down the stairs and through the door. Walk north, and you are allowed to take 2 choices: the shortcut with harder monsters, or the long route with the easier ones. I recommend the shortcut to gain levels. You'll get the Holy King Helmet for completing this trial. |
 |
 |
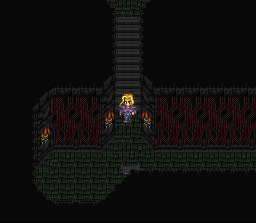
Painful Trial:
Now go to the Holy King's Altar which is between the two other Trials. Examine the altar, and it'll reveal a set of stairs. Talk to the Skeleton, and it'll ask if you'll take the Painful Test. Agree, and it'll attack you. The R Knight can hit you 4 times a round with each hit draining 1 LP. Use Nature Dance, Triple Thrust or other maximum strength waza to put him out of comission in a single round. Agree to continue when has asks. Walk through the entrance in the back of the room. Walk up the stairs and open the chest, and the floor will collapse! You'll now have to fight a battle against 3 Dancers and 2 Clowns. They'll use Charm Spells the first round to attempt to charm the entire party. Use hit-all waza such as Great Wheel, Firecracker, Megahawk, or Holo Sword to attempt to wipe out the entire enemy party. After a couple of rounds, the battle will end. If you manage to wipe out the entire party, you may win a Heartache. Walk south into the next room and make your way to the top-middle of the room and go through the exit. Walk up the stairs and open the chest for the Holy King Boots. |
Quest Starts: Pidona
Requirements: Have Herman/Black in your party.
Rewards: Many nice items from the Divine Tower, one of which is the Seven Star Sword. Also you'll get the Masquerade...
Walkthrough:
| **Note: If you have been playing the business game,
make sure you have completed the 3rd mission before you take on this quest!
Once you start this quest, you will not be able to talk to the Trading
Agent in the Divine Tower which you need to go to. Save this quest
until you have finished the 3rd mission!
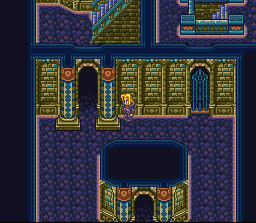
By now, you've heard about the pirate Jackal. He's killed innocent people, kidnapped children, stolen the Holy King's spear, killed Nora's father... basically, he's not a nice guy. You probably also know that Maximus is the Jackal if you're asked around, but you can't prove it. Herman/Black thought he killed Jackal long ago and says he can recognize his face anywhere. Hopefully, you had taken Herman with you through the Water Abyss Gate, and he'll have become Black. I'm going to refer to Herman/Black as only Black now. Take Black back to Pidona and enter the Divine Church's headquarters there. You'll find Maximus greeting Ludwig. Black will identify Maximus as the Jackal which causes him to panic. Jackal escapes, and two demons appear. Everyone, including Ludwig, quickly flees. Dispatch the two demons then walk behind the desk that Jackal was at. You'll enter a short dungeon. Walk south and then turn and continue to the left. Ignore the double doors, there are only monsters behind them. Now walk to the north and turn right. Walk down the stairs to the next level. Walk down then turn left. Enter the double doors this time to get some chests containing a Nut [Shirt], Remedy, Soft, 800 G, and an MPotion 3. |
 |
 |
Now return to the previous room and head down the stairs like you did on the last floor. On this floor, head to the area the double doors have been in the previous floors. You'll notice an outline on the wall where a door should be. Examine the outline, and the wall will move up revealing a hidden door. There are 2 chests in the room with a Witch's Eye and 2000 G. Now examine the mirror to find another hidden entrance. Go down there for a room with a chest that contains Stardust armor. Leave the room and head down the stairs. On this floor, head all the way south then turn to the left and walk up the stairs. Keep walking up the stairs until you run into a stationary Divine Church member. He'll suddenly charge at you and begin the battle. |
| Ren Wang
This battle should end rather abruptly and leave you wondering why this was even a boss battle. You should be able to wipe out Ren Wang in a round (maybe 2 if he uses Nap). Using waza such as Nature Dance and Split Body should quickly finish him off. His attacks aren't very strong either and are mainly flame/sun based. He uses Heat Wave sometimes which will do very little damage (0-10) if you have good magic defense. There's not much that can be said about him. You shouldn't even have a problem if you don't have any WP left. |
 |
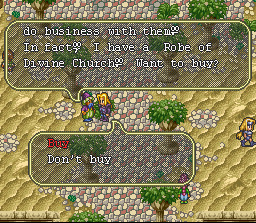 |
Head on upstairs, and you'll wind up back in Old Pidona. Talk to the people, and they'll tell you that Jackal and some members of the Divine Church quickly fled from town to Librof. Leave Pidona and head to Librof. Well, Jackal is no where to be seen in Librof, and he was a member of the Divine Church, so let's go there now. Talk to the merchant that is seen in the picture. He'll offer to sell you a Robe of the Divine Church so that you may enter. However, if you are using Harid (like me) you won't be able to buy the robe. Harid will refuse to wear it since the Divine Church killed his Princess. Instead, you'll have to donate 10000 G to enter. Once you enter, take note of the Church member blocking the right-hand door. You'll need to talk to Tiberius to be able to continue. Since the Divine Tower is very confusing, see the Maps section to find the way through it. Trying to convince Tiberius that Maximus ,who is the pirate Jackal, is evil is nearly useless. Luckily, Jackal/Maximus decides to prove the point for you. Jackal declares that he is landing on the Divine Tower and will use his monsters to collect the Holy King's Relics so that he can rule the world. |
| Now Tiberius is willing to listen to you. Talk to him again, and he'll join you. Now go up the stairs to the right of Tiberius's chamber' Head up to the top of the tower and kill all of Jackal's monsters. None of the battles are very hard. The Red Dragon will provide the most trouble so hit it with Nature Dance, Split Body, Dynamic Hit, Southern Cross or any other strong waza. Tiberius tells you that Maximus has taken out the elevator so you'll have to find another way to get him. Head back down to the first floor. Remember the Church Member blocking the entrance? Walk near him, and he'll turn into a monster and attack. Now head through the door and walk east then turn up. Turn left and go through the northwestern door. Head down the stairs into the basement of the Divine Church. Walk counter-clockwise and kill the female demon that's guarding the large door. There is a switch behind there that will active the elevator. | 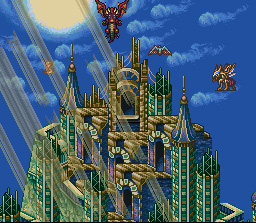 |
 |
However, it has to be constantly pressed so you'll have to leave someone behind to continue. Walk back upstairs and go to the large central door on the first floor. Step into the elevator, and you'll be transported up a few floors. Walk up the stairs on the floor you land on. Head south through the door, and you'll emerge on the outside of the tower. Walk up the stairs and head into the entrance on the right side of the tower. Head west to find another stationary demon guarding a switch. Sadly, you'll have to leave another party member at the switch so that you may continue. Head back to the room with the elevator and take the newly opened door to the right. Walk downstairs into the next floor. Instead of heading down the primary hallway, walk through the hidden entrance to the west of it. Get the 2 chests for the room for 1000 G and Sorcerer [armor]. Head back and walk down the hallway and open the chest next to the stairs for a Life Element. Walk down the stairs to the next level. Head down the next set of stairs in the adjacent room and head north into a room with a chest and a set of stairs heading upwards. |
| Get the chest for a Soft and then head up the stairs. Get the chest in the room for a Salve 2 then head northeast and head west into a small romm with a chest that contains a Life Cane. Head back to the previous room and go down the stairs. In this room, there is a large crevice that divides the room. As you jump over, the last character to jump slips and falls down into the crevice. Walk down the stairs in the next room and open the chest for an MPotion 3. Head east into the next room and walk down the stairs. On this floor, first head southwest then walk downstairs and enter the northern door. Open the chest for a Remedy and head back up. Now head through the southern door and open the chest for a Rune Staff. Walk back to the first room on this floor and head through the southeastern door. Before going down the stairs, head through the northern door to get a ches with a Salve 3 inside. | 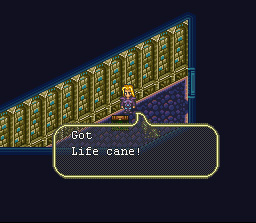 |
 |
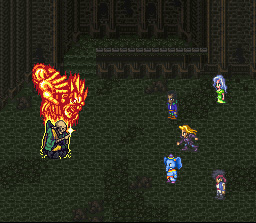
Head down the stairs and through the southern door. Open the chest for a Will Spear then head back upstairs and go north to open the chest for a Barrier Stone. Head down the stairs, and a wall of slimes will knock out another member of your party. Go down the right staircase first for a chest with 3000 G. Go back upstairs and take the left staircase this time. Walk left into the next room and head up this staircase. As you walk down the hall, a trapdoor will spring and drop your last remaining party member into the basement. Looks like you'll be facing Jackal alone... Head through the large doorway for the controntation. Needless to say, Maximus/Jackal is not pleased that you're here. He decides to kill you so no one can stand in his way for world domination. |
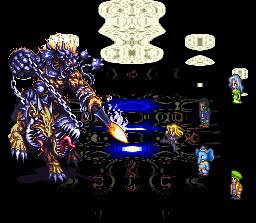
| Maximus
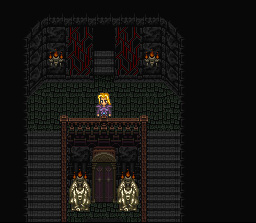
You begin this battle with only your main character. After fighting for the first 2 rounds, another of you party members will show up. One will show up each round until you have 5 members. Then you'll have one round before Maximus "transforms" and brings in his guards. If you've already sealed the Water Abyss Gate, you should be able to wipe out Maximus in the 4th or 5th round- before all your party members return. Maximus is not strong at all. Once he transforms, he has the Holy King Relics at his disposal, but still isn't much of a challenge. 4 Max's Guards will appear with this transformation and are only a minor annoyance. Use waza such as Nature Dance or Split Body to end Maximus's world domination career abruptly. With Maximus's death, you'll receive all of his Holy King Relics which are: the Glory Staff, the Masquerade, the Holy King Spear (the one stolen from the Workshop), the Seven Star Sword, and the Devil King Axe. If you are playing as Katrina, you may now return to Loanne with the Masquerade If you don't have any room in you inventory though, you WON'T get the relics! |
 |
Save the Fairy from the Traveling Circus
Quest Begins: Librof, Stanley, Farce (maybe other cities, but I've only seen it happen in these)
Requirements: 500+ HP
Rewards: Yousei becomes recruitable
Walkthrough:
| From time to time, when you're strong enough, you might see a large sign showup near one of the town exits. If this happens, walk through the exit where the sign is placed, and you'll arrive in the Traveling Circus. To enter, pay 10 G to the ticket lady and walk through the gates. The two pink tents contain creatures that you cannot see due to the crowd. In the center is a blue tent which contains the poor fairy, Yousei. You aren't able to see the fairy, but you are able to hear its desperate pleas to be left alone. Now leave the circus and stay at the inn. During the night, you'll hear some one crying. Decide to help, and you'll appear in the circus. Enter the tents, and you'll find nothing in the cages except for the fairy... how strange. Go back to the tent on the right and examine the cage. When you try to leave, you'll be attacked by one of the strange monsters. | 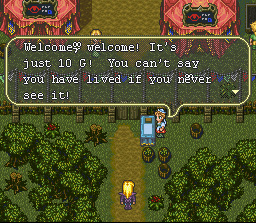 |
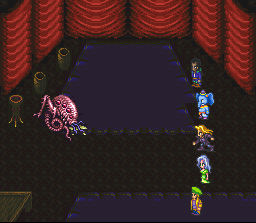 |
Soul Sucker
This battle is very easy. If you want to end it quickly, use waza such as Triple Thrust, Final Letter, or Gold Dragon, and the battle will end in less than a round. Otherwise, this battle shouldn't last long at all, probably 3 rounds tops. The Soul Sucker has less than 4000 HP. It's Dissolve attack does half-way decent damage, but that's about all it can really do. Treat this monster more like a regular monster if you wish. Now head to Yousei's tent and walk to the backside of the cage. Examine it, and you'll open the cage freeing her. Yousei will fly off without a word back to the Fairy Village in the Ake Jungle.
|
Quest Begins: Zweig
Requirements: Finished the Podol Rat Quest
Rewards: Stop being run over by that car!
Walkthrough:
| Sick and tired of being hit by that huge car when entering Zweig? Well this problem can be solved. Head to the Professor's House in the West Forest. Go through the back door in the Professor's House that was previously locked. Go down the stairs and talk to the Professor. The Professor is depressed about her creation that has gone berserk. Choose to cheer her up, and she'll ask you to destroy the Car using the prototype behind the northeastern door. | 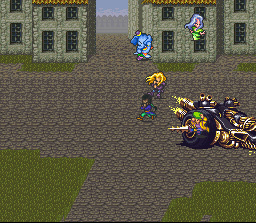 |
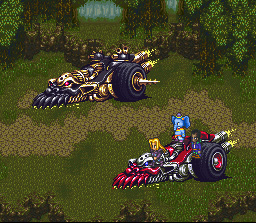 |
N. Zweiger
The Dragon Car can be hard if you aren't prepared for the battle. You'll only get to use 3 characters, and if any of them die, they are knocked off your car and out of the battle. The Car can get 2 attacks per round and likes to use Poison Mist against the entire party. Equiping Hid. Leather armor can save 2 of your characters from the poison. Use waza such as Nature Dance, Split Body or Golden Dragon, or Final Letter to cause around 6000+ damage per round. The Dragon Car battle won't be very hard if you keep your HP high and have powerful waza. |
Quest Starts: Zweig
Rewards: 10000 G, Gold Medal, and Podol appears on the World Map
Requirements: Main character cannot be Monica
Walkthrough:
| Talk to the guards in front of the Zweig Castle Gate. They'll explain that the tournament is a team match where the winner stays and the loser is kicked out. You'll have to fight a couple of teams before you can win the prize from Duke Zweig. When you enter, it'll bring up the Team List. If you are using Zsnes, the list won't display properly. Next will come the order in which your characters will fight. I recommend placing your strongest characters in the first and last slots. After beating each team, you will be completely recovered, and any characters that were beaten may compete again. Not much can really be said for these battles. If you've sealed the Water Abyss Gate, then you shouldn't have any problems with any of the teams | 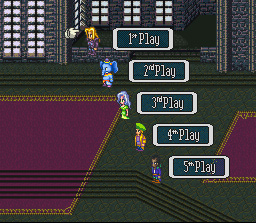 |
Quest Starts: Lance
Rewards: Ice Galaxy opened, amongst others
Requirements: Did not ask for money when Ice Hunting with Wood, 500+ HP.
Walkthrough:
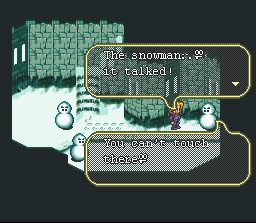
| Go to Lance and talk to Anna about the Aurora. If you are strong enough, she will tell you the Aurora will occur soon. Now exit Lance and go to the large scale view of the map. Wait for about a minute and a half or so (Zsnes's Fastforward feature comes in handy here...), and the screen will darken. Then, you'll begin to see some interesting lights. Go back to the smaller map, and the Aurora Path will open. Journey to the path, and the Aurora seems to get really close... once the light show is finished, you'll be in a town full of snowmen. None of them are moving, though. Enter the southwestern house and walk down the stairs in the back. Talk to the Snowman on the far right side of the room. Depending on your main character, you might have to talk to him multiple times. Eventually, he'll reveal the truth that the town is populated by living Snowmen. | 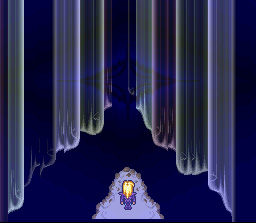 |
 |
Your quest is now to get the Ice Sword and Eternal Ice Crystal from the Ice Galaxy. The Eternal Ice Crystal is needed to allow a Snowman to leave the village without melting. Talking to the Snowman again will allow him to join you. Return to the entrance of the village and walk inside the cave and past the first room which you can rest in. This cave will lead you to the Ice Galaxy where the Ice Sword and Eternal Ice Crystal can be found. After leaving the cave, exit the village to the right to enter the Ice Galaxy. From the beginning, run and jump east one island then north two. Walk up the ramp and exit to the west. In the next screen, jump west one island, north two, then jump east one island and exit to the north. Kill the stationary female demon and examine the statue. You'll gain the Eternal Ice Crystal which can be given to the Snowman. Once equipped, he may not remove it ever again. Walk north then a bit west. Jump down one island, and west an island to get back to the main path. Walk north and jump across the islands all the way to the right. Now jump up an island and jump all the way to the left. Jump north an island and get onto the large strip of land. Walk all the way to the right to encounter the first Dragon Ruler. |
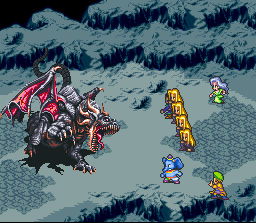
| Dragon Ruler (White)
This Dragon Ruler is the first you will encounter and also the easiest. It recovers around 700 HP per round and enjoys casting Freeze Wall on itself. To beat the Dragon, use high end waza such as Final Letter, Nature Dance, Sky Drive, Split Body, or Triple Thrust to inflict loads of damage. If you have Turtle Shell Split, it will also make the battle much easier by lowering the Dragon's defense every round. The Dragon Ruler can do a fair amount of damage with its breath attack and Freeze Wall counterattack, but overall, the Dragon shouldn't pose too much of a threat. Behind the Dragon Ruler is a small island with the Ice Sword encased inside. Run over and grab it then head out of the Ice Galaxy. |
 |
Rewards: Earth Abyss Gate Sealed, Treasure
Quest Begins: Pidona
Requirements: none
Walkthrough:
| First of all, you'll need to have gotten the Royal Ring from the descendents
of the Holy King in Lance. Now enter the Devil King Palace through
Old Pidona. Return to the door that mentioned The Ring. The door
will open leading you to a small room with a portal. Step on the portal,
and you'll be teleported into entrance of the Abyss. Walk down the
stairs to enter the Earth Abyss. Walk down the stairs and go through
the door. If you wish, you can quickly fight Arakes by walking towards
the large portal and then walking through the door. Go down the stairs
and walk through the door, and you'll be at the Earth Abyss. However,
you most likely don't want to do that just yet...
Walk to the west to reach a chest with a Barrier Stone in it. Return to the previous room and walk into the room to the east. Open the chest to get an MPotion 2 then return to the previous room. Now walk to the north and go through the door. Keep on the railing and take the exit to the right to be in a small room. Open the chest for a Demon Belt. Return to the previous room and walk down the stairs. Take the exit to the north then, in the next room, take the eastern exit. Walk along the hallway and take the eastern exit once more. Now walk down the stairs to enter the lower floor. Continue walking down the stairs then follow the winding path until you reach the stationary beastman which is an Arakes Demon. Kill the demons and walk through the door. Now walk through a hidden door on the bottom-left corner and walk south through the exit. Walk through the western exit, and go north. Walk along the mirrored path to reach a Storm Dragon and a chest with a Meteo Frag inside then return to the previous room. Take the eastern exit to get a chest with Fishscales inside. Return to the previous room and take the southern exit. Keep walking south to enter a hidden room with a chest containing 500 G. Walk north to the previous room and take the western path. This path takes you to the southern end of the room so that you can access a chest with the White Tiger armor in it. |
 |
 |
Now return to the 4-way intersection and take the eastern path. Follow the path then head south and down the stairs. Follow the winding path and exit through the door to the north. Now you are in another of the 4-way intersections. The eastern path contains a chest with 500 G, the northern path contains a chest with a Meteo Frag, the western path allows you to continue onwards. On the western path, follow the walkway until you reach the next basement. There, go in the first cell and examine the skull that's sticking up to get an Elder Bow. In the second cell, examine a similar skull to get an Edelweiss. Take the exit to the right. You'll appear in the last 4-way junction. The exit to the south has chests containing a Wonder Bangle and the multi-magic spell Light Wall, the eastern exit contains a Meteo Frag, and the northern exit leads you to Arakes. Walk north then go down the stairs. Head through the door, and you'll encounter the Earth Abyss Gate. Before you can seal it, Arakes comes to stop you. |
| Arakes
At this point in the game, Arakes should be absurdly easy. His enjoys using a fire elemental attack, Rear Burner, which doesn't do more than 140 damage when it hits. His other attacks don't do too much either. Use waza such as Golden Dragon, Triple Thrust, Final Letter, Dynamic Hit, or Tiger Break to quickly finish this battle. For me, Golden Dragon (at level 37 swords) did 4890 damage when it hit. Arakes should die in no time. |
 |