
Walkthrough for 350-500 HP
These are the recommended quests that you should attempt between these HP ranges. (Note: this is not the order you have to do these quests in, and it is possible to do quests in the next range before these.) If there are any requirements before you can perform these quests, they will be listed.
Travel the Naj Desert to Reach the Divine Tower and Mung Tribe
Quest Start: Librof
Rewards: Open up the East, lots of treasure
Requirements: Talk to the people in the Librof Pub to open up the Naj Desert.
Walkthrough:
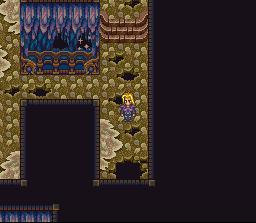
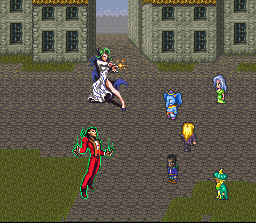
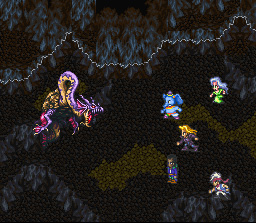
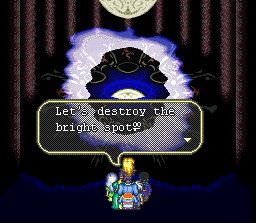
| After talking to people in the Librof Pub, head to the Naj Desert. Continue heading left until you reach the Divine Tower. Talk to the person seen in this picture and leave the Tower. Head back into the Naj Desert, and this time head to the right. If you've gone right for over 10 screens, most likely you didn't talk to the correct person and will have to head back to the left to exit. If you don't talk to the red-headed lady in the Divine Tower, the Dry River will never appear as you head through the Naj Desert. (Note: The Dry River will not appear on the World Map, even after reaching it through the Naj Desert. If you ever want to head back there, you'll have to walk through the Desert again.) The Dry River is easily identifiable as it looks very different than the Naj Desert you've been walking through. Now, head down the ledge and encounter the Plant enemy to reach the river. | 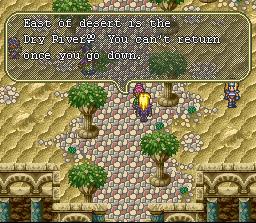 |
 |
If you aren't prepared, the Sundines you'll fight here can be very difficult. Head down into the river. Remember, after going down the waterfall, you may not return to the Desert! The only way back is to complete the series of quests that follow. Follow the river and exit to the right. Follow the river down through the cave and exit to the left. Now follow the river and exit to the south. Go through the cave and down the large waterfall. Continue down until you reach another huge waterfall. Go down there to reach the Desert of Death. In the Desert of Death, head down a bit then turn left. Climb down the ledge and continue to the right. Climb up the ledge and head to the right some to the next ledge. Climb up this one also and then climb down the other side. Circle around the ledge and climb up to the new one. Now circle around the ledge and exit to the south. |
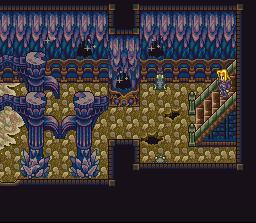
| Now you enter the main screen of the Desert of Death. If you exit to the north, you'll reach the Crystal Ruins. The walkthrough for that is found below. Now just make your way through to the east (it really isn't that hard), and you'll appear on the Great Praire. Head 1 screen north and then 1 screen east to enter the Mung Tribe's village. Everyone here comments on how strange you look. |  |
 |
Go to the hut in the southeast that has a woman standing in front of the entrance. Talk to her, and she'll run inside the hut calling for her teacher. Enter after her to meet the teacher. She asks how you got here, and you explain. She says you're a total idiot (well you did go down a large waterfall ;) ). She'll mention the only way out is going through Xuan City to the east, but they'll imprison you because you look so suspicious. She'll talk to the general there, Yan Fan, if you'll do her a favor. She wants to use some special magic and takes away one of your party members (ARG! Taking Harid away is bad...), and you'll need to investigate the Neft Tribe to the south. Talk to Zhi Lin, and she'll join you. You'll get a special helmet (the Psycho Helmet) so that you may communicate with the Neft Tribe. Now leave the Mung Village and head south until you end up in a cave. |
| This is the cave of the Neft Trive. It seems that the Zelnams (demons from the Abyss as the Mung call them) have invaded their cave. Make your way to the southwestern corner of the first room and go through the door. Walk through the western door in the next room to come into an area with an Zelnam standing still. There are 2 of these Zelnam standing still that you'll need to kill to restore peace upon the Neft Tribe's cave. After killing the stationary Zelnam, exit the cavern to the right. Now go south, and you'll come to an intersection. You can either go east or west. Going west will take you down to where all the Neft Tribe members are currently inhabiting. The leader of the Neft is busy right now so you'll have to return once you've killed the other stationary Zelnam. Now go back to the intersection and take the eastern tunnel. Go to the southern portion of this cavern and kill the stationary Zelnam. All the monsters in the Neft Tribe's cave will disappear now. | 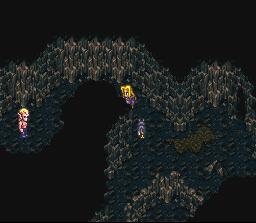 |
 |
Return and talk to the elder. He'll tell you that no one has come from the west in over 600 years. The Zelnam are from the Abyss, and they must be stopped. He also reveals that the location of the Zelnam Tribe is in the northern section of the Great Praire. Return to the Mung Village and talk to Bai Meiling. Your party member that she borrowed will return, and you'll be told to talk to Yan Fan in Xuan City. Leave the Mung Village by exiting to the east. Right when you enter Xuan City, you are arrested. You're brought before Yan Fan who explains he's currently in charge of the city. After explaining your story, Yan Fan doesn't believe you at all. He has you taken to jail, just as you expected, eh? Try to leave the cell, and Bai Meiling will come and unlock it. |
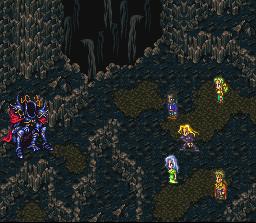
| Before you can leave, Yan Fan demands to know what his teacher is doing. Despite his doubts, he seems to agree with her that your arrival is a sign. You are released and free to roam Xuan City. While you're here, the ultimate Moon and Sun magic can be bought for a low price of 9999 G. Higher level Moon and Sun magic is also available here. Once you're finished here, leave Xuan City and head back to the Mung Village. Leave the village and head north 2 screens to enter the Zelnam's Den. From the entrance, head west as far as you can go and then go down the stairs. The Zelnam Den can be very confusing due to the numerous caverns throughout the floors. First head west up the stairs to get a chest with 300 G inside. Now go down the stairs on the far right side of the chamber. Open the chest in this area for a Spirit Stone scroll. Now return to the prievious chamber. Go down the stairs in the far left side of the chamber. On the next ledge, go down those stairs too. On this ledge, go down the first set of stairs you encounter to find 2 chests. The chests contain an Elder [bow, left chest] and 500 G in the right chest. Now return to the previous chamber and take the stairs in the northeastern corner. Continue down the stairs in the next area. Here, run to the right to jump over the gap and onto the ledge with 3 chests. The left chest has a Barrier Stone, the center one has a Victory [katana], and the right one has 2000 G. Now cross back over and prepare to fight the leader of the Zelnams... |  |
 |
Devil Armor
Here he is, straight from the Abyss itself. The Devil Armor battle can be just plain brutal. I recommend casting spells like Illusion Sun and Shadow Servant to be able to avoid attacks [Illusion Sun] and pile on the damage [Shadow Servant]. He'll summon Zelnams in every round which will make this battle much more difficult. You'll need to use long range attacks like Backstab, Great Wheel, Megahawk, and any high level bow wazas to do any amount of decent damage. If you don't have any long range attacks or multi-hit wazas, this battle can drag out for quite a while. Once you have defeated the armor, you'll gain the Devil King Armor. You're automatically teleported back to Xuan City where you're thanked by both Yan Fan and Bai Meiling. Now you can return to the west! But first return to the Mung Village and talk to one of the men there. He'll mention he kept going west and saw a city of elephants. Now Rashkuta is revealed on the map. You can go there and explore if you wish. |
Quest Start: Crystal Ruins
Rewards: Nice treasures
Requirements: Must have exited north from the main screen in the Desert of Death.
Walkthrough:
| I think the Crystal Ruins has some really cool music and graphics. After entering, walk north and enter a T-shape intersection in the ruins. Walk to the left and open the chest for a Spirit Stone scroll. Now head to the right and get another chest with a Spirit Stone scroll in it. Now head back into the center of the intersection and head through the northern exit. Now head right and go up the stairs into the next room. Head south and then left until you get to an entrance in the middle of the chamber. Enter the room and get the chests. The one on the left has a T Potion, and the one on the right has an M Potion. Now leave the room and head left then up to get another treasure chest with 1000 G in it. Now go back downstairs and head left to take the stairs down this time. | 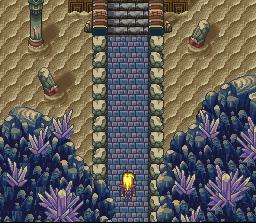 |
|
Now you'll find that a woman is being attacked by a multitude of frogs. Go towards her and the amphibians will disperse and attempt to attack you. When you get close to the woman, she suddenly turns into a monster and attacks you... lovely. Afterwards, go left and walk downstairs. You'll see 2 dragons flying around near 4 treasure chests. Erm... kill them if you wish. The chests contain, starting from the upper right and going clockwise: T Potion 3, Star Trail [armor], Magic Beast [armor], and an M Potion2. It is possible to get these chests without fighting the dragons, but I recommend trying to kill the brutes. |
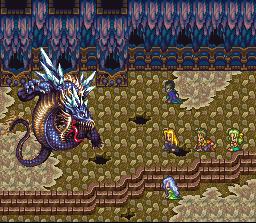
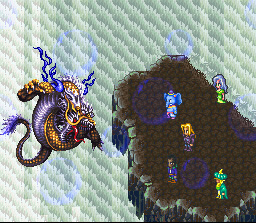
| Crystal Dragon
This monstrosity is the Crystal Dragon. It's big and thinks you look delicious. Not only this, but they guard the treasure chests in the Crystal Ruins. They're not quite as hard as they may appear, and now I don't recommend Tri-Anchor otherwise Electricity will tear you apart. Its regular attack hits twice and may paralyze you. Use the Tiger's Cave formation, and you'll take very little damage from the dragons. You'll probably want to use higher level waza like Shot Wave, Split Image, and others to do significant damage to the beast. Unlike the Dragon Rulers, these don't have inordinate amounts of HP and regenerative abilities. |
 |
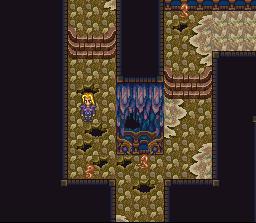 |
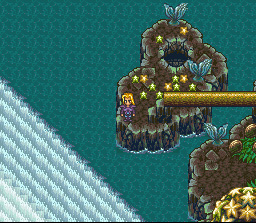
You're not done with the Ruins yet! Drop down the large hole in the bottom-left corner of the room to enter the second part of the ruins. This next section is more of a maze than the previous ones. First head down to the T-Intersection seen in the picture to the right. Now go right until you see an arch. Head up then turn left to reach a chest with a Spirit Stone scroll inside. Now head up and to the right and climb up the stairs. There are 4 chests in the room from left to right that contain: Life Element, Salve 2, Remedy, and a Soft. The Slimes in the room will multiply if given enough time. Now leave the room and head back down to the arch. Now head to the southwest corner of the room and go down the stairs. There are Cyclops in this room which can be difficult if you're low on WP so avoid them if you find it necessary. |
| The chests in this room contain (left chest) 3000 G and Titan Suit
(right chest). Now go back up the stairs and head to the middle section
on the eastern side of the room. You should see a hole near there.
Jump down into the hole. Now head up the stairs through the next
2 rooms and drop down into the hole. You may now exit the ruins and
continue back on into the Desert of Death to get to the Great Praire.
There you can find the Mung Tribe and finish the Quests in the East
which are found in the walkthrough above.
|
 |
Get the Dolphin Statue with Herman
Quest Starts: Lance
Rewards: the Dolphin Statue
Requirements: See below
Walkthrough:
| To begin this quest, first travel to Lance and enter the home of the
Johannes and Anna. Talk to Anna who is standing next to the stairs
about the Abyss Gates. Agree to listen to her story, and, before she
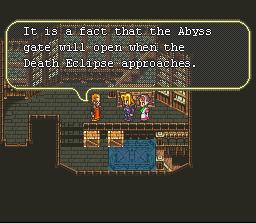
can get started, Johannes will walk downstairs and explain everything to
you. He tells you that after the Death Eclipse approaches, the Abyss
Gates will open. There locations can be told by the gaps in the stars
which he has studied. He tells you the locations of the Abyss Gates
which are:
Earth Abyss Gate- Devil King Palace, Pidona |
 |
 |
After this, you should be able to go to Vanguard by the World Map and begin the Vanguard Murder Case. If you are in fact not able to, then either a) the game has deemed you too weak to seal an Abyss Gate yet or b) you might have to seal a different Abyss Gate first. If you are stuck with the second case, I suggest you seal the Earth Abyss Gate since it is probably the easiest. I listed the Water Abyss Gate first because it will allow you to trigger some other helpful events such as recruiting Boston, Undine, and Herman; recapturing Herman's lost youth as Black; and allow you to be able to trigger the Maximus Quest easier since you must have Herman or Black in your party to start it, and I would rather have Black than Herman. Anyways- on to Vanguard for the murder case. Instead of appearing in Vanguard as you usually would, you'll switch to a scene in the home of a lovely couple. They're both asleep in bed when the husband has to use the washroom. He goes outside and is brutally slaughtered by an evil demon! The demon drags the body back inside and throws it upon the bed. The wife asks what the problem is only to discover her husband's blood... The demon moves in for the next kill. Now you enter Vanguard normally. Talk to everyone to learn about the mysterious murders that happened last night. Enter the couple's house, and you'll see one of those sights from a horror movie: the house is pretty much covered in blood. Next go talk with "Captain," the Mayor of Vanguard. |
| Now travel to the inn and spend the night there. During the night, the main character wonders if the monsters will come... Suddenly your awakened by footsteps only to find its one of the other party members, heh. Everyone goes back to sleep again, alert yet again for impending danger. This time, much louder footsteps awaken the dozing heros. Your main character awakens and yells "So Sweet"... well at least Mikhail did as he kills one of the monsters. Now you'll have to fight 3 others in this rather simple Boss fight. |  |
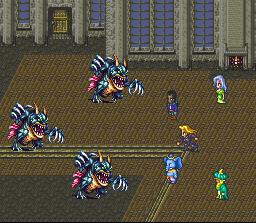 |
Forne Soldier x3
Hah- I don't really consider it too much of a Boss battle, but the wonderful Boss Music is playing so... Just use a nice hit-all waze. Any of them will do nicely, especially Great Wheel. I had Mikhail use that and it killed all of them in 1 hit. The Forne Soldiers, being Soldiers of Forneus, the Water Abyss Gate Guardian, are naturally immune to Water-based attacks and will also use them. Although you were sleeping at an inn, your WP and JP has not been recovered, not like it overly matters in this battle. If worst comes to worst, just use regular attacks. They only have around 1100 HP each. |
| After defeating the Forne Soldiers, you'll finish your stay at the inn. In the morning, go and talk to the Captain. He'll be completely baffled about how to protect Vanguard from the threat of Forneus. You suggest that you should make Vanguard move as it did in the times of the Holy King. The Captain agrees with your suggestion but has no idea on how it could be accomplished. He'll ask if you'll help though- don't ask for money. This choice can cause massive problems later on. (ie: no Aurora occuring thus no Snowman Town or Ice Galaxy). Agree to help, and you'll begin searching for the inner sanctum of Vanguard. Leave the Captain's house then re-enter it and talk to him. He asks if you've found it yet, and you will respond no. Then you notice the dark spot the Captain is always standing on. He'll open it up and says its where he stores his money. Go down the stairs into a small dungeon. |  |
 |
Go down and then turn to the left. Walk past the stairs and go up into the small room. Open the treasure chest for 600 G. Return to the previous room and walk down the stairs. Exit the room you're in and turn to the left. Walk up and turn right then walk down into the room with the treasure chest. Open the chest for a Horned helm. Now head out of the room and turn left. Walk down the hall and then down the stairs. The first door on the left is locked. Inside the second one is a trapdoor and another locked door. Going down the trapdoor in this room is pointless; it will only lead you back to this room. The third door also has a trapdoor and a chest behind the locked door in the back. Walk into the middle of the trapdoor to drop down into the next level. Exit the small room and walk up the stairs to the left. Open the chest to get a Fang Charm. Go down into the trapdoor and, this time walk up the stairs to the right. Open the chest for a Life Element. Exit the room and continue down the hallway. The last 2 doors lead down into rooms full of monsters. Head up the stairs in the right side of the room. Go south through the door and turn right then head into the room in the center. |
| Open the chest for an M Potion 2. Leave the room then head right and up the stairs. Hit the switch to the right of the Ghost to open up stairs behind it. Kill the ghost then go up the stairs. In theis room, walk up and onto the dolphin emblem in the altar. The room will begin to light up as it is activated. Now leave the dungeon and talk to the Captain again, but on you way back, return to the room with the chest that contained 600 G. The chest can be opened again for another 600 G. | 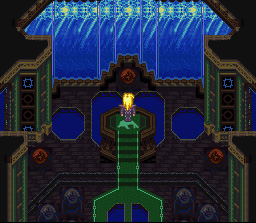 |
 |
When talking to the Captain, he'll mention he's seen a picture in an ancient book. He asks if it looked like the picture to the left. Answer "No" because there isn't a Dolphin Statue in the current Control Room. You're told that the statue is needed to make Vanguard move. He also mentions that it is made from Orichalium and could be sold for a high price. When asking if anyone else knew about the area, Captain says that someone in the city might know. Head for the Pub and talk to the owner. Choose Gossip 3 times, and he'll say that he sold the Dolphin Statue to the Dophore Firm in Yamas because he was desperate for money. Now head for Yamas. |
| Talk to the owner of the Armor Shop, and he'll ask you to buy something before telling you the location of the statue: Black stole it. Head to Great Arc now and look for an the person that looks like an old pirate. He'll ask for 100 G to show you the cave until you mention the Dolphin Statue. Once he hears that you'll use it to move Vanguard so that you can fight Forneus, he'll join. His name is Herman, the worst character in the entire game. Now that he's in your party, he won't leave until you either kill Forneus with him or if he dies (0 LP). After killing Forneus with Herman, he regains his lost youth and becomes Black who is very good. In the cave, Black will guide you to the Dolphin Statue. Just follow his instructions, and you'll get there easily. On the second screen in the cave, get the chest guarded by the skeletons to grab a T Potion2. In the third screen, you're told that the Dolphin Statue is in the cavern to the left, and treasures can be found in the cave to the right. In the cave to the right, open the chest down the first corridor to the right to find 50 G. The Demon statues around the chest revive when it is opened. Climbing up the stairs and opening the next chest also nets you 50 G and some Demon statues to contend with. | 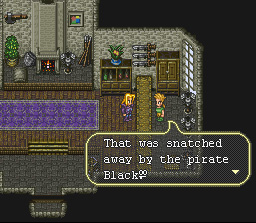 |
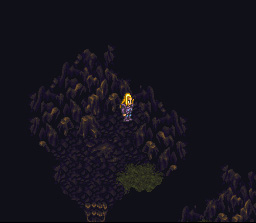 |
Going through the cavern in the back of the tunnel leads to a chest with 50 G in it. Some slimes will be dropped into the room after you open the chest. Return and enter the left fork. Herman mentions that there are hidden rooms in this area. The hidden area can be accessed from the location in the picture to the left. The first chest in the room contains a Spirit Stone scroll. Walk down the stairs to get the other one which has a Barrier Stone inside. In the next area, head right for two chests with a Spike shield and a Viking axe. Exit the small side room and go down the stairs into another side room on the left. |
| Open the first chest to get a Life Element. Then walk down and turn left and go through the hidden passage (denotated by the green moss growing around it). Now head down and into the entrance. As you head right in the next floor, examine the strange face carved into the cavern walls. The face will suddenly light up, and cavern exit will not close when approached. In the next room, hit the face-like switch again, and the dragon statue will activate. If you bump into it, you'll be forced to fight a Blue Dragon which isn't overly difficult. In the next room, go up onto the ledge and open the chest for 200 G. The chest to the northwest of it creates zombie monsters. Before exiting this room, get the treasure chest next to the exit for a Training Cane. The first chest in the next room contains 1000 G. Exit this room to the right to enter the last area. You'll have to run to jump across the islands. The treasure chest on the first island contains 1000 G. Do not exit to the right just yet. Go up the stairs and examine the Dolphin Statue. You'll be attacked by an angered mollusk which means... | 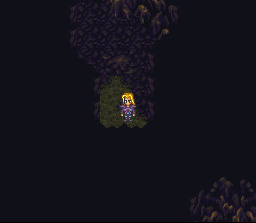 |
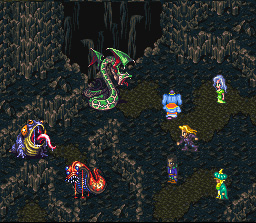 |
Kanherdraco, Psn Leech, Croaker
Hah... The only reason I consider this a sub-boss fight is that the monsters have alot more HP than usual. They are, however, exceedingly easy. I recommend using regular attacks because, if you're like me, you fought all the enemies through the cave and are low on WP from mastering techs. Besides, why waste T Potions when you'll end up fighting these guys? If you want, throw in a hit-all waza like Holo Sword or Great Wheel for good measure. You shouldn't have a problem with his battle. If you do, you're definately not ready for the battles to come. Now walk up and examine the Dolphin Statue to obtain it. Return to Vanguard and place it in the very front of the Control Room. Vanguard is still unable to move so it looks like you'll need to get some Water Mages from Moses to help you, but there is one problem: Moses is currently divided in a feud between Undine, the head Water Mage, and Volcano, the head Fire Mage.
|
Quest Starts: Moses
Rewards: Money, Devil King Shield, Water Mages to move Vanguard
Requirements: Must have obtained the Dolphin Statue
Walkthrough:
| Head to North Moses first. Go into the mansion in the southwest corner of the town. You'll be attacked by 3 Water Mages before you can get very far into the room. After beating them, Undine will come downstairs and apologize for the mages's behavior. She'll ask if you could kill Volcano for her because you seem strong. Accept her proposal, and she'll throw in 2000 G as well. Now go upstairs. There, you if you manage your way through the maze (See the maps section for details), you can get 2 chests with a Witch's Eye and Lake Armor in it. Now leave North Moses and head for South Moses via the World Map. Here, go to large mansion in the northeastern corner of the town. Upon entering, 2 Fire Mages. After beating them, Volcano will come down and apologize. He'll ask you to kill the Water Mage, Undine. Agree and he'll give you 2000 G. Yes- I have made you agree with both mages to kill each other. Devious, eh? Well exit the town to the north, and you'll find a well guarded by both Fire Mages and Water Mages. Go to the pub now and talk to everyone in there to learn that Undine and Volcano are fighting over something in the Dead Man's Well. Time to head there! Since you have talked to both Undine and Volcano, you can talk to both mages and have them leave. | 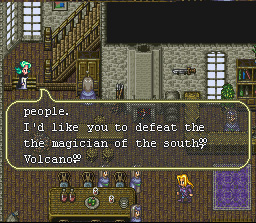 |
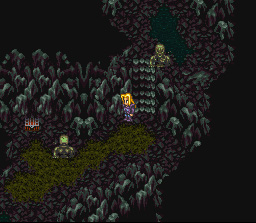 |
Examine the well, and you'll jump in. Exit to the left first to get a chest with a Bloody sword in it. Now head back to the first room and exit to the right. Head down two sets of stairs then turn right to get a chest with an M Potion2 inside. Turn around and walk down the stairs to the left. Now walk up the set of stairs and ignore the room to the north. There's nothing in there. Walk down the stairs the stairs here to get to the next level. Walk down the stairs and turn left to get a chest with 300 G in it. Continue to walk down and get the chest with the Spirit Stone scroll in it. Return to the previous level and walk west through the wall. Continue through the entrance. Now walk to the left then up some, and you'll see a stationary zombie. Talk to it to begin the battle... |
| Death Master
He's a bit over-confident calling him self the Master of Death, but he can summon tons of undead. That's his main strategy really. You'll need to keep using hit-all waza such as Great Wheel, Snake Sword (if you learned it from the Kris Naga), and Holo Sword work great, even though Holo Sword will only hit 3 of the enemies. If you're able to hit him yourself, Brook Rush has done in excess of 2000 damage so I recommend using it. Other good waza to use are Tomahawk or any other of the Tomahawk-based waza or strong Bow waza. As long as you keep depleting his summoned undead, this battle will be very easy. Also, as long as you leave some of the monsters alive, he doesn't seem to summon more undead. This will work vert well if the ones he has summoned are on the back row. The battle ends when the Death Master dies, regardless whether or not there are monsters left. You'll obtain the Devil King Shield after winning the battle. |
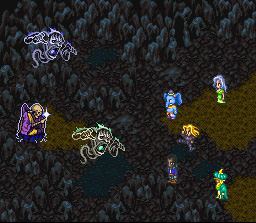 |
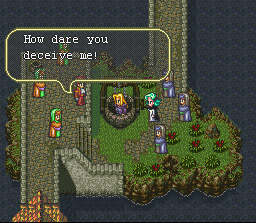 |
Now return to the entrance to the well. Move to the back and examine it and choose "Go" to go back up. It seems Undine and Volcano have realized they've been doubled-crossed. Both of them are very angered at the prospect of you getting the Devil King Shield. Each demands that you hand the Shield over to them. Finally, after their incessant bickering, they decide to join forces to kill you... well you brought them together... in a sense. That music must mean its time for a good 'ol boss fight. |
| Volcano and Undine
I must say, this battle isn't exactly the difficulty that you might expect from some master mages... Each of them have around 8000 HP or so, but it'll drop oh-so-quickly. Use attacks such as Brook Rush, Southern Cross, Dynamic Hit, Great Wheel, or Split Body to deal out the damage in no time. Using attacks like these, this battle should only last for 2 rounds. Both of them have their seperate elements at their disposal. Like I said, this battle is easy ;). After beating them, neither will end up dying which they would have if you had killed one of them instead. They realize how much trouble they've caused and change their ways... aww. Now you can go back to Undine's and gather the Water Mages for Vanguard. There is also a Flame Beast armor and a Guard Ring in Volcano's mansion. |
 |
Quest Starts: Vanguard
Rewards: Numerous, Water Abyss Gate sealed for one...
Requirements: Placed the Dolphin Statue in the Control Room, gathered the Water Mages
Walkthrough:
| Now that you've solved the problems in Moses and gathered the Water Mages, head back to Vanguard. Go into the Control Room and step up to the altar. The Water Mages will amplify the power of the Dolphin Statue and cause Vanguard to lift off! You'll ask Herman where you should head next, and he says to Limit Island at the edge of the world. Now return to the Control Room and step onto the altar. Set Limit Island as your destination, and Vanguard will move to it. Now leave the control room and head to the building which worked as the port for Vanguard. Take the boat to Limit Island to find that it's populated by... Lobsters? Erm... okay. One of the Lobsters knows the location of Forneus's Lair and will reveal it to you. Now you have a choice: Forneus has sent one of the Dragon Rulers to exterminate the Lobster-people of Limit Island. You can kill the Dragon Ruler and save them, or you can go on and kill Forneus. |  |
 |
Leave to kill Forneus ,and the Dragon Ruler will kill all the Lobsters. This will make Limit Island completely unaccessable. Besides, you don't want all these nice Lobsters to die, do you? You can recruit Boston here, God of the Martial Arts. His regular punch can knock off around 2000 damage later on so if you need a strong hitter and good water mage, get Boston. To enter the dungeon, go down the stairs in the small island seen in the picture to the right. In this first room of the dungeon, just walk down a bit and exit to the south. The next room is pretty much the same, keep walking south for a fair amount then exit. In this next room is the gigantic waterfall you saw earlier except you're on the other side. Hidden in this waterfall is the exit to the Dragon Ruler. |
| Water Dragon
This is very powerful if you are not prepared, but you may run. It will recover 999 HP per round and use some devestating attacks on you. You'll need to use attacks such as Split Body, Southern Cross, Dynamic Hit, and Headwind to survive. You can Run Away from this battle which will greatly assist in learning waza from this beast. A good way to attempt to counter the Dragon's regenerative capabilities is to use another element such as Fire to alter the "air." Just continue to use your best waza, and the dragon will eventually fall. |
 |
 |
After killing the Water Dragon, open the chest behind to get the Magic Beast armor. You can now either turn back since the island is saved or continue on into the caverns to find the Mist Dragon, a very strong regular enemy. If you want to fight the Myst Dragon, go back to the large waterfall and continue walking to the west. In the next room, head to the southeast corner and go behind the waterfall. In the next room, the mollusk-type enemy is the Myst Dragon. There is also a chest in the same room with a Life Element in it. Take the exit behind this room to find 3 chests that contain (from left to right) a Fang Charm, a Spike shield, and a Barrier Stone. Now return to Vanguard and head for Forneus's Lair. You'll have to dive to get to the Sea Palace and don't worry if it's not detected the first time. Continue searching for the palace, and it'll show up. Upon arriving at the Sea Palace, walk left and up the stairs. Continue walking to the left and go up the next set of stairs. In this room, walk to the left then go down the next set of stairs. Now begin to walk to the south but turn right to enter a hidden room. |
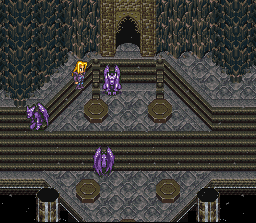
| There are 2 chests that contain 2000 G and a Meteo Frag. The entrance to the hidden room can be seen in the picture to the left. Now return to the main chamber and continue heading to the south then head down the stairs to the right. Now walk all the way to the north to enter the second part of the dungeon: the Sea Palace. If you don't want to fight all the demon statues, don't go down the center path. Instead, take the left or right sides then go through the entrance into the Sea Palace. Now walk through the next entrance. Walk to the left then go up the stairs. You might notice the outline of a door to the southeast. Go on through there to enter a small room with some demon statues. Walk through the northern exit, and you'll find yourself in a room with 2 chests and some demon statues that activate when you get close to them. Open the chests to get 500 G and a Barrier Stone. Exit this room and the next and take the northwestern exit this time. Walk northwest across the walkway, and you'll see the Forne Soldiers from Vanguard. | 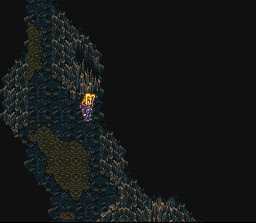 |
 |
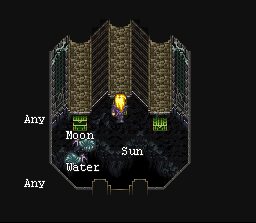
This time, they are Forne Generals though, and about the same challenge as the Soldiers. Continue walking to the northwest and exit. Walk to the left and down the first set of stairs and take the left branch at the intersection and go through the exit. You'll be in a room with a chest that contains 1000 G. Now return and walk to the right and through the opening. In the nex room, continue to the northeast and walk through the opening. Now walk north and the demon statues here will revive also. Try to avoid them if you wish and exit to the north. The next part of the Sea Palace splits into two paths: to the left and to the right. Take the right path first to enter a room with 3 chests. They contain: T Potion2, the Multi-Magic Tempest, and another T Potion2. |
| This is the formation needed for the Tempest Spell (Power Raise).
Now leave the room and take the path to the left. Walk north through the next room and then head to the left. Take the northern path, and you'll enter a large room full of enemies. In the northern side of the room, there are 5 chest that contain (from left to right) 1000 G, Fishscales, Sea Tortoise, Fishscales, and 1000 G. Now return to the previous and head down and through the entrance on the left. Go north through 3 rooms and you'll enter a curved hallway. Walk up then turn right and go back down. |
 |
 |
Walk north through the exit, and you'll be in a large room similar to the one with the 5 treasure chests. The entrance to the Abyss Gate is through the opening to the north. Before going there, I would recommend using a Barrier Stone to completely recover. Once you choose to close it, there's no turning back. Before you can destroy the Abyss Gate, Forneus emerges to destroy you. |
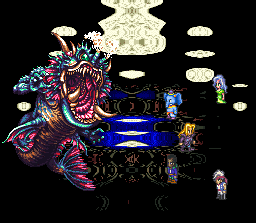
| Forneus
As much as it may appear to be hard, it really isn't. Forneus does recover 999 HP per round and gets two attacks. His physical attack will hit you twice for not too much damage. The trick is to have either a high magic defense or armor that will make you immune to water so his constant use of Squall doesn't do too much damage. The best way to counter his regenerative powers is Split Body. With around 30 skill in Swords, you should easily do around 2200 damage with that waza alone. Use other power wazas like Southern Cross, Dynamic Hit, Reverse Wind, Triple Supremecy (or Spiral Wind if you don't have that). This battle will be even easier if you have a designated healer. If you've fought nearly all the monsters since when you started the quest to get the Dolphin Statue, Forneus should prove to be no problem. (I started the quest with 400 HP and had around 750 when I fought Forneus). By going through these long quests, you have no problem completing any other of the side quests. After killing Forneus, you will be back in the Control Room in Vanguard. Take the city back to the main land, and you're ready to begin your next quest. Also, make sure to return to Lance and talk to Anna. She will give you the ultimate Water magic that was released with the destruction of the Gate. |
 |