
Walkthrough for 150-250 HP Range
These are the recommended quests that you should attempt between these HP ranges. The walkthrough also assumes you finished your introduction with around 150 HP. (Note: this is not the order you have to do these quests in, and it is possible to do quests in the next range before these.) If there are any requirements before you can perform these quests, they will be listed.
Transport Goods from Lance to Yamas/Farce
Begin Quest: Lance
Rewards: You'll receive around 3000 G for completing both quests and even more in the Thieves's Hideout. The Ancient Cave can be opened up on the map.
Requirements: You should do this quest as early as possible otherwise there will be no thieves on the maps.
| To begin this quest you must first be able to reach Lance. Go into the Weapons Shop and talk to the man seen in the image to the right. He'll mention that the transportation of goods has become dangerous as of late and will ask for you to transport goods to Yamas for 1000 G. Agree to do it, and you will set out at once in an area not located on the map. The path on the way to Yamas is very straight-forward and only has 1 exit. You'll find the path is loaded with thieves. Kill enough of them, and they will sound the alarm to retreat. Now fight some more and you'll have three options: "Give me money"; "Give me info"; "Don't need help." Give me money, well, gives you some G. Give me info will reveal the Thieves's Cave on the map. Don't need help will trigger a battle with the thieves. It's really very basic. | |
| After killing off/stealing from/gathering info from the thieves, exit the screen to arrive in Yamas and gather 1000 G. While you're in Yamas you can start the Robin the Masked Hero quest, or you can return to Lance and deliver goods to Farce. Assuming that you return to Lance, talk to the man once more. This time, he'll offer you 2000 G to transport goods to Farce. Once again, accept the offer, and you'll appear on another path. This path also has some regular monsters on it in addition to the thieves. The path, once again, is very straight-forward. If you didn't ask an thief for info last time, you'll need to do it this time when they call the Retreat, or the thieves cave will not open up. | |
| Upon arriving in Farce, the Thieves's Cave will appear on your map. Head there for the last part of this quest. Enter the Thieves's Cave from the world map. If you haven't fought too many battles, there still should be thieves in here. In the first floor, make your way up and then to the left to exit into the next screen. In the next room, first go onto the ledge and enter the cavern. Fight your way through the thieves here and open the chest to get 500 G. Now leave the cavern and head down to the lower part of the area. Continue on to the east and enter the next cavern you come upon. Inside, three thieves will scream and run away once they see you. Continue onward deeper into the cavern. | |
| Here, some main characters will have the opportunity to meet Paul, Nina(from Kidlanto)'s lover. He will beg for his life, and you will release him. He runs out of the cavern and disappears. If you want to recruit Paul later, return to Kidlanto after finishing the Rat Cave quest there and sealing at least 1 of the Abyss Gates. Leave this cavern and head past the stairs and enter the next cavern. Once again there are thieves and a chest in the room. Inside the chest is 500 G. Leave and walk down the stairs to enter the last area. Walk through the entryway to the main hall of the Thieves's Cave. The leader of the thieves is at the throne. Talk to him, and he will offer you 1000 G to overlook them. You can refuse and he'll raise the price to 2000 G. If you refuse again, he'll raise it to 3000 G. Now you can either take the bribe, and the cave will disappear from the map, or you can be heroic and honorable and refuse again. This time he attacks instead. | |
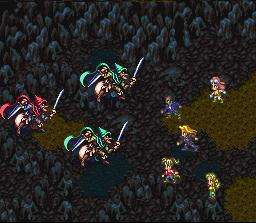
| Great Thief & the Thieves The Great Thief begins with 2 thieves in the battle. Each time you kill a thief, at the end of the round it will be replaced. The 2 thieves in the beginning of the battle must be eliminated before you can do any non-long range damage to the Great Thief. Be warned, the 2 thieves in the front row can use a combo: Time Gap Atk to hit one of your characters for around 200 damage. Try to kill these thieves in the first round. The rest of the thieves will generally appear in the back row. I recommend beginning with some long range attacks on the Great Thief and using powerful low-level waza such as Cross Slash, Rotation Hit, or Aiming on the thieves in the front row to finish them quickly. The Great Thief fights basically like a normal thief in all aspects. The battle ends once the Great Thief is dead regardless of any surviving thieves. This battle is very easy. Note: if you come here and there are monsters, there will be a more powerful demon here instead to fight. After the battle is over, grab the 2000 G in the chest behind where the Great Thief stood and exit the cave. For some main characters, the Ancient Cave should now be opened on the world map. If it is not, you'll need to talk to the old lady in Stanley after sealing at least 1 Abyss Gate. |
 |
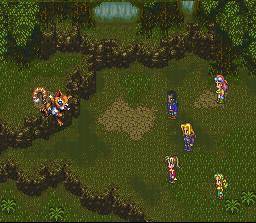
Catching the Pets in the West Forest
Begin Quest: Zweig
Rewards: Either selling the pets for money or info from the Professor.
Requirements: Talk to the old man in Zweig that mentions the West Forest.
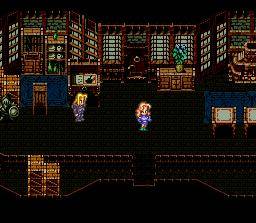
| This quest can be easily opened up from Zweig. Go into the mansion
in the very back of the forest and talk to the woman. She reveals that
she's the Professor, and her pets have run away. The pets are the
spirit-type enemies that are floating through the forest. You'll have
to talk to them to begin a battle. But before we get into the battles
of the monsters, its best to decide which path you want to go: the honorable
one of giving them back to the Professor or selling them to the old man in
the Zweig pub. I do believe your choices affect the "greed counter"
in the game. Anyways: onto the monsters
|
 |
 |
Mukcha
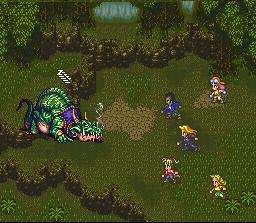
Mukcha is by far the hardest of the runaway pets. Mukcha is a fire-breathing Green Dragon with quite the nasty attitude. Mukcha begins the battle asleep. Early on, Mukcha can be very difficult if you're not careful. I recommend using Cross Slash, Aiming, Rotation Hit, Beast Chaser, or any other moderately strong waza that you have. Hot gas is Mukcha's most powerful attack which can do around 150 damage to its target. This battle is the only one out of the rest of the pets that you should be more cautious. |
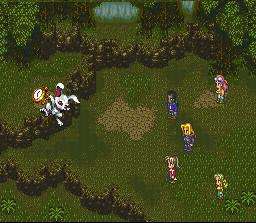
| Bunny
Erm... this battle is really a joke. How can something that looks like that actually be dangerous. I guess this defies the RPG cliche of the cute and fuzzy animals being insanely difficult. Bunny has around 750 HP or so. His suction attack can do about 130 damage, though. You shouldn't have to worry about it, however, since this battle should in a round or two. |
 |
 |
Face Plant
These pets are just plain strange. Face Plant isn't so much hard as it is annoying. It likes to use Blood Suck for about 140 HP of damage. Face Plant has about 1000 HP (note: I get my estimates by approximating the total damage I've done. Well... helps since everyone except Harid and Mikhail do around 100 HP). The only real thing you should watch for is Blood Suck. |
| Mako
Wow, another fuzzy little animal. Mako's Step attack is annoying, it is a Feint attack that hits the entire party. Mako is the weakest of all the monsters. Its attacks are basic and do very little damage. (Hard to tell how much HP it had... Mikhail killed it instantly). |
 |
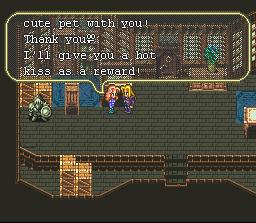 |
Now comes your choice: you can either take the pets back to the Professor and get your "reward" from her, or you can attempt to sell the pets to the old man in Zweig. If you try tosell to the old man, first he offers 3000 G, then 4500 G, then 5250 G, then 5625 G. After that he'll yell at you for being greedy and stop offering to buy them from you. Otherwise go back into the mansion and talk to the Professor. You'll get the reward seen on the picture on the right... joy. Didn't that 5625 G sound nice? After that she'll mention she created a genius rat named Algernon for the Duke of Zweig. The rat escaped, though, but she says don't bring it back if you find it. She thinks it died in the wilderness anyways. This statement leads us to the next quest: The Genius Rat and Kidlanto. |
Defeat Algernon, the Genius Rat
Begin Quest: Kidlanto
Rewards: Nina is saved; Paul can be recruited later
Requirements: none
| Talking around in Zweig will open up Kidlanto on the world map. Travel there and learn about the horrible monster in the cave next to Kidlanto that demands sacrifices from thevillage. The village elder will ask you to defeat the monster. Agree to it, and he'll take you to the cave. Once inside, try to leave the first room, and the elder will seal you in the cave and won't let you out until you kill Algernon. Examine the boulder that has sealed you in a couple of times until your main character has given up on trying to open it- this step is essential. Well actually it is if you're going to do this quest the correct way. Besides, its alot more satisfying to do it this way- and less painful. Now leave the room you started out in. Go through the next room also. Now go up a bit and walk up the stairs and turn to the west. Continue walking that way and go down the stairs into the next section. | 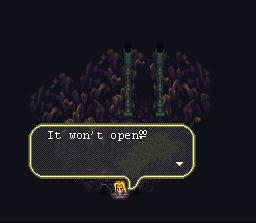 |
|
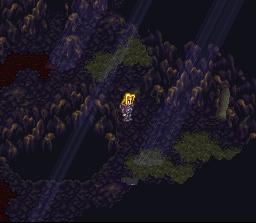
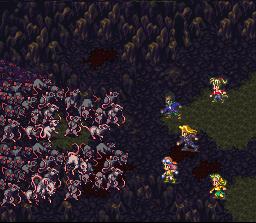
In this new area, make your way down and enter the cavern on the right.In this small room, examine the skulls on the skeletons to get a T Potion and Hard Leather. Leave the small room to go back to the main cavern. Now head to the southwest and enter another small cavern with 3 skeletons lying on the floor. Search each of their skulls to get: a Spirit Stone scoll and a Club. Now head north and walk through the cavern into the next area. In this area, head north up the stairs and turn to the left. Enter the cavern and walk north into the darkness. Suddenly you'll hear some louad noises, and a swarm of rats will appear around you and attack. Now if you want to do this the right (and more fun) way, fight for a round or two then flee. You aren't supposed to be able to win this battle- notice the Boss Music isn't playing. To do this the not-so-fun way, you can try to guess which in the rat swarm is Algernon (it changes every round). Of course if you have lots of hit-all waza/magic, it won't be much of a problem. You'll know you're hitting Algernon when the screen flashes. |
| If you win leave the cave and the quest is over... no fun eh? Now on with the right way: after fleeing the battle, return to the entrance of the cave. If you examined the boulder a couple of times after it was sealed behind you, you can examine it again and Nina will move it. Remember that the Professor talked about a genius rat named Algernon? Well return to the Professor's house and ask her about it. She'll give you some Rat Poison that should sure'll kill Algernon... isn't this a bit too easy? Return to Kidlanto, and you'll learn that Nina is now having to be sacrificed to Algernon. Enter the cave and return to where you fought Algernon. Sadly, there is no sign of Nina. The rats will now start appearing again, and a battle ensues. | 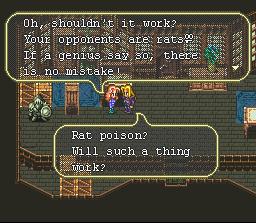 |
 |
Algernon
First notice- the Boss Music is playing this time. Luckily for you, the Rat Poison works- well it works in a sense. Algernon is in the rat swarm that does not take damage. Every round, all the rat swarms take damage due to the poison. Just remember to target the one that took 0 damage, and you'll be hitting Algernon. The first round, you won't know which ones is Algernon so just use regular attacks or hit-all wazas/magic. Now for every round after, you'll know which one he is. The Rat Swarm's Rat Fever is the most dangerous of all their attacks. It hits everyone for a pretty random amount of damage (5-80). Use the strongest wazas you have against the Rat Swarm that Algernon is in, and the battle should be over in no time. Afterwards, the main character is depressed that Nina has died to save everyone, but suddenly Nina appears. It seems she threw some meat at the rats when she was placed inside the cave so that she wouldn't be eaten. Now that Algernon is dead, there won't be any more sacrifices. You're automatically teleported back to Kidlanto. |
Find Gon in the Devil King Palace
Begin Quest: Pidona
Rewards: Opens up the Dream Quest
Requirements: None
Walkthrough:
| Go to Thomas's house and talk to him. Leave the house and head into the southern portion of Pidona. Go into the Inn then leave. Thomas will walk into the armor shop. Follow him into the shop then leave once again. Thomas will then leave for the older section of Pidona. Follow him into the first house on the left which is Muse's house. Thomas explains that he was talking to Muse about their adventures with Monica and in Loanne. He'll then join the party. Muse wishes that you would rest and talk with her because she hasn't had visitors in ages. Before you can get comfortable, a child rushes in saying that Mitch got lost in the Devil King Palace, and Gon went in to find her. | 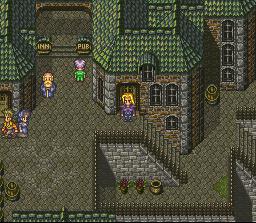 |
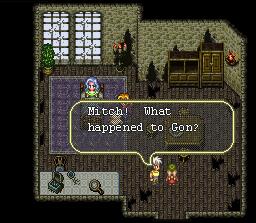 |
Muse tells Sharl to go after her, and, if you have room, Sharl will join you. Just then, Mitch walks in and tells everyone that Gon is lost. It's up to you to find him. You'll automatically be teleport to the entrance of the Devil King Palace after viewing some scenes that describe its history as a lair of thieves. You'll also learn of the Divine Church and their followers... sounds like some shady fellows if you ask me. Enter the Devil King Palace and walk up the stairs. Go down the stairs on the left side and follow them around until you get to a four-way intersection. Take the left path and walk through the door. Now head up past the first ledge and walk up the stairs and follow the platform to the right. You'll run into a hole on the way. To get past the hole, run up to it, and you'll jump across. You'll find Gon there. Talk to him and exit the Palace, and Sharl will leave with Gon. |
Begin Quest: Yamas
Rewards: Obtain Robin/Fat Robin
Requirements: none
Walkthrough:
| The Robin Quest in Yamas is a very short one. To begin it, enter the central warehouse in the Yamas Port. You'll see two men making a drug deal. Before you can do anything, the Masked Hero, Robin, will drop from the ceiling and interrupt them. They will run off, and Robin will disappear. You learn that the men were working for the Dophore Firm. Now leave the port and enter the first house you come upon. You'll see 2 more men working for the Dophore Firm forcing tax money from the woman that lives inside the house. The men grab the old woman in the bed in order to make their point. Once again, before you can do anything, Robin appears and attacks the men. They run away, and Robin restores order. | 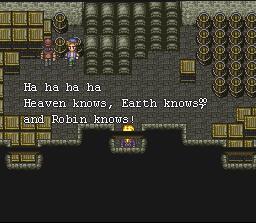 |
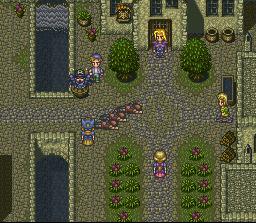 |
Leave the house and enter the armor shop. Now leave the armor shop to witness the final events. A man is speaking out against the Dophore Firm. 3 men rush in and throw him against that wall and start beating him. Robin once again appears... erm is that Robin?... and fights the men off. Robin jumps up on a barrel to make his dashing escape- and falls inside! The men come to their senses, and Robin is captured. Robin is placed, still in the barrel, in the middle of the town square. The wonderful people of the Dophore Firm decide to give him a trial. Robin is found guilty and has been sentenced to be burned to death. It would appear as if everything was over for our Masked Hero Robin, but then the laugh of the true Robin fills the area. |
| The real Robin jumps from a building and ends the fake trial, saving the fake and plumper Robin. The "judge" is confused and angers and summons his masters to take care of the situation. Two demons suddenly appear, and, for once, you get to save the day. If you have 4 people are less in your party, Robin will join you in your fight against the first monster. In the second fight, Fat Robin will join you. After beating both of the monsters, you will be able to go into the central warehouse and get either Robin or Fat Robin (it's random- reentering changes who appears). | 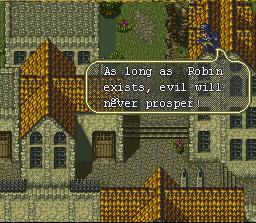 |