
Harid's Introduction
![]()
| Harid's introduction begins with him talking with the barkeep in Shinon. When the barkeep asks if Harid is from the Naj Desert, it creates a flashback. Harid was searching for the Princess Fatima in the desert for a while before she appeared. Harid, who she calls El Nool, has been forced to go to Librof for another war. Fatima doesn't want him to leave, however. The flashback ends abruptly. Julian, Thomas, Ellen, and Sara enter the pub once the flashback ends. Julian asks Ellen to go to Yamas for shopping, and Ellen basically tells him not to get any ideas. A soaked Monica enters the pub once their small talk ends. Monica needs to talk to Mikhail immediately about Baron Godwin's plans to usurp the Loanne throne. Master, the barkeep, advises against heading into the forests at night, though. Harid steps up and sums up the situation in Loanne and describes Godwin's actions. Julian et al decided that they will help escort Monica to Mikhail's camp. Harid decides to accompany them in the name of Kamsheen which startles the barkeep who recognizes him as the Tornado. You rest and set off the next day. | 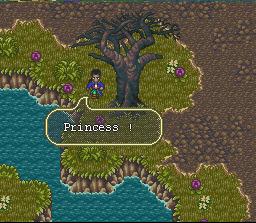 |
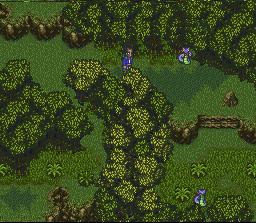 |
The forest which you will travel through is very basic. In the first section travel as far north as you can then turn east. After going as far to the east as possible, head south then turn east once more when you reach the intersection. Now head north and attempt to exit this screen. Before you can, a bird swoops down to attack you. |
| Garuda Wing
The Garuda Wing is the first boss in many of the quests you face. This battle is very simple, especially since you aren't given much time to gain any levels prior to the battle. Have Harid use Demi Rune and Ellen use Tomahawk. If Sara or Thomas have Shadow Sew, use it to paralyze the Garuda Wing. Everyone else should use regular attacks or any other wazas they might have already learned. In the Desert Lance formation, the Garuda Wing will be unable to do much damage, if any, against Harid. After killing Garuda Wing, Harid will wonder why it was in a place such as this. He believes that the Abyss Gates were reopened during the Death Eclipse, but he's not too sure... |
 |
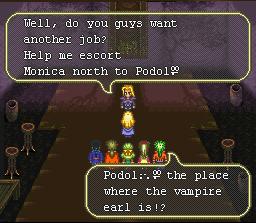 |
After exiting the screen, you will arrive at Mikhail's camp. Mikhail learns from Monica that Godwin has started a rebellion against him. Mikhail then asks for the group to escort Monica to Podol in the north where the Vampire Earl Leonid is. Mikhail wishes them luck and sends the group off but stops them once he recognizes the Tornado. Harid agrees to stay with Mikhail and help in the war against Godwin. Mikhail reveals that Godwin's rebellion is in his plan so that he can finally eliminate him once and for all. Mikhail and Harid leave to plan their battle strategies against Godwin. In the tent, you learn that one of the best generals, Radom, has allied himself with Godwin in the battle. Before you can plan too much into the strategies, a soldier brings news that goblins have been summoned by Godwin. Instead of letting Mikhail fight, Harid takes the lead so as to keep Mikhail alive to be with Monica. |
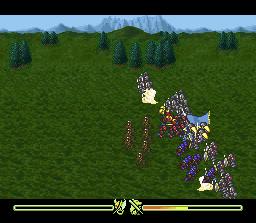
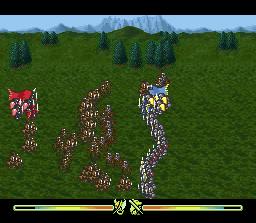
| Battle 1:
Harid vs the Goblin King Harid, an experienced war veteran, has Cmd Charge as an extra tactic. I wouldn't exactly recommend using it in this fight- its just too easy. Use the Straight formation for this battle. Meet the goblins in the middle of the battlefield and switch to all defense. Sense Harid only fights in 2 battles, there is no point in trying to get the Backwater Tactic from this battle. Once the goblin's morale has plummeted use charge until Radom has arrived, then throw in All Charge and laugh. They'll drop like flies, especially since the calvary that was with them has retreated. It just doesn't get any easier.
Radom will appear after battle and talk with Mikhail. He apologizes for working for Godwin and promises to stay loyal to Loanne and Mikhail this time. |
 |
 |
Battle 2:
Harid vs Godwin I recommend using the Middle Charge formation in this battle. The calvary will be positioned in the middle and will push Godwin's troops back easily. When Godwin uses 2 Row Exchange, use All Defense. Attacking during the exchange seems to kill off more of your troops than his. Use All Defense until either their morale drops then use Charge (or if they or you are in particularly bad shape then use All Charge) or until Godwin uses All Charge then follow it with your own All Charge. Using Cmd Charge can be helpful to push the enemy back if you wish during the battle. If Godwin is wounded or if you take too long to beat the battle, he/his army will retreat from the battle, and you'll automatically win. |
| After the battle with Godwin, Harid and Mikhail will arrive in Loanne. Your purpose is to go to the throne room and kill the Evil Demon on the throne (yes the same Evil Demon from Katrina's intro). Getting there is very easy. Enter the castle and continue going straight. Katrina will join you right before you enter the throne room. The same dialog will occur both her and in the throne room as in Mikhail and Katrina's introduction. The demon states that Godwin's purpose has been served, and the throne belongs to Ferdinand. The demon then attacks. | 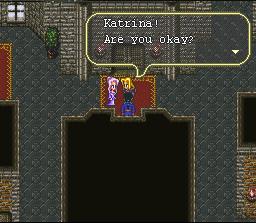 |
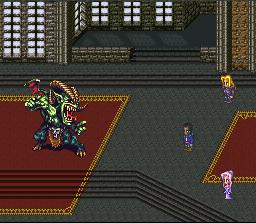 |
Evil Demon
The Evil Demon is strong and can do significant damage if you aren't careful. Begin the battle by having Katrina use Awaking to change the Masquerade into a Big Sword. After using Awakening, have Katrina use Moulin Rouge to do a hefty amount of damage to the demon. Harid should use Demi Rune, and Mikhail should use Snake Shot. Mikhail will be your healer for this battle because he possesses the Life Cane. Beware of Face Hit- this attack will hit everybody for around 60-80 damage which is crippling when its half of your max HP. Use the salves if needed, basically, don't hold back After defeating the demon, you get the usual awards ceremony. The scene shifts to several days later where Mikhail is talking to Harid about what he will do next. Harid mentions he'll go see the tomb of the Holy King in Lance first. Harid leaves the castle and you gain control of him oncer more. Now the game begins... |