Diaspola
Hidden Cities - 3
Treasures - 2
This is not the hardest of stages, especially compared to the horror that is the Kastolatian Sea. With area attack magic, no unit in this stage is a problem. There are some Undeads here and there, so don't de-equip those White Magic weapons. And even though the map is pretty open, the enemies don't really get too creative in their advance patterns.
Send a unit northwest from your base to a Temple, then northwest, across the river and into the mountains. Where the dark mountains meet the light ones is a hidden city called Ajan, where that unit should stay. Send two more units along the northern road. Liberate Me'mak and Romorant along the way, and leave one unit in Romorant. Have the other unit continue north and take the first turn left into Rimorge. Over three quarters of the enemy forces will pass through here.
After a wave or two of enemies, send whoever was in Ajan north to Alkyshon, and if you're not attacked at this point, further west into Somyul. There, if your reputation is high enough, you will meet a girl named Posha who will ask you for a Golden Beehive.
Send a flying unit into the southwest quadrant to discover Pelegue. There is a hidden Temple at the end of the road that leads out of it. You'll receive a free Golden Beehive there, and Posha in Somyul will trade you a Sentoul Demon for it. And if you're wondering when you're going to get to use those Demons, this is the stage. Send a unit northeast of Rimorge; there is a road there and at the end of it is the hidden city of Anglem. After you beat the boss of this stage, if you return to this area and to this city you will have the chance to trade your Sentoul Demons for 10,000 bucks, the Stone of Dragos, or the Undead Staff. Take the staff. Using the staff on a Mage will allow him to change to a Sorcerer, who can use area-attack magic like the Mage's, except twice in one battle.
You won't need to guard the southwestern cities with units, as they're well out of the enemy's way. You may need to keep a guard near Anglem, though. If you do, use whoever is in Romorant for that purpose. Liberate the Temple between Rimorge and Alkyshon if you haven't done so. Now send whoever is in Somyul along the northern road, across the river to a Roshfallian Temple, right next to the enemy base. Send your flying scout to liberate the city west of Somyul, Raloshel (where you can buy another Golden Beehive for 70,000 bucks if you feel such an overwhelming urge). Now just send whoever is in that Temple into the enemy base, beat the boss, and walk away proudly knowing that you only used three strong units on this map.
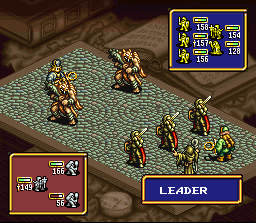
Boss: Norn
HP: 149 | STR: 97 | AGI: 123 | INT: 134 | CHA: 63 | ALI: 53 | LUK: 53
P: 28 | F: 27 | I: 25 | E: 27 | B: 18 | W: 62
 This
is fairly easy. The Titans are strong but miss often with their attacks. Norn
gets to use Healing Plus (heals the entire enemy unit) two times in the battle
so it gets somewhat annoying. Use Mages and specialized characters. The
Samurai's Iainuki is particularly good against a back-row, physically weak
character like Norn. With that and the Mages, your melee fighters (who should
now be Paladins, by the way) should have no problem tearing down the weakened
Titans and eliminating their leader. If you are really, really bad at this sort
of thing, a Fool card will make Norn extremely vulnerable. So will a Moon.
Oh, by the way, after the fight you get the option to kill Norn. Don't do it. She'll join you in the hopes of finding her lover, General Debonair, someday. And she's a great addition since Monks get to heal the entire party at once.