
Final Fantasy Mystic Quest Walkthrough
by Sephiroth Katana
Reference Points:
I. The Crystal of Earth
II. The Crystal of Water
III. The Crystal of Fire
IV. The Crystal of Wind
V. The Crystal of Light
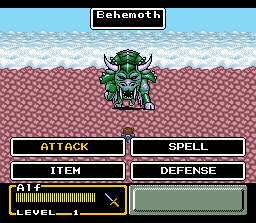
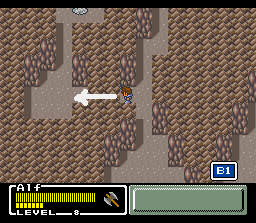
- You won't be in control for most of this sequence, so just sit and get through the introduction to the plot, such as it is. You'll be taught to jump (which you can do by pressing B anywhere that isn't a battle or the world map) in the process.
- You'll also have your first fight against the Behemoth. Since you have no items or magic, the only thing you can do is attack him to death. Highlight "Battle," press A, then highlight "Attack" and press A to do so. It'll take four hits to win; you'll probably miss at least once, but you'll last longer than the enemy.
Level Forest
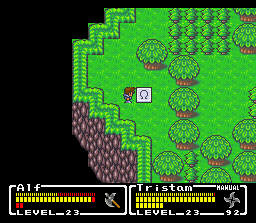
- The Level Forest is the only place accessible to you on the map, so enter it. Talk to the cloud man (henceforth referred to as "White," in keeping with the official Mystic Quest strategy guide) you met in the intro. Now look around.
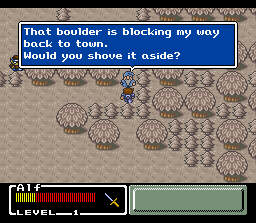
- You can't get to anywhere outside of a small section of forest; in one corner there's an old man. Talk to him to learn his problem. To solve it, face him, press B to leap over him, and hold Up to push the rock out of the way.
- Now you've got the Tree Wither. Take the Cure Potions from the nearby wooden chest (walk up to it and press A) and leave the forest.
- Note that now one of the arrows on the map is flashing, meaning that you're allowed to go in that direction. Do so and enter Foresta.
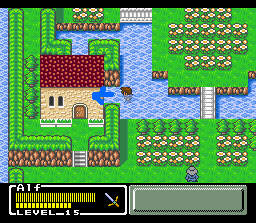
Foresta
- The goal is to recruit Kaeli, but there's a few other things you can do. The house in the lower right corner contains Cure Potions, as well as a bed in which you can sleep for free.
- You can also get your first magic spell. Cross the bridge in the north and stand across from the tree stumps poking out of the water. Press B to jump across them and walk straight down into the back entrance of a house. A red chest will be there which you can loot for the Cure spell. You can leave either the way you came or by pushing some of the barrels out of the way (the same way you dealt with the rock in the Forest).
- The house in the lower left corner of Foresta is Kaeli's house. She's the one in the green dress with the red hair. Talk to her and she will join you. Now leave Foresta and return to the Level Forest.
Level Forest
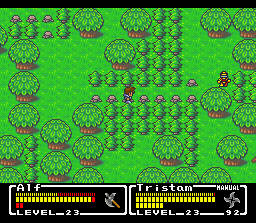
- Your goal is to find the glowing tree in the north part of the Forest. When you enter it, Kaeli will remove a tree, allowing you to progress farther than you could before. Note that the wooden chest with the Cure Potions from before is replenished. In fact, every wooden chest in the game will be replenished if you leave the area and return.
- You can see all the enemies, but that won't help you any since you won't be able to jump over them. Walking into them will start combat, but before continuing, press Y. This will switch control of Kaeli from the computer to you, which you should do at all costs since the computer is not a reliable ally. You can keep track of who's in control of your ally by looking in the right-hand corner of the screen right above your ally's weapon. If it says MANUAL, as it should, the control is yours.
- During fighting, once you select "Battle," you'll be able to attack, use items, magic or defend. Defending is fairly pointless at present, and you have no offensive magic, so it looks like you'll be attacking the enemies to death. You'll first get to select an action for your character, then again for your ally.
- Both Brownies and Slimes will take one hit from Kaeli and two from your character before dying; plan out your hits accordingly so as not to waste a strong hit. Slimes are slightly stronger than Brownies, but not by much.
- As you fight, your character (but not your ally) will gain more health capacity at times. This is good. It's also the only way to gain health capacity. If you get dangerously weak for some reason, you can either use one of your Cure Potions, cast Cure on yourself, or head back to Foresta and sleep there for free (in which case the enemies will be respawned when you return). However, if you should lose all your health, the only thing that will cure you is a trip to Foresta or a cast of the Life spell (Kaeli has it, you don't). After you gain a level, you'll be about as strong as Kaeli, able to take out an enemy in one hit.
- There are more Cure Potions in the northwest corner of the forest, and some Heal Potions in the northeast. Heal Potions will cure status ailments such as Poison, Blind, Confusion, and so forth.
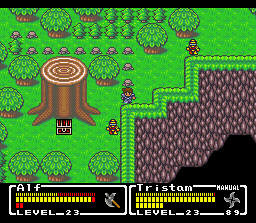
- When you finally get to the glowing tree, a battle with the Minotaur will start. Have Kaeli cast Life on him to take him out in one hit. You'll receive Kaeli's axe, and you'll be able to go north after you leave the Forest.
- The first thing on your way north to the Sand Temple is a Battlefield. Here and in every other Battlefield in the game, you can fight ten battles for money and experience points. You'll also get an extra reward when you win the last battle - usually this will be experience points, but sometimes it will be an item. This first one is nothing special. Fight in it if you want.
- Also, now that you have the Axe, you'll be able to chop down small trees. To do so, walk up to one and press A. Assuming you have the Axe equipped (if not, press L or R until you do), it'll go down right quick.
Sand Temple
- Walk up and open the chest. It's empty, and you'll soon find out why. You'll now have to go through the Bone Dungeon, but you will have a new ally, Tristam. Like Kaeli, he can cast Life, and he uses Ninja Stars, which are in finite supply. Fortunately, he starts out with 99, and you'll be able to find more soon enough.
- Before going into the Bone Dungeon, head left to a Battlefield. If you yawn your way through ten battles here, you'll win the Charm item.
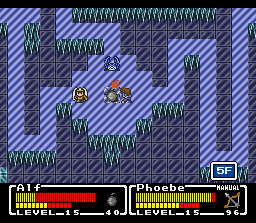
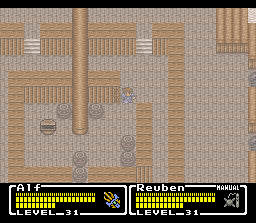
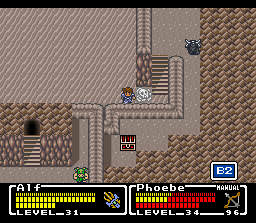
Bone Dungeon
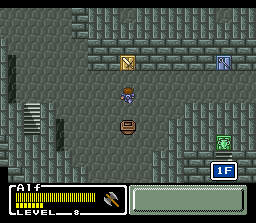
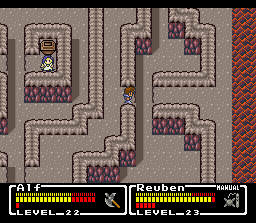
- The Bone Dungeon is your first major test. The goal is to make it to the innermost chamber and find the treasure. The path is straightforward, but relatively long.
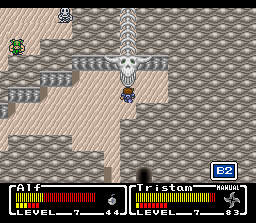
- The major gimmick of the Bone Dungeon is shifting sands. If you look closely, you'll see that some sand moves and some doesn't. If you step on the kind that moves, you'll be swept away in the direction it flows in. Thus, you'll usually have to find a path around it. In this first chamber, you actually don't have to do that, but go around it via one of the side paths anyway, as you'll have to clear it out on your way back, and it'll be harder then.
- The enemies are stronger, though not by much. For at least the first half of the dungeon, all of them should go down after one hit. Sand Worms are weak against axes and Rocs are weak against Ninja Stars, so exploit those weaknesses accordingly. Skeletons are probably the biggest danger, as they can occasionally Confuse you (and make you attack your ally or vice versa), but they're not especially strong.
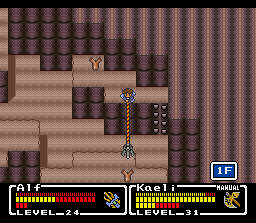
- Walk through the bone jaws and you'll be past the first chamber. In the next one, position yourself in a straight line with the turtle shells in the water, and press B to jump across them. Take note of the bone barrier right after the shells; you'll be coming back to it in a second.
- Now use the stairs to go into the water. Head left through the bones, then up until you get to a door. Tristam will show you how to use Bombs and offer to sell you some. Refuse his first offer and he'll halve the price. You'll now have 50; you can use them in battle (where they will hit all enemies onscreen when used) or out of it (where they can break bone barriers and sealed doors if properly applied), but don't waste them.
- Head back into the water and return to that bone barrier you saw earlier. Walk up to it with the Bombs equipped and press A to remove it. Head past it and loot the chest for a Steel Shield. Now head back again to where you got the Bombs, and proceed onward.
- In the next chamber, you can break open a sealed door to find a chest with ten Ninja Stars, but the way further down is in the west.
- Gorgons and Minotaur Zombies will take two hits from Tristan or one Bomb, and you can eliminate the first Gorgon you see to access a chest of Bombs behind it. Also note that if you use a Bomb on a group of enemies, the strength of the Bomb will decrease proportionally.
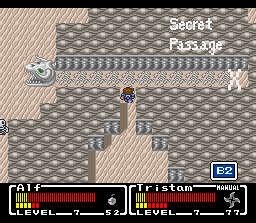
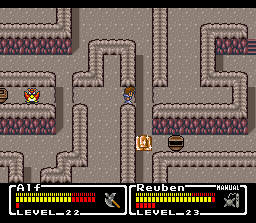
- When you reach a dead end made out of ribs, use a Bomb on it to clear the way. There's also a secret passage leading to more Ninja Stars that you can get to here. If you head left (as you eventually will), you'll come across some shifting sand. To get through it, stick to the topmost wall, where the enemies are, and break through the ribs you see for a path around the moving sand. Head straight down, hugging the eastern wall.
- When you find a set of closed bone jaws, Bombing it will open them. You'll go up and left to continue, but first, head straight up to find a chest of Seeds. These are extremely valuable items at this point in the game; don't use them in any circumstances until I tell you to.
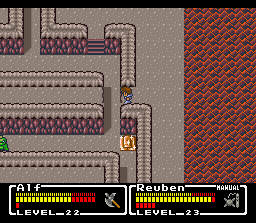
- When you do proceed left, you'll find more shifting sand; this time, clinging to the bottom wall will get you where you want to go. Bomb open another set of jaws; the way onward is up and to the right, but first head straight up to find a red chest containing the Quake spell. This is your first offensive spell.
- When you do proceed right, you'll find the last set of bone jaws. Bomb them open and head through, hopping across a turtle shell, to reach the first major enemy of the game - Flamerous Rex. Before doing this, you will probably want to use some of your Cure Potions to restore your health. Saving the game might be a good idea as well.
- The Rex has about 2100 HP, and hits pretty hard. The Quake spell will cause some solid damage, and so, paradoxically, will the Cure spell. Use the former, though; you'll need the latter to heal yourself. To heal both yourself and Tristam simultaneously, select Cure off the menu and press Down. You'll need this, as after a few rounds, Rex will start using a spell that hurts both you and Tristam at once. Once you run out of magic points for Quake, switch to using Bombs. Tristam should use Ninja Stars throughout.
- When you win, you'll get the Elixir, and the Crystal of Earth will reappear. Before leaving this chamber, however, make sure you cross the bone bridge to the right of where Rex was standing! There's a red chest there containing the Sand Coin, which you'll need later. If you forget to do this, you'll have to go through the Bone Dungeon again to get it - by yourself.
- Once you've got the Sand Coin, you can leave the chamber. Tristam will leave you, so you'll have to make your way back on your own. Fortunately, whatever enemies you killed will stay dead, and whatever Ninja Star-filled treasure chests you left unopened will now contain more Bombs. Hopefully you cleared out one of the side paths in the entrance chamber like I told you to, and so you don't have to clear it now.
Foresta
- Foresta should look very different now. Head back to Kaeli's house and talk to her (she's in her bed in back of her house). Sleep for free at the other house if you need to, and head to the Focus Tower east of the Sand Temple. If you like, you can clear the Battlefield on the way, but there's nothing special to be won there, and it contains Minotaur Zombies, and so it might be a good idea to wait until you have an ally or to skip it altogether.
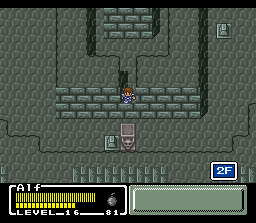
- The Focus Tower is, in my opinion, the most original idea to be found in Mystic Quest. It's a huge complex which you will be exploring throughout the entire game. There are no enemies here, fortunately, but there are a few puzzles of sorts. This time through, however, it's fairly straightforward.
- You'll start in the catacombs leading into the Tower. The path is fairly long, but you can save yourself some boredom by using a secret passage. At the end, you'll meet White again. Talk to him and head up into the Tower proper.
- You'll see four coloured doors, but right now you'll only be able to open the yellow one. Walk up to it and press A, and assuming that you got the Sand Coin like I told you to, it will open. Go through the door and head up the stairs.
- On the next floor, the exit is in plain sight. However, head to the left and down, around the stairs you used to come up, to find a red chest with the Fire spell. You'll need it for this part of the game.
- Once you do take the exit door, you'll have the opportunity to fight in some Battlefields, but since the enemies are a bit stronger here, you might want to wait until you've found a new ally. As of now, head to the Libra Temple.
Libra Temple
- Walk up, take the Cure Potions from the chest, talk to the girl. She's Phoebe, your next ally, and she'll join you. She's equipped with the Cat Claw (for now) and also has an impressive array of spells - Cure, Heal, Life, Fire and Thunder. Now you'll have to head to the next town, Aquaria; you can also go fight in those Battlefields. Mintmints are stronger versions of Brownies, but Phoebe can take them out in one hit. Giant Toads and Scorpions, however, will probably require two. All of these enemies will make much freer use of status alterations; you'll be poisoned, confused and paralyzed fairly frequently. Rather than use Heal after each ailment, it might be a better idea to just take them and cure them only when it becomes absolutely necessary.
- If you clear out the Battlefield right before Aquaria, you'll win the Magic Ring. Do so, as it will protect your character from the Silence status ailment.
Aquaria
- The inn here is not free, so unless you have 95 GP to spend every time, you might have to make the long trip all the way back to Foresta. Note that a fellow in the inn will sell you Bombs for 10 GP a pop.
- In the northwesternmost house, a woman will offer you the Steel Helm for 200 GP. Buy it. You can also get Refreshers from a wooden chest here. These items will allow you to regain abilities lost in battle, but are fairly worthless from a practical standpoint.
- Phoebe's house is the southwesternmost one. Inside, you can get some Heal Potions from a chest. You'll also learn your next destination - the Wintry Cave.
Wintry Cave
- The Cave is more complicated than the Bone Dungeon, and the enemies are much more difficult due to their constant use of status alterations. Scorpions will poison you, Edgehogs will blind you, and Centaurs will confuse you. Blind should be healed right after battle.
- Scorpions and Edgehogs are weak against Fire and Land Worms don't take well to axes. Exploit these, but don't waste Phoebe's magic points.
- After your first encounter with Land Worms, you'll walk along a path and suddenly take a fall. This will prompt Phoebe to give you her Cat Claw and show you how it can be used out of battle. She will now use the Bow of Grace, with a finite amount of Arrows (like Tristan's Ninja Stars).
- You'll only be able to use the Claw when you see claw marks in the wall. They are quite conspicuous, so don't worry about not spotting them. Walk up to them with the Claw equipped, press and hold A, and walk into the claw marks. (You can also change directions while climbing as long as you don't release A.)
- Phoebe's new weapon is quite a bit stronger than her old one, so now those Scorpions and Edgehogs should only take one hit.
- Now you're on the floor. Head left, passing underneath the ground above (there are no hidden enemies under it, thankfully), and hug the bottom wall until you find this path up. Climb it using the Claw. Kill the Scorpion, climb up some more, kill the Edgehog and open the door it was guarding with a Bomb.
- In the next room, you'll be able to avoid some enemies. When you have to fight, fight the Land Worms and Land Turtles, as both are weak to axes. If you find yourself missing attacks often, you're probably blinded. Use Phoebe's Heal spell or a Heal Potion.
- Centaurs are probably the worst enemies in the Cave. Use the Bow and Bombs, and hopefully you'll win before they confuse you. If they do, keep attacking anyway, and you might win via brute force before anything really bad happens. Continue on; the exit is in the northeast.
- In the next and last room, you'll be moving under ice. Sparnas are weak to arrows, so they shouldn't cause much difficulty. Work your way to the right of the room, and emerge from underneath the ice on the right side of the two Centaurs. Kill the one on the right, collect the Arrows from the chest, and head up the stairs for the major battle of the Cave. Use your Cure and Heal Potions to bring yourself to something approaching full strength before doing so.
- Squidite is stronger than Flamerous Rex, and comes with two cohorts (Sparnas). Have Phoebe take one out with a regular attack, and have your character use Fire on the other. Now you can concentrate on Squidite. Fortunately, he's weak to Thunder, so have Phoebe cast it on him until he dies. Your character should back her up with Fire or heal with Cure as necessary.
- Loot the chest Squidite was guarding for the Libra Crest. Now head back the way you came to get out of the Cave and return to the Libra Temple. You should probably stop by Aquaria for a rest at the inn. You can also clear out the Battlefield next to the Cave if you want. It's full of Desert Hags, which are very weak against Fire, so it shouldn't take too long.
Libra Temple
- Step on the white tile to be transported to the Life Temple.
Life Temple
- Head up through the passage you see to meet White, who will give you Wakewater. Take the Cure Potions from the chest nearby and return to the white tile to teleport back to the Libra Temple.
Libra Temple
- Take the Cure Potions again, then go back to Aquaria.
Aquaria
- Phoebe will immediately pour the Wakewater on the plant in the centre of the town. This will thaw the plant, but not the town. You'll have to head to the Ice Pyramid by way of the Falls Basin to do that. But it's not a total loss - a man at the inn will now sell you Cure Potions, which you shouldn't need to buy.
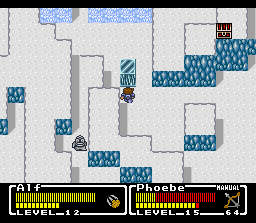
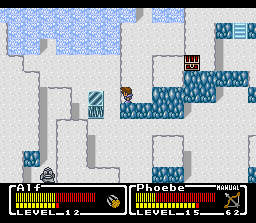
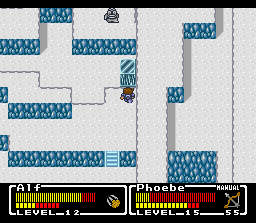
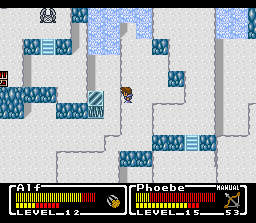
Falls Basin
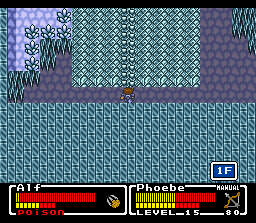
- The goal is to reach the exit in the center-north of the map. This is more difficult than it sounds, since the path is rather twisted, but overall this place isn't as difficult as the Wintry Cave.
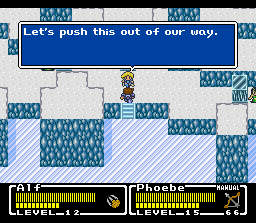
- When you first enter the Basin, Phoebe will clue you in as to its major gimmick - pillars of ice that you'll need to push into certain places in order to proceed. Push them exactly like you pushed that rock in the Level Forest, but be careful not to push it into a corner where you can't get behind it.
- The enemies aren't much to write home about. Desert Hags will counterattack axe and claw attacks, but Bombs and Arrows, as well as Fire magic, all work well. The Lamias can put you to sleep and confuse you, but aren't stronger than the Hags. Both take two hits from your character or one from Phoebe.
- There's a pillar right in front of where you start. Push it nine spaces to the north, then seven to the west, then one to the north. You should now see that it functions as a stepping stone across the gap. Leave it alone and walk through the door behind it. Kill the Desert Hag and take the door on the right. You should now find yourself in a position to jump the gap you just bridged with that pillar.
- Jump the gap and continue down. Kill the Desert Hag, go down the little stairs, and kill the Lamia. You're now back at the entrance, but now you've got another ice pillar. Push it four spaces east and one north. Now if you retrace your steps a bit and head back up the little stairs and to the right, you'll be able to jump the gap.
- Jump it, go down the stairs and kill the Lamia. You now have a third pillar. Push it four spaces west, one north, two west, six north, seven east, one south, and then east all the way to the east wall. If you retrace your steps again, you'll now be able to jump yet another gap. Don't do that yet, though. Instead, go to the entrance, where you left the second pillar. Push it nine spaces north, five east and one north. This is the last time you'll need to push pillars here.
- Go back and jump across the third pillar. Kill the Desert Hag, go through the door behind it, loot the chest for some Bombs, kill the Lamia, and emerge on the left side. If you placed the second pillar right, you'll be able to jump across the final gap. The exit is now in plain sight, and so is the Snow Crab guarding it. Before fighting him, make sure you take the Heal spell out of the nearby red chest; you won't be able to return to the Basin once you beat the Crab. Using some Cure Potions now to bring yourself back up to full health would probably be a good idea.
- The Crab has somewhere around 3000 HP, and comes with two Desert Hags. Take them out in the first round using Fire. Now have Phoebe cast Thunder and your character cast Fire or heal with Cure until you win. The Crab actually hits quite hard; 120 HP of damage per attack is de rigueur, and more is not uncommon. You'll have to Cure fairly often, but you'll win in five or six rounds.
- Once you win, Phoebe will upgrade your Bombs to Jumbo Bombs, and you'll be able to use one to open the sealed door the Crab was guarding. The Ice Pyramid is now accessible, as is a new Battlefield. This one contains Desert Hags, Lamias, and Mages. The latter will try to use Silence on you (which should do nothing if you took the time to win that Magic Ring earlier). They'll also cast Blizzard, which Phoebe is strong against.
Ice Pyramid
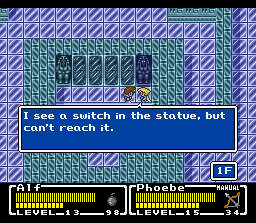
- Once again, Phoebe will alert you to the dungeon's gimmick: statues with glowing eyes conceal switches which open doors. To flick them, equip your sword, face the statue and press A.
- The overall goal is to get to the top and beat the Ice Golem, but the path is far from straightforward. To make matters worse, all the enemies here are invisible, so you won't even have advance warning of what you're going to face. Fortunately, there's a Magic Mirror on the first floor that will cure that problem, and finding it should be your first goal.
- Once you open the front door, head right and down. Hug the bottom wall and move right until you can't move right anymore; now head up and take the rightmost passageway. A few battles with invisible enemies will ensue, but at the end of this passageway is the red chest containing the Magic Mirror.
- Now you'll be able to see the enemies, but you'll still have to fight them. The first floor won't contain any enemies that you haven't seen thus far. If you need any arrows, there's a chest with some in the bottom left corner of the map, just a bit southwest from the entrance.
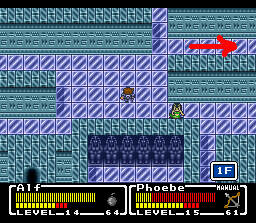
- There are many paths that lead to nowhere on the first floor, but only one right one. Here's how to get to it. From the entrance, head southwest to that chest with arrows. Now take the leftmost way up, and follow it until you get to a crossing of five paths. Take the second one from the bottom right and follow it to the stairs to the second floor.
- The second floor will introduce you to Phanquids. Although they have a lot of HP, they are relatively weak; they'll waste time trying to weaken your statistics rather than doing damage. You'll also meet Stoney Roosts on this floor; they can cause heavy damage to your character, but are weak against arrows. The path to the next staircase (to the third floor) is straightforward; just head west.
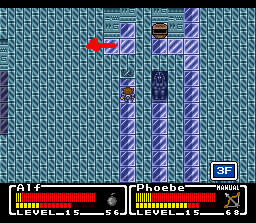
- On the third floor, you'll meet Gatherers. Don't use magic on them unless you have a death wish; instead, use Bombs, which they are weak against. You'll also see Freezer Crabs, which have the most HP out of all the enemies in the Pyramid; they're weak against axes. Getting to the fourth floor requires some work; starting from where you entered the third floor, head right and down, through the enemies. When you come to a chest with arrows that's blocking your way, just jump over it. If you follow the narrow path to the end, you'll come to a switch statue; hit it with your sword and retrace your steps to the entrance to the floor. Head the opposite way now, down the narrow path on the left side of the floor. You can take a detour into the chamber in the centre for a pair of chests containing Bombs and arrows, respectively. When you come to the door you opened earlier, take the hidden passageway in the left wall. The staircase to the fourth floor is in plain sight.
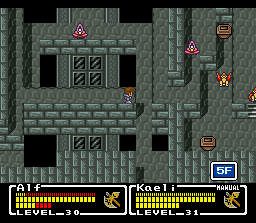
- That red chest in the center room on the fourth floor contains the Noble Armor, but you can't get to it yet. Instead, head left from the entrance and counterclockwise around the floor until you get to the staircase to the fifth floor in the southeastern corner. It's guarded by a Sphinx, probably the most difficult recurring enemy in the Pyramid. Don't fight them unless you absolutely have to, and when you have to, focus on them before any other enemies.
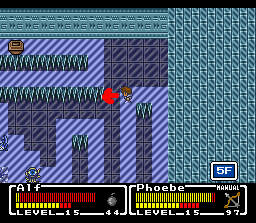
- On the fifth floor, head to the right and follow the winding path till you get to about here. Now just step off the path to your left into thin air, and you'll fall back to the fourth floor, right into the center chamber you couldn't get to earlier. Take the Noble Armor out of the red chest; it will protect your character against poison and water. To get out of the chamber, you'll have to get through the walls of enemies to the statue on the left side, looting all the wooden chests along the way, hit the statue with your sword, then go back to the red chest and head out the now-open door. Fight the Phanquids and Gatherers rather than the Sphinxes, and return to the fifth floor.
- Follow the winding path again and take care not to fall off it this time. Work your way to the platform in the centre. Now you're faced with the Ice Pyramid's most devious puzzle; the tile in the centre of that platform. Set off a Bomb on it to create a hole, then step into the hole.
- You'll fall to the fourth floor; step into thin air again, and keep doing so until you get to the first floor. There, hit the statues with your sword until a hole appears, then fall into that to the basement.
- In the basement, the first thing to catch your eye should be a red chest. Open it for the Knight Sword, which will take out Lamias and Desert Hags in one hit, and which you should use to save your Bombs until you get to the end of the Pyramid. If you want, you can scale the wall to your immediate north with the Cat Claw to meet the Ice Golem for the first time; he'll only run from you, though. Now make your way to the southeast corner, walk down the stairs, and head underneath the ice to the exit, which is the northwest corner.
- Now you'll be in a tiny room with a high wall. Clear out the enemies, then climb the wall with your Cat Claw and go through the door.
- You'll be on the fifth floor again. Head straight up and through the door. You will now be in the final chamber of the Pyramid; get across the winding path in the centre without falling off it and you'll have to face the Ice Golem. Heal yourself fully first. You'll need quite a bit of magic to win; hopefully you haven't used too many magic points, but if you have, the Seeds you got in the Bone Dungeon will replenish them fully.
- The Ice Golem has over 6000 HP, and hits for about 200 points of damage each round. Fortunately, you hit harder; Phoebe's Fire should do about 600 HP of damage, and your character's about 400. Just cast Fire until he's finished; your character should cast Cure when necessary (at least once every other round).
- Now that you've won and the Crystal of Water is freed, make sure you take the River Coin out of the red chest unless you fancy fighting all the way through the Pyramid again without Phoebe. After doing so, you can fall off the path to make the way back quicker. As always, whatever enemies you killed before won't be there. Head back to Aquaria.
Aquaria
- The town should look quite different. Sleep in the inn if you need to, and save your game. Then go to Phoebe's house (it's the one in the southwest corner) and talk to her. Now go outside and go into the water via the little staircase next to the inn. There's a secret passage underneath Phoebe's house that leads to Spencer's Place.
Spencer's Place
- Spencer's place has arguably the best music of the game. Enjoy it on your way down, which is long but uneventful, as there are no enemies.
- In the next and last room, Spencer can be seen just southeast of the entrance. Talk to him and receive the Venus Key. Leave the way you came and head to the Focus Tower.
- Note that you now have a choice between two entrances to the Focus Tower; the one you used to get to Aquaria in the first place, and a new approach that you can (and should) take by turning north at the Libra Temple. There are two Battlefields along the way. If you clear out the first of these, you will win the extremely useful Exit spell, but you'll face Phanquids and Sphinxes, so it might be a good idea to wait until you have an ally. If you do decide to postpone it, don't forget to come back to it later.
- The Wintry Temple along the way contains nothing whatsoever. Later, after you'll win the Gemini Crest, you'll be able to teleport here for some Potions, but it's really more trouble than it's worth.
- Go down the only path available to you and you'll meet White. Talk to him, then open the sealed door just left of the entrance with a Bomb. Go through it to find a red chest, which will yield the Venus Shield if you have the Venus Key.
- Now you can set to the business of figuring out what the statue is for. It's a stepping stone just like those ice pillars in the Falls Basin. Push it all the way to the left, then all the way down, then all the way to the left. There will be another red chest just to the left of that; it contains the Blizzard spell.
- Now leave the Tower altogether and come back through the entrance which you originally took to get to Aquaria. Go down the staircase to the room with the four coloured doors. Assuming you have the River Coin, the blue door can now be opened. Go through it and up the stairs.
- In the next room, head south of where you entered and you'll see that you're now able to jump a gap. Do so and leave via the door in the northwest. Then take the first door you see and you'll find yourself in a whole new quadrant of the map.
- On your way to Fireburg, the next town, you'll encounter three Battlefields. If you clear the second one, you'll win the Gemini Crest. You might want to postpone this for a bit, as you'll be getting a new ally shortly.
Fireburg
- You can buy the Battle Axe in the southwesternmost house for 500 GP. You can also talk to your old ally Tristam in the hotel, but he won't join you. Also, the Hotel sells Cure Potions and Seeds, so you'll at last have a replenishable supply of the latter.
- The house west of the hotel is where you can find your next ally, Reuben. Just talk to him and he'll join you; he doesn't have a very impressive array of spells, but he has a decent attack. Now climb down into the pit in the centre of the town and try to enter the house there. When you find that the door is locked, go and talk to Tristam again in the hotel to receive the Multi-Key, then try again. Talk to the fellow inside to get your Jumbo Bombs upgraded to Mega Grenades.
- Your new destination is the Mine. Now you can clear out some of those Battlefields; Reuben should be able to take out all the Jellies, Sting Rats, Plantmen, Red Caps and Flazzards in one hit, and your character will do it in two. If you clear the Battlefield just south of the Mine, you'll win the Thunder spell.
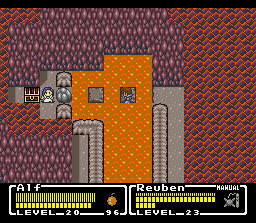
Mine
- The Mine's major gimmick is one-way paths; both the conveyor belts and the pulleys will function as such. The enemies will all take one hit from Reuben and two from your character. The Zombies have a nasty trick up their sleeves - they can spontaneously make clones of themselves - so take them out first.
- From the entrance, take the conveyor belt up, then the one to the right, then the pulley down. You should see a sealed door just to your left which you can open with a Grenade. Inside, if you take the right path, you can get to a red chest containing the Charm Claw.
- After that detour, take the conveyor belt down and climb the wall to your left using the Charm Claw. Now take the conveyor belt left and you'll be back at the entrance.
- Take the pulley down, then the conveyor belt further down. Take the conveyor belt right, scale the wall and take the conveyor belt up. Now head up and take the conveyor belt right. The door to your immediate southeast is your goal. Heal before taking on the enemy guarding it.
- The Jinn has more HP than the Ice Golem, but you're stronger now too. He comes with two Red Bones; have Reuben attack one and have your character cast Exit on the other. Now have Reuben attack and have your character cast Blizzard, and have either heal when necessary. (If you want to heal both characters, use your character's Cure spell.) It should be over soon.
- Now walk through the door, open all the chests and stand on the right edge of the platform. After the scene is over, cast Exit to leave the Mine.
- You can now get to the Sealed Temple, where you can have an odd conversation with White. You can also warp to the Wintry Temple from here. You can also fight in a new Battlefield, where you'll meet Ghosts. They'll only weather one hit from Reuben, but not only can they cause a variety of status alterations, they can clone themselves and counter physical attacks with confusion. You'll also see them at the Volcano, your next destination.
Volcano
- Here you'll see Werewolves and Nightmares, both of which are weak against Blizzard and both of which, as before, only need one hit from Reuben. From the entrance, head up and take the first staircase on the right. Kill the Werewolf and go into the passage he was guarding. Press Up, Left, Down, Left and Down, in each case holding the button until you stop moving. You should emerge at a red chest, which contains the very powerful spell White.
- Retrace your steps back to the entrance and head left and up the stairs. You can jump across the gap. Now head up the stairs you see.
- Parts of the Volcano are obscured by fog, and you won't be able to see the enemies there. To cure this problem, you need to find the Gas Mask. Head left and down the stairs, and into the passageway. Press Up, Right, Up, Right, Up, Right, Down, in each case holding the button until you stop moving. You'll emerge on a walkway that leads to a staircase. Follow it up, head left, then up and take the next staircase. The chest with the mask is just slightly northwest of where you are.
- Retrace your steps back to where you first entered the part with the fog. Go straight up and take the staircase, then head left and into another passageway. Up, Right, Down is the right path this time. Now take the next staircase and you should emerge near the crater, which is to the northwest of your position. The staircase down into the Lava Dome is guarded by Medusa.
- Take out Medusa's Werewolf cohorts with Exit and Reuben's regular attack. Now have your character cast White on Medusa until she dies. Reuben should attack and heal using Life when necessary. Medusa can paralyze, poison, confuse and petrify you (the latter being especially dangerous), but you should win quickly. If you lose the fight, just select "No" when the game asks you if you want to give up.
- Your next destination is the Lava Dome. It's quite a trial, so you might want to return to Fireburg for a rest. Also, it's probably a good idea to stock up on Seeds to ensure that you'll have enough magic to survive the Dome.
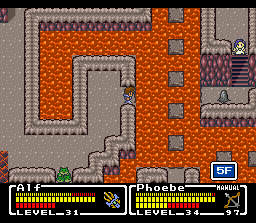
Lava Dome
- This is probably the most confusing dungeon in the entire game; some of the subsequent ones are more difficult but also more straightforward. You must first find the switch that opens the Great Door, and then find the Great Door itself. There are also some items to be found.
- The enemies here, as usual, will for the most part go down to one hit from Reuben and two from your character. Avizzards and Iflytes will require two hits. Use your axe throughout the Dome.
- From the entrance, take the staircase on the right, then the next staircase on the right. Head into the door there and turn right, into the passageway the Fangpire is guarding. When you get here, equip your Grenades and use one by pressing A. Unlike Bombs, Grenades fly a distance before exploding, so the rock blocking the way to the chest will be destroyed. Now kill the Stheno and open the chest to find the Life spell.
- Now return to the entrance. Take the staircase on the left, then head left and into the passage you see. Head up and you should see a lake of lava on your left and a bunch of enemies to your right. Head up until you hit the top wall, then move left and jump onto the stepping stone. Hop down three times, then destroy the rock the same way you destroyed the earlier one. Jump to where it was and go into the door. Head up through the enemies and the chest containing the Moon Helm should be in plain sight.
- That done, return to the previous room, hop back across the lava, and head right, through the wall of enemies (fight the Sthenos, as those fights tend to go quicker). Work your way to the staircase in the southeast corner. Now go through the long passage and you'll emerge at the bottom of the volcano. The switch that opens the Great Door is to your immediate left. Step on it to activate it.
- Now it's time to find the Great Door itself. Return to the entrance to the Lava Dome. From there, take the staircase on the left, then the staircase on the right. Head left and go into the first passage you see. Fight through the first room (it's straightforward).
- In the next room, go left then up to find a small staircase. Climb it, then go right and down until you get to a gap. Jump across it and work your way to the exit in the northwest. Fight through the next room to the exit on the left.
- Now climb the staircase on the left and enter the first passage you see. Go down the stairs and into the next room. Work your way straight down to a small staircase, then climb it and jump this gap. From there, work your way southeast and jump this gap. Now jump this gap; the exit should be in sight, and once you go through it, the Great Door will be to your immediate right.
- Enter the Great Door, then head up and kill the Salamand. Now jump the gap to your left, and hop across the stepping stones to the northwest island. Now jump from the east end of that island, twice to the east then once to the north. One more jump and you'll fight the Dualhead Hydra; first heal using Cure or Life and replenish your magic using Seeds.
- To beat the Dualhead Hydra, have your character cast White and Reuben attack. Reuben should be the healer, since he will do less damage to the Hydra; also have him use a Seed on your character when the latter runs out of magic points for White. The Hydra will do around 300 HP of damage to one character per round, or around 200 HP to both. It can also poison you, but that will be the least of your worries. As long as you can keep casting White, the fight is yours.
- The red chest containing the Sun Coin is in plain sight; make sure to take it. Also, you don't have to hoof it all the way back through the Dome; a convenient exit is located just to the east of the platform the Hydra stood on. Just hop across the stepping stones.
- The lava flow from the Dome created a link to Aquaria's quadrant of the map, and also opened up a new battlefield. This one's populated by Sthenos and Iflytes; take them on if you like, but it won't be too easy since they'll get the drop on you in almost every fight. The Iflytes have more HP, but are actually easier to beat since they can't petrify you.
- Once you're done there, head to the Focus Tower, using the entrance that you used when you first came to Aquaria.
- Go to the room with the coloured doors. You'll now be able to open the purple one. White will be waiting for you on the other side. After talking to him, go down the staircase right next to you. It will take you to the basement; just go straight down into the next room.
Doom Castle
- This is your first glimpse of Doom Castle, the final dungeon of the game. However, from this entrance you can only beat the lone enemy you see and claim the Aero spell in the chest behind him.
- The enemy will be a Minotaur Zombie (from the Bone Dungeon), but he may be accompanied by Shadows, which are quite a bit stronger than what you're used to. If you see them, take them out with Exit. Head back the way you came once the Aero spell is yours.
Focus Tower
- Once you emerge from the stairs to Doom Castle, head right and down to find the exit.
Rope Bridge
- By far the game's most bizarre scene will take place when you try to cross the bridge. When you have to fight, use Exit for a quick victory. As a result, you'll lose Reuben, but Tristam will appear out of nowhere and join you. Now just cross the rest of the bridge, which you won't be able to revisit after you do.
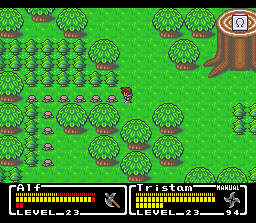
Alive Forest
- Here you'll meet Mummies and Spectors. Cast Exit on the former and have Tristam attack the latter (they're weak against missile attacks).
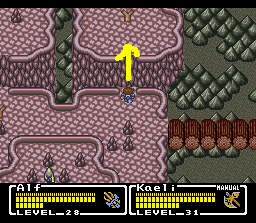
- Cut a swath southward through the trees using your axe and cross the bridge. Now cut another swath westward. If you cut down this lone tree, you'll uncover a tile which will take you inside a tree to some Refreshers. Now cut your way east, and get to this chest. It contains the Giant's Axe, the best axe in the game.
- Now head north from the chest, chopping down trees as necessary, then east to the big tree with a face. Try to talk to the face. You're told to find Kaeli, but you should actually go to Aquaria. So, head backwards through the forest and go to Aquaria via the Focus Tower.
Aquaria
- Kaeli's in Phoebe's house, but you can't talk to her until you talk to Spencer. So head to Spencer's underground lair.
Spencer's Place
- Revel in the groovy music and go down just like you did before. Spencer is exactly where you left him. Talk to him; you'll lose Tristam but gain the Dragon Claw, the best claw in the game. It also has another use, which you'll be learning shortly.
- Phoebe will then cause a cave in for no reason whatsoever, and you'll have to go back to Aquaria.
Aquaria
- Kaeli will join you when you go to Phoebe's house. She's now equipped with a Giant's Axe and has a wider selection of spells. With her in tow, head back to the Alive Forest via the Focus Tower.
Alive Forest
- Do what you did before and get to the tree with the face. Talk to it and it will talk back this time. It will then invite you inside.
Giant Tree
- For the first part, you'll mostly have to put up with Mummies and Spectors. Live Oaks are weak against axes and Snipions only need one hit from Kaeli.
- From the start, take the upper left path and follow it clockwise around the room to the northwest corner. Climb onto the little platform using the Dragon Claw and get rid of the Live Oak.
- This looks like a dead end, but it isn't. Those little fork-shaped growths coming out of the floor are actually grappling hooks. To get across a gap, face one of those growths, equip your Dragon Claw and press A. You'll grapple right across.
- Grapple to the south platform, then to the next south platform. Continue to grapple your way clockwise around the room until you get to the door shaped like a face in the centre north.
- In the next room you'll meet Giant Toads, which take two hits from Kaeli. They can cause you quite a bit of grief by petrifying your character, so dispatch them quickly with Exit. Leeches are weak against axes.
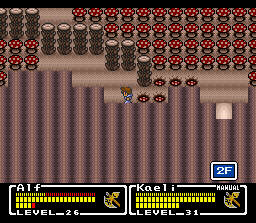
- Go down the easternmost passage south and go through the door there. You'll be in a strange room filled with mushrooms; you can chop them down with your axe as if they were trees. Hugging the outer walls, chop your way clockwise across the room until you get to the door in the northeast. On the other side of it is a chest with the Meteor spell. Now go back through the room with the mushrooms to the room you were in before.
- Using your claw, grapple your way across the gap to the southwest of the entrance. Now climb up to the platform to your immediate east. To open the door, hit the face with your sword.
- In the next room, look just to the left of where you enter for a hook. Use it to grapple across the gap. Now follow the platform counterclockwise until you get to the door in the northeast corner.
- Now you're in a room with more mushrooms. Chop your way through the second passage from the left. Now climb the wall and fall down on the left side, then go down to the exit. Now go southwest and climb down the vine; you'll fall to the second floor. Now go straight up for the exit.
- Now you're back on the third floor. Using your claw, climb up along the claw marks; you'll have to deliberately fall and catch the next set of marks in midair (just release A and hold it down again) to proceed in some places. Do this until you get to the door that's sitting high up.
- In the next room, you'll be meeting Skuldiers and Oozes. The former are weak against Aero and the latter are weak against Grenades. Unfortunately, Exit doesn't work on Oozes. Skuldiers are fair game, though; take them out quickly, as they have an instant death attack.
- Go down the left side of the room you're in and enter the first door you come to. Now hug the outer wall and chop your way clockwise until you get to the platform in the center; climb it and go through the door. Now go clockwise around the platform, climb to the next level and go through the door.
- Make your way around the holes and try to avoid as many Skuldiers as you can. If you climb up to the platform in the center north, you'll meet Gidrah.
- Gidrah comes with two Skuldiers; get rid of them with Aero and Exit. Now use Meteor and Aero against Gidrah until he dies; since he's really weak against Aero, this should be easy. The only problem lies in taking the Skuldiers out before they have a chance to use their instant death attack.
- Once Gidrah is gone, talk to the face right above him. Now cast Exit to leave the Tree. You'll now be able to go to Windia. If you stop by the Kaidge Temple along the way, you'll meet White. You can also get some Cure Potions there. Also, you'll be able to fight in the last two Battlefields of the game; the first contains Skuldiers and Water Hags, the second contains Water Hags and Vampires. Liberal use of Aero and Exit will make these fights quick.
Windia
- Someone in the southwesternmost house will sell you the Cupid Locket for 300 GP; make sure to buy it. Also, you can climb the cliff to the east of the inn, then grapple across to the roof of the inn; your character will recognize the weathervane if you examine it.
- The southeasternmost house is Otto's house. Go there and talk to Otto, and learn your next destination: Mt. Gale. You can stop by the Windhole Temple for some Heal Potions.
Mt. Gale
- This is actually a far easier stage than much of what you've recently slogged through. You'll meet Skuldiers, Vampires and Water Hags; Exit or Aero will make short work of the first two, and the last will often die to one hit from the Dragon Claw.
- From the start, head up the first two staircases you see, then east across a bridge. Now go south and east, and climb up the staircase. Follow it north to a gap, which you can grapple across, then another gap, which you can just jump normally. Now head south and down the next two staircases you see, then a bit east and down two more.
- Go east until you see the next staircase; climb it and the one north of it. Now follow the bridge west, and grapple across the gap you see to the north. On this platform is a red chest containing the Apollo Helm.
- Now jump the gap to the west and grapple across the next gap south. Head south and the centre of the mountain will be in sight. Go there and meet Dullahan, and observe the most idiotic dialogue the game has to offer.
- Kill the Vampires with Aero, then use Meteor and Aero on Dullahan. He'll take a bit longer than Gidrah, but not by much. Have Kaeli ready to use Cure or Life every other round, since he has an instant death attack. After you win, cast Exit to leave Mt. Gale, then return to Windia
Windia
- You can now buy Seeds from an old woman wandering around in the northern part of town. Visit Otto again and learn of your next mission, which is to conquer Pazuzu's Tower north of Windia.
Pazuzu's Tower
- When you enter, you'll see a girl on a platform just northeast of the entrance. This is Norma; talk to her and she'll escape to Windia.
- Head up to learn the gimmick of this stage: Pazuzu's elevator. You'll meet him on every floor, but he'll escape in the elevator every time; thus, you'll have to get to the even-numbered floors and flick the switches there to trap him on one of the odd-numbered floors.
- Beholders are weak against Grenades, but have a nasty habit of blinding you; don't use magic against them unless you have a death wish. Garuda will try to silence you, which by now should be a waste of their time; take them out with a joint effort. Manticors and Chimeras will likewise take two hits, and aren't particularly dangerous. Your Dragon Claw will prove very effective against some of these enemies, often killing them in one hit.
- From the entrance, head to the door on your right and go up the stairs. Climb the long staircase and you'll be on the third floor. Now head all the way to the left, then down and up the staircase. Head up another long staircase and you'll find yourself on the fifth floor. Follow the path counterclockwise and go up the first staircase you see. Another long climb up, and you'll be on the seventh floor.
- To the left of the entrance will be gap. Grapple across it (the grey loops function as hooks) and fight your way through the Thanatoses (use Aero), Manticors (use Exit) and Sorcerers (use Aero) east, then south until you get to the little stairs in the southeast corner. Take them down and you'll be on the sixth floor.
- Open the sealed door just above you with a Grenade, then head up through the Nagas (Aero) to find the switch. Hit it with your axe and return to where you entered this floor.
- Go west and you should see a red chest. Go and open it for the Flare spell, the most powerful offensive spell in the game. Now go up past it for a staircase to the fifth floor.
- Head south, then east. Jump the gap and head up to find a staircase to the fourth floor. Head south through the Gargoyles (Aero, yet again), kill the Sorcerer to your right, and head through the door he was guarding to find a red chest. Clear out the enemies and open the chest for the Excalibur, the best sword in the game. Now go left and up, and flick the switch in the northwest corner of the room. Take the staircase just to the left of it, and go down through a bunch of Thanatoses to the second floor.
- Head all the way down, then right. Pass by the sealed door and take the door right after it, then the first path up. The last switch is in the northeast corner.
- Now it's time to go Pazuzu hunting. If he's on this floor (you can see him if you're at the switch), get to him by backtracking a bit and blowing open the sealed door with a Grenade, then going up. He'll disappear again; head to the next floor via the staircase near the switch, plow through a pair of Beholders, and grapple north across the gap. He should be at the elevator; heal and restore your magic before approaching him.
- Pazuzu has one trick up his sleeve called the Psychshield. This will deflect any spell you cast on him and make it hurt you. However, this shield will not be up initially, so cast Flare and Aero on him until he starts flapping his wings, then switch to regular attacks (use the Excalibur) for the rest of the fight; the shield will come down occasionally, but since you have no good way of telling when it's up and when it isn't, it's best to err on the side of caution. Have either character heal whenever necessary; it's likely that you'll have to make Kaeli heal every round. Pazuzu will easily do 400-500 HP of damage per round, sometimes to both characters simultaneously; very rarely, however, he will attack you with the Psychshield itself, only doing 1 HP of damage. This is going to be a somewhat long fight, but you shouldn't have too much trouble.
- After you win, you'll be taken to the top of the tower in the elevator. Take the Sky Coin out of the red chest and cast Exit to leave the tower. Return to Windia.
- Sleep at the inn, buy some more seeds, then visit Otto again. You'll lose Kaeli, but Reuben will reappear and join you. Now go to Fireburg via the Focus Tower.
Fireburg
- In Fireburg, go to Reuben's house and talk to Arion, who is in bed. You'll receive the Thunder Rock. (You can talk to Tristam and Spencer in the hotel if you want to.) Now return to Windia.
Windia
- Talk to Otto again, then leave Windia. You'll see that you can now go north past Pazuzu's Tower, where there will be another entrance to Spencer's Place.
Spencer's Place
- It looks quite a bit different, but the music remains the same. When you go in, Reuben will immediately set off a Grenade, refilling the lake. You're not done here yet, though. First, go up all the way, and climb down the claw marks into the water. Head left, climb up onto the little platform, and from there blow open the sealed door above you. Now return to the entrance.
- Hop across the little stepping stone to your left, then open the sealed door you see. Go through it and step on the tile. Now enter the passage to your left, head up, left and down, and open the red chest for the Mobius Crest.
- The nearby white tile will now take you back to the entrance. Leave Spencer's Place and go back to Windia.
Windia
- First, go to Otto's house and talk to Kaeli to receive the Captain Cap. Now go to the northeasternmost house in Windia and go downstairs. Step on the white tile to be taken to the Ship Dock.
Ship Dock
- The ship is right above you. Just walk up to it and press A.
Mac's Ship
- The enemies here are no different from the ones in Pazuzu's Tower. Since Reuben doesn't know Aero, the battles might take a bit more time, but they shouldn't be too difficult.
- Head up from the entrance, then left and down into the enclosure. Push the barrel out of the way and climb the mast. Turn right when you can, then up, then left and down. Kill the Thanatoses, go down the stairs to your northwest, then down the next stairs you see.
- Head straight down and go up the stairs. Take the left path down and go down the stairs. Then go straight down and down the stairs. Open the red chest for the Gaia Armor and go down to meet Captain Mac. Talk to him and you'll eventually be taken back to the Ship Dock.
Ship Dock
- Teleport back to Windia.
Windia
- Go to the inn. You'll lose Reuben but gain Phoebe, your last ally of the game. Go upstairs and talk to Mac to learn your final destination - Doom Castle.
- If you're running low on Seeds, now's the time to stock up. Also, if you go to the Kaidge Temple now, you can use the white tile there to warp to the Life Temple, where you can talk to White for the last time before the end of the game.
- When you're done preparing, go back to the Ship Dock and enter the ship. The enemies are now gone. Just walk up to the wheel on the deck and press A. You'll be automatically taken to the entrance to the Doom Castle. Just leave the ship by its usual exit and enter the Castle.
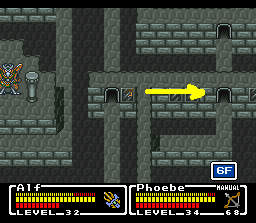
Doom Castle
- This is the last dungeon of the game. As such, it has a few gimmicks. First, every floor is modeled after one of the major dungeons of the game. You'll meet plenty of enemies from before as well as some new ones: Shadows and Cerberi. Both have instant death attacks, and both will take two solid hits before dying, but the Dragon Claw will occasionally kill them in one hit.
- The first floor, the catacombs of the Doom Castle, is based on the Bone Dungeon. The whole floor in the middle is made of shifting sands that drag you south, so you'll have to carefully plan where to step on it.
- First, hug the outer wall and work your way clockwise. Step down the rightmost staircase and let yourself be dragged down as far south as possible. You should see a red chest. Destroy the bone barrier with a Grenade, kill the Gorgon, and open the chest for the Aegis Shield, the last piece of armor in the game. Your character should now be guarded against just about every element and status ailment in the game. When you've got the shield, head all the way left and up the staircase.
- Now do what you did before, moving clockwise and stepping down the rightmost staircase. Grapple onto the hook to your right and go up the stairs. Now grapple your way west across two gaps. Kill the Minotaur Zombie and climb down the wall. Let yourself be dragged straight down. Now throw a Grenade west to destroy the bone barrier, and grapple onto the hook behind it. Go up the stairs to fight the Skullurus Rex.
- To kill the Rex, hit him once with the Dragon Claw. Now mop up the Shadows using Exit and anything else you want. Go through the door he was guarding into the Focus Tower.
Focus Tower
- Go up the stairs south of where you are. You'll walk straight into the last of the coloured doors. Since you have the Sky Coin, it will open and admit you back into Doom Castle.
Doom Castle
- Now you'll have to clear three floors one by one; you won't be allowed to proceed to one until you've cleared the one before it. Right now, there's only one available door, so go through it.
- This floor is based on the Ice Pyramid, and the gimmick here is switch statues. You'll have to search out all of them and hit them with your sword. Start with the one right in front of you and go through the newly-created opening.
- First go left, jump the gap, hit the statue there and go through the door that just opened to find another statue. Hit it and return to the entrance.
- Now go right and grapple across the northern gap. Go left and hit the statue there with your sword. Now go right, jump the gap and go through the opening on the right to find another statue. Hit it with your sword, go back outside and go through the opening on the left. It will lead to another statue if you follow it to the end.
- Now grapple back south and grapple across the eastern gap. Go through the opening and follow the path through some doors until you get to a statue. Hit it, then go through the door on the left and hit the statue there. Now move south of that statue and jump west across the gap. Go west, across the gap, down and through the door, then north and across the gap. Go through the door and grapple across the eastern gap. The door there should be open; go through it to meet the Stone Golem.
- The Golem is strong against Flare, so just cast White on him until he dies. He has not much more than ten thousand HP, so it won't take very long. When you're done, backtrack to the entrance and leave the floor. You can grapple across the gap south of the Golem's room if you want to save some time.
- The next floor is based on the Lava Dome. Go all the way to the right and jump north across the stones. Once you're on the island, jump across the stones west to the small island with the Stheno. Kill it, loot the chests and jump south to the small island with the Werewolf. Kill it and grapple west onto the small lump of earth. Hop over it and jump all the way north.
- From there, move south and grapple across the eastern gap. Kill the Stheno and hop north across the stones to the Twinhead Wyvern. Just have both characters cast White until it dies. Now grapple across the gap west of that island, then head south and grapple across the southern gap, and you'll be back at the entrance. Leave the floor.
- The next floor is the last one, but it's also the most difficult. Here you'll have to take especial care while moving, as you can fall off the path, in which case you'll have to find your way back all the way from somewhere on the last floor. Also, as you'll no doubt see from the windows, there are enemies even in the covered areas.
- From the start, head all the way right, then all the way down and up the little stairs. Now head east, north and all the way west. Go down the little stairs, go north then east all the way, then south. Turn east when you come upon a covered section, then go all the way north at the first opening, up the stairs. Now go all the way west, then south and east, and you should be in the centre, ready to fight Zuh.
- Zuh is a stronger version of Pazuzu, and he has an instant death attack which Pazuzu didn't. Take out the Chimera with Exit and the Thanatos with Blizzard, and hit Zuh with Flare and White until his Psychshield goes up. At that point, switch to regular attacks, healing constantly, until you win. This is probably the hardest battle in the game, as it's so easy for something to go wrong due to Zuh's cheap shots; have Phoebe heal every round unless you're at absolute full health. When you win, backtrack to the entrance, as there's no shortcut; alternately, you can fall to the previous floor and use a shortcut there.
- Now, the final staircase should be available. Climb it and go through the door. Go straight up and talk to the statue. You can now loot the chests in this room for 25 Cure Potions, Heal Potions, Seeds and Arrows. When you're ready, go through the door in the centre; the final battle with the Dark King will commence at the end of that walkway.
- This is by far the easiest fight in the game, if you know the trick to it. Just have your character cast Cure on the Dark King to damage him for around seventeen thousand HP. This won't work if you make Phoebe do it, so just have her defend or cure herself. You'll win in three rounds.
- If you don't want to win the quick and dirty way, just have your character cast Flare and Phoebe cast White. Have Phoebe double as the healer, since Flare does a little more damage than White. The Dark King will go through four forms. You'll probably destroy the first one without taking a hit. The second one will hit you with earth and thunder, and can cure itself, but still isn't much to write home about. The last two can cause a multitude of status ailments - these won't harm you, what with all your armour, but they might paralyze Phoebe, in which case you should cast Heal on her immediately. This will be a war of attrition, but you'll win it, and it's actually easier than the fight with Zuh.
- When you win, you'll learn the amazing truth about White and watch the ending. And you know, it's really not a bad ending at all; a bit inane, perhaps, but good clean fun. As is the game itself, really. Hardly as bad as people say, and possessed of a rather charmingly guileless air. And that, as they may say with some cause, is that.
~ FIN